TL;DR
Measuring a kitchen for new cabinets requires knowing both the process and the vocabulary. This glossary covers every term you’ll encounter on spec sheets and in designer conversations, from wall length and ceiling height to filler strips and NKBA clearances. Measure every wall at three heights, record numbers in inches to the nearest 1/8 inch, and always use the smallest measurement. Rough measurements start the design conversation, but professional verification before ordering is non-negotiable.
Most guides on how to measure a kitchen for new cabinets focus on the steps: grab a tape measure, sketch the room, write down numbers. That’s necessary but not sufficient. The real confusion hits when you sit down with a designer or read a cabinet spec sheet and encounter terms like “scribe molding,” “toe kick,” or “blind corner cabinet” for the first time.
Wrong measurements cause expensive problems. Even a small error can mean cabinet doors that won’t open fully, awkward gaps between boxes and walls, or costly reorders that push your timeline back by weeks. But wrong vocabulary causes miscommunication, and miscommunication is just as expensive.
This glossary defines every term you’ll see during the measuring process, with the standard dimensions and clearances attached to each one. For the full step-by-step measuring procedure, see our complete measurement guide. This page gives you the language around that process.
If you’d rather have a professional handle measurements from the start, our kitchen measurement service takes the guesswork out entirely.
How Do You Measure a Kitchen for New Cabinets?
To measure a kitchen for new cabinets, record each wall’s length, ceiling height, door and window openings, appliance spaces, and plumbing and electrical locations. Measure each wall at the bottom, countertop height, and near the ceiling to identify variations. Record dimensions in inches to the nearest 1/8 inch where practical, and document corners, soffits, floor irregularities, and door swings. Use these measurements for preliminary cabinet planning, then have the room professionally verified before ordering cabinets.
This glossary explains the key cabinet-measurement terms, standard cabinet dimensions, installation clearances, and fitting details you’ll encounter during the planning process.
Kitchen Cabinet Measurement Checklist
Before requesting a cabinet layout or quote, record the following information:
Wall dimensions: Measure every cabinet wall at floor level, countertop height, and near the ceiling.
Ceiling height: Record the finished-floor-to-ceiling height at multiple points.
Doors and windows: Record opening widths, heights, trim dimensions, and distances from nearby corners.
Soffits and obstructions: Measure bulkheads, columns, vents, pipes, and other features that affect cabinet placement.
Plumbing and electrical: Document sink drains, water supply lines, outlets, switches, and other connection points.
Appliance openings: Record the required dimensions from the appliance manufacturer’s installation specifications.
Floor and wall conditions: Note high spots, uneven surfaces, and walls or corners that are not square or plumb.
Clearances: Check walkways, work aisles, cabinet doors, drawers, and appliance door swings.
Measurement notes: Label each wall on a sketch, photograph important details, and record dimensions consistently in inches.
Final verification: Confirm site measurements, finished surfaces, appliance specifications, and cabinet layout before placing the order.
For the full measuring sequence, see our step-by-step guide to measuring kitchen cabinets.
Room Measurement Terms
These are the foundational concepts you need before picking up a tape measure. Every dimension you record will reference one of these terms.
Wall Length
The distance from one inside corner to the next, measured along a single wall. Here’s the critical rule: measure at three heights (floor level, roughly 36 inches up, and near the ceiling). Older homes especially can have walls that bow or lean, so these three numbers sometimes differ by half an inch or more. Compare all three measurements before planning the cabinet run. The smallest dimension is a useful preliminary constraint, but it should not automatically replace the other measurements. The cabinet designer or installer must account for wall irregularities, corner geometry, cabinet depth, fillers, and installation tolerances when determining the final layout.
Ceiling Height
The distance from the finished floor to the ceiling, measured in multiple spots. This number determines whether you can fit 30-inch, 36-inch, or 42-inch wall cabinets (and whether there’s room for crown molding on top). In older homes, ceiling height can vary by an inch across the same room.
Floor-to-Soffit Height
The distance from the finished floor to the bottom of a soffit or bulkhead. A soffit is a lowered ceiling section, often boxed out above upper cabinets to hide ductwork or plumbing. When soffits are present, you need both floor-to-ceiling and floor-to-soffit measurements. The soffit dimension, not the ceiling, is what limits your wall cabinet height.
Out-of-Square
A corner that isn’t a true 90-degree angle. This is more common than most people expect, particularly in homes built before the 1990s. To check, measure 24 inches out from the corner along one wall and 24 inches along the other wall. Then measure the diagonal between those two marks. If the corner is square, that diagonal should be about 33 15/16 inches. If it’s off, you’ll need filler strips or scribing to close the resulting gaps.
Out-of-Plumb
When a wall leans or tilts vertically rather than standing perfectly straight. You discover this by measuring each wall’s length at the top, middle, and bottom, then comparing the numbers. A wall that’s 120 inches at the floor and 119.5 inches at the ceiling is out of plumb, and that half-inch matters when fitting a run of cabinets end to end.
High Point
The tallest spot on the floor surface within the kitchen. Most floors have slight variations (even in newer construction). Finding the high point matters because that’s your reference height for leveling every base cabinet in the room. If you set cabinets at a low spot and don’t compensate, countertops will slope.
Fixed Point
Any reference that won’t move during the remodel: a wall corner, a window edge, a drain center, a gas stub-out, or a structural post. When you measure the location of plumbing, electrical, or gas connections, always measure from a fixed corner, not from an appliance or a cabinet that will be removed. This is one of the first concepts to grasp when learning how to measure a kitchen for new cabinets accurately.
Rough-In Location
Where plumbing supply lines, drain pipes, gas lines, or electrical boxes exit the wall or floor. Record each rough-in location as two measurements: how far from the nearest fixed corner, and how high off the finished floor. These measurements determine sink base placement, dishwasher positioning, and range hookup clearances.
Diagonal Check (Squareness Check)
A diagonal check helps identify corners that may not form a 90-degree angle. For a basic check, mark two points 24 inches from the same corner, one along each adjoining wall, and measure between the marks. A true 90-degree angle produces a diagonal of approximately 33 15/16 inches. Small deviations can indicate an out-of-square corner, although measurement error and uneven wall surfaces can affect the result. For cabinet planning, record the actual wall dimensions and have the designer account for the corner geometry.
Cabinet Dimension Terms
Understanding standard cabinet sizes before you measure helps you interpret your own wall dimensions. When you know that base cabinets are 34.5 inches tall and widths come in 3-inch increments, your raw wall measurements start to mean something.
For a deeper look at how cabinet boxes are actually built, our cabinet box construction guide breaks down materials, joinery, and quality indicators.
Base Cabinet
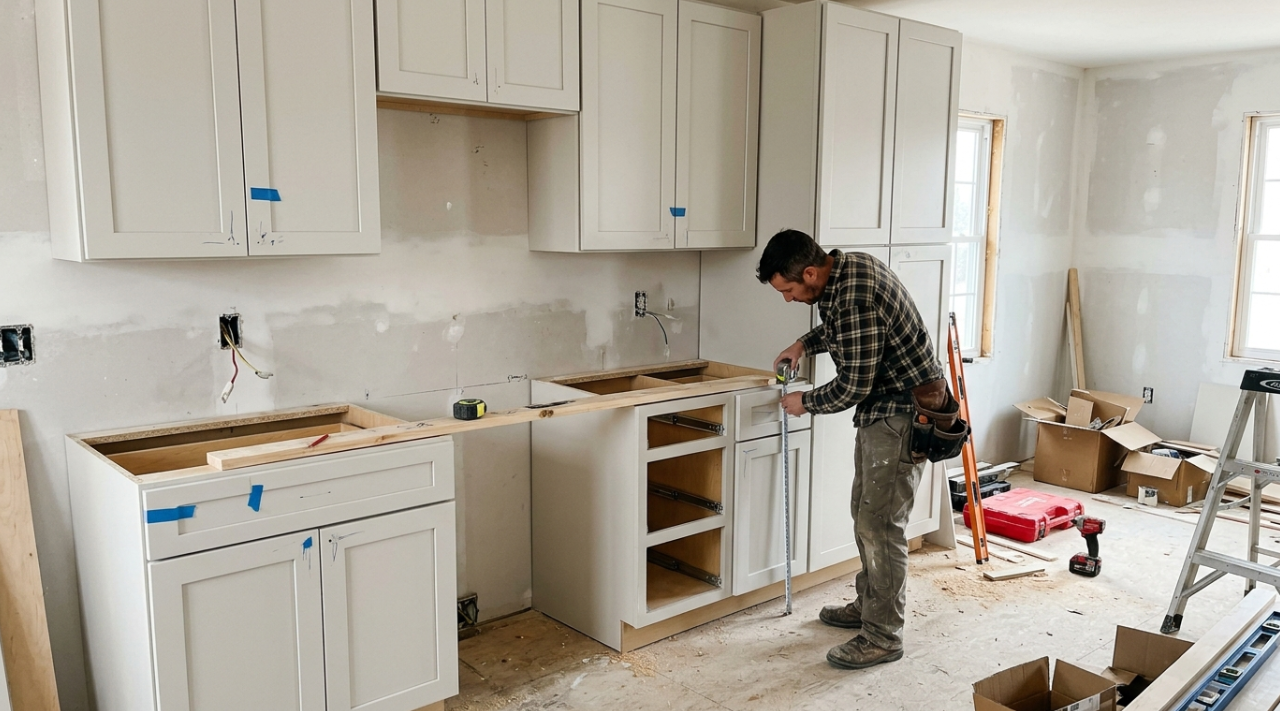
The lower cabinets that sit on the floor and support the countertop. Standard dimensions: 34.5 inches tall, 24 inches deep. With a countertop added, total height reaches 36 inches, which is the ideal working height for most adults, balancing comfort for prep work and cleaning. Widths range from 9 to 48 inches in 3-inch increments.
Wall Cabinet (Upper Cabinet)
Cabinets mounted to the wall above the countertop. Standard depth is 12 inches, with common heights of 30, 36, or 42 inches. The 42-inch option is popular in kitchens with 9-foot or taller ceilings because it eliminates the dust-collecting gap between cabinet tops and ceiling.
Tall Cabinet (Pantry Cabinet)
Floor-to-ceiling or near-ceiling cabinets, typically 24 inches deep (same as base cabinets) and available in heights of 84, 90, or 96 inches. Width ranges from 12 to 36 inches. When measuring for a tall cabinet, you need precise floor-to-ceiling height, because even a quarter-inch error can mean the cabinet won’t stand upright.
Sink Base
A base cabinet designed to accommodate plumbing. Typically 30 to 36 inches wide, with a false drawer front and an open interior for supply lines, drain connections, and garbage disposals. When measuring for a sink base, center your measurement on the existing drain rough-in location, then confirm that the cabinet width allows enough clearance on both sides.
Corner Cabinet (Blind Corner / Lazy Susan)
Cabinets designed to fill the 90-degree junction where two cabinet runs meet. A blind corner cabinet has a section that extends into the corner but isn’t directly accessible from the front. A lazy Susan cabinet (typically 33 to 36 inches wide) uses rotating shelves to make the corner space usable. Corner cabinets require especially careful measurement because out-of-square corners compound fitting problems.
Cabinet Width Increment
Standard stock cabinets come in widths that increase in 3-inch steps: 9, 12, 15, 18, 21, 24, 27, 30, 33, 36 inches, and so on up to 48. This means a cabinet run almost never lands exactly on your wall measurement. The leftover inches get absorbed by filler strips. Semi-custom cabinets adjust in 1-inch increments, which reduces (but rarely eliminates) the need for fillers. For a comparison of stock, semi-custom, and custom options, see our RTA vs. custom cabinets guide.
Toe Kick
The recessed space beneath a base cabinet that gives your feet room when you stand at the counter. Standard toe kick dimensions are 3.5 to 4 inches tall and about 3 inches deep. When measuring floor-to-ceiling heights for cabinet layout, account for the toe kick as part of the base cabinet’s total footprint.
Countertop Overhang
The edge of the countertop that extends past the face of the cabinet box, typically 1 to 1.5 inches on the front and sides. This matters when measuring for appliances that need to slide into openings between cabinets (like dishwashers and ranges), because the opening at countertop level is slightly narrower than the opening at cabinet-box level.
Overlay
How much a cabinet door or drawer front overlaps the face frame or cabinet box edges. Full overlay doors cover nearly the entire frame, while partial overlay leaves some frame visible. Inset doors sit flush inside the frame. Overlay type affects the visual width of each cabinet and matters when choosing between framed and frameless construction.
Fitting and Finishing Terms
This is where the vocabulary of measuring a kitchen for new cabinets gets practical. These terms describe the pieces and techniques that bridge the gap between perfect cabinet dimensions and imperfect real-world walls.
Filler Strip
A plain finished panel, usually 3 or 6 inches wide, that fills the leftover space between the last cabinet in a run and the wall. Since cabinet widths move in 3-inch steps, nearly every kitchen needs at least one filler. Fillers also provide door-swing clearance in corners, preventing handles from crashing into adjacent doors or walls. They are not a sign of poor planning. They are a standard, professional part of every well-designed kitchen.
Scribe Strip (Scribe Molding)
A thin, trimmable strip fitted on site to close the gap between cabinetry and a wall or ceiling that isn’t perfectly straight. Walls never are. The scribe strip is cut to follow the wall’s contour, creating the appearance of a seamless joint. Scribe strips are different from filler strips: fillers absorb dimensional gaps in a cabinet run, while scribes handle surface irregularities.
Scribing
The process of transferring the exact contour of an uneven wall (or floor) onto a cabinet edge, filler strip, or trim piece, then cutting along that line so the piece fits with a near-zero gap. Installers typically use a compass or a small block to trace the wall profile onto the material. Good scribing is what separates a professional-looking install from one with visible gaps.
End Panel (Skin Panel)
A finished panel that covers the exposed side of a cabinet at the end of a run. Without it, you’d see the raw cabinet box. End panels need to be measured for height and depth to match the cabinets they cover, and they add a small amount of width to your overall run (usually 1/4 to 3/4 inch).
Crown Molding
Decorative trim installed where the tops of wall cabinets meet the ceiling. Crown molding adds 3 to 6 inches of visual height to your upper cabinets. Factor this into your ceiling clearance: if your ceiling is 96 inches and your wall cabinet tops sit at 90 inches, you have 6 inches for crown. If the ceiling is only 94 inches, a 5-inch crown will be tight.
Light Rail Molding
A trim strip that runs along the bottom edge of upper cabinets. Its primary purpose is to hide under-cabinet lighting fixtures, but it also creates a finished look. Light rail adds roughly 1 to 1.5 inches to the visual depth of your uppers, which can matter if you’re tight on backsplash height.
Shim
Thin, wedge-shaped pieces (wood or plastic) used to level and stabilize base cabinets on uneven floors. Shims go between the cabinet and the floor or between the cabinet and the wall. They’re invisible once the toe kick covers them, but they’re essential. A good installer uses shims at every base cabinet and checks level across the entire run.
Filler Strip vs. Scribe Strip vs. End Panel
Component | Main purpose | When it is used |
|---|---|---|
Filler strip | Fills a planned gap between a cabinet and a wall or adjacent cabinet | When cabinet widths and layout dimensions leave a gap or door clearance is needed |
Scribe strip | Closes a gap caused by an uneven wall or surface | When the wall contour needs to be transferred to a trim piece for a close fit |
End panel | Covers an exposed cabinet side with a finished surface | When the end of a cabinet run is visible |
Crown molding | Finishes the top of upper cabinets | When the design includes decorative top trim |
Light rail molding | Finishes the underside of upper cabinets and may conceal under-cabinet lighting | When required by the cabinet or lighting design |
Quick distinction: A filler manages planned space, a scribe follows an irregular surface, and an end panel conceals an exposed cabinet side. These components can be used together in the same installation.
Clearance and Layout Terms
These terms connect your raw measurements to the functional design of the kitchen. Most come from NKBA (National Kitchen and Bath Association) planning guidelines, and they’re the numbers your designer will reference when reviewing your layout.
Work Triangle
The imaginary triangle formed by the three main work areas: sink, range, and refrigerator. According to NKBA guidelines, the total distance of all three legs should fall between 13 and 26 feet, with no single leg shorter than 4 feet or longer than 9 feet. When measuring a kitchen for new cabinets, note the center-to-center distances between these three points.
Work Aisle
The clear floor space between opposing cabinet runs or between a cabinet run and an island. NKBA recommends a minimum of 42 inches for a single cook and 48 inches when two people cook simultaneously. Measure this distance at countertop height, not at the floor, because countertop overhangs reduce the aisle width slightly.
Walkway
A path through the kitchen that doesn’t involve the work zones. NKBA minimum is 36 inches. This is the measurement from the edge of a countertop or island to the nearest obstruction on the opposite side.
Backsplash Height
The vertical distance between the top of the finished countertop and the bottom edge of the wall cabinets mounted above it. The standard is 18 inches. This dimension matters not just for backsplash tile layout but also for the usable space where you’ll store small appliances, knife blocks, and canisters.
Cooktop Clearance
The vertical clearance between a cooking appliance and the cabinets, hood, or other surfaces above it. Required clearances vary by appliance type, hood configuration, surface material, manufacturer instructions, and applicable building or mechanical codes. Do not assume that one universal measurement applies to every cooktop. Check the installation manuals for both the cooking appliance and the ventilation equipment before finalizing upper-cabinet placement.
Landing Area
Counter space immediately adjacent to an appliance, intended for setting down hot pots, grocery bags, or prep items. NKBA recommends specific landing area widths next to the sink, range, and refrigerator. When measuring your kitchen walls, note how much uninterrupted counter space exists (or will exist) beside each appliance location.
Door Swing Clearance
The arc that a cabinet door, drawer, or appliance door traces when opened. A cabinet layout may look perfect on a floor plan, but if a fully opened drawer blocks the dishwasher door, you have a problem. Measure and record the swing path of every entry door, cabinet door, and appliance door in the kitchen. Practitioners on Reddit frequently cite this as a top regret: one homeowner described placing a dishwasher directly beside a corner drawer, making it impossible to open both simultaneously. The homeowner permanently lost access to storage behind the blocking door.
Appliance Clearance
The manufacturer-required gaps around appliances for ventilation, door opening, and service access. Refrigerators typically need 1 to 2 inches on each side and above, while slide-in ranges need tight tolerances to avoid visible gaps. Record appliance dimensions from the manufacturer’s spec sheet, not from the appliance itself, because handles and trim kits can change the effective width.
Planning your full remodel beyond just measuring? Our kitchen remodel checklist covers permits, timelines, and sequencing.
Quick-Reference Kitchen Cabinet Dimensions
Cabinet dimensions vary by manufacturer, product line, and installation requirements. The measurements below are common U.S. planning dimensions, not guaranteed dimensions for every cabinet.
Standard Cabinet Dimensions
Cabinet component | Common height | Common depth | Common width or size |
|---|---|---|---|
Base cabinet box | 34.5 inches | 24 inches | Often 9–48 inches in 3-inch increments |
Base cabinet with countertop | About 36 inches overall | Depends on countertop and cabinet design | Depends on cabinet layout |
Wall cabinet | Commonly 30, 36, or 42 inches | Commonly 12 inches | Often available in 3-inch increments |
Tall or pantry cabinet | Commonly 84, 90, or 96 inches | Commonly 24 inches | Often 12–36 inches |
Sink base cabinet | Commonly 34.5 inches | Commonly 24 inches | Often 30–36 inches |
Toe kick | Commonly 3.5–4 inches high | Commonly about 3 inches deep | Varies by cabinet design |
Important: Confirm actual cabinet-box dimensions, finished dimensions, countertop thickness, and available sizes with the cabinet manufacturer before designing the final layout.
Common Kitchen Planning Clearances
Measurement | Common planning reference | What to verify |
|---|---|---|
Countertop to upper cabinet | Commonly about 18 inches | Appliance use, hood requirements, and cabinet layout |
Work aisle for one cook | 42 inches is a common NKBA planning recommendation | Layout type and applicable guidance |
Work aisle for multiple cooks | 48 inches is a common NKBA planning recommendation | Traffic patterns and opposing doors |
Walkway | 36 inches is a common planning reference | Local requirements and actual traffic needs |
Work triangle | Commonly cited total of 13–26 feet, with individual legs of 4–9 feet | Current planning guidance and kitchen configuration |
Cooktop-to-hood or cabinet clearance | No universal value applies to all installations | Appliance and hood manuals, surface materials, and applicable codes |
These figures are preliminary design references, not a substitute for manufacturer installation instructions, current professional guidance, or local code requirements. Confirm the relevant specifications before ordering or installing cabinets.
Once you have your measurements, you can start estimating costs. Our 10×10 kitchen cabinet pricing guide gives you a useful benchmark.
Tools and Measurement Method Terms
The right tools make accurate measurement possible. The wrong tools (or no tools at all) guarantee errors that multiply across a full cabinet run.
Steel Tape Measure (25 ft)
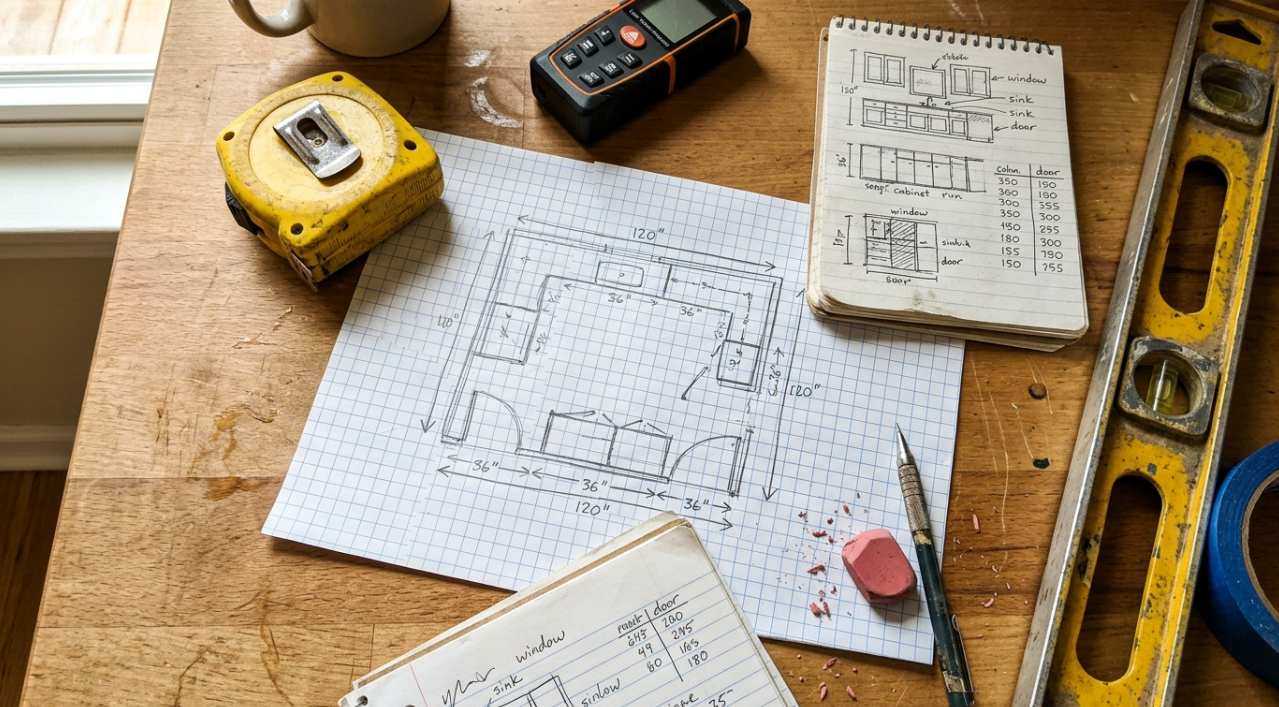
A locking steel tape is the primary tool for measuring a kitchen for new cabinets. Anything shorter than 25 feet may not reach across larger kitchens without a break. A locking mechanism is essential when measuring solo because it holds the blade extended while you mark and record.
Laser Distance Measurer
An electronic tool that shoots a laser beam to the far wall and displays the distance digitally. Faster and often more accurate than a tape measure for long wall runs, but it requires a flat, perpendicular target surface. Not a replacement for a tape measure (you still need the tape for window widths, rough-in locations, and other small measurements) but a valuable complement.
Laser Level
Projects a perfectly level or plumb line across the room. A laser level is the most accurate tool for establishing level reference lines during cabinet installation, and it’s equally useful during the measurement phase for identifying floor and ceiling irregularities. A 4-foot carpenter’s level works for shorter runs if you don’t own a laser.
Carpenter’s Level (4 ft)
A traditional bubble level, useful for checking whether floors, walls, and existing countertops are level or plumb. Place it on the floor to find high points, and hold it against walls to check for plumb. Four feet is the minimum useful length for kitchen work.
Floor Plan Sketch
A hand-drawn bird’s-eye view of the kitchen showing all walls, doorways, windows, and fixed points, with measurements labeled. Use graph paper (one square equals 6 inches or 1 foot) to keep proportions roughly accurate. This is what your designer or cabinet supplier will use to begin the layout.
Elevation Drawing
A front-facing view of a single wall, drawn as if you’re standing directly in front of it. It shows ceiling height, window and door openings, outlet and switch locations, and where upper and lower cabinets will land. You need one elevation for each wall that will receive cabinets.
Kitchen Cabinet Measurement Worksheet
Use this worksheet to organize preliminary measurements before requesting a cabinet design or quote.
Room Dimensions
Measurement | Recorded dimension |
|---|---|
Wall A: floor-level length | ______ inches |
Wall A: countertop-height length | ______ inches |
Wall A: near-ceiling length | ______ inches |
Wall B: floor-level length | ______ inches |
Wall B: countertop-height length | ______ inches |
Wall B: near-ceiling length | ______ inches |
Finished floor-to-ceiling height | ______ inches |
Floor-to-soffit height, if applicable | ______ inches |
Distance between opposing cabinet runs | ______ inches |
Repeat the wall measurements for every wall that may receive cabinetry.
Openings and Fixed Features
Feature | Measurements to record |
|---|---|
Door | Width, height, trim, and distance from the nearest corner |
Window | Width, height, sill height, trim, and distance from the nearest corner |
Sink plumbing | Horizontal position, height, and drain location |
Electrical outlets and switches | Horizontal position and height |
Refrigerator opening | Planned opening dimensions and manufacturer requirements |
Range or cooktop | Required opening dimensions and installation clearances |
Dishwasher | Required opening dimensions and door-swing clearance |
Soffits, columns, and vents | Width, height, depth, and distance from the nearest corner |
Notes for the Cabinet Designer
Mark each wall consistently on a room sketch.
Label every measurement with its starting and ending points.
Record obstructions and uneven surfaces rather than estimating around them.
Photograph plumbing, outlets, windows, and other fixed features.
Identify dimensions that still need to be confirmed after demolition or finished flooring installation.
These measurements support preliminary planning. They are not a final cabinet order specification. Have the cabinet supplier or installer verify site conditions and appliance requirements before the order is released.
Common Measurement Mistakes (and What to Call Them)
These errors crop up so often that they deserve their own vocabulary. Each one has a name because each one has a specific, predictable consequence.
Single-Height Measuring
Taking wall length at only one height. This is the most common amateur mistake. Walls lean and bow. A wall can be 120 inches at the floor and 119.25 inches at counter height. If you only measured at the floor, your cabinets may not fit at countertop level. Always take three measurements and use the smallest.
Rounding Measurements
Recording 3 feet 6 inches instead of 42 inches, or worse, rounding 41.75 to 42. Always record your kitchen cabinet measurements in inches, never in feet and inches. Writing 42″ is much clearer than 3’6″, and it matches how cabinet manufacturers size their products. Measurements should be accurate to 1/8 inch. Small errors multiply across a cabinet run, especially at corners and appliance openings.
Forgetting Filler Allowance
Planning a cabinet layout that uses every inch of wall space without accounting for fillers. Since widths jump in 3-inch steps, nearly every run will have leftover inches. If you don’t plan for a filler strip, you’ll end up with a gap you can’t close or cabinets jammed against a wall so tightly that corner doors can’t open.
Ignoring Door Swing
Designing a layout that looks perfect on paper but fails in three dimensions. A drawer that collides with an open oven door, a cabinet that blocks a doorway when opened, or two adjacent doors that can’t open simultaneously are all consequences of ignoring swing paths. For more on preventable errors like this, see our guide to kitchen remodel mistakes to avoid.
Measuring Before Finishes Are Complete
Recording measurements on subfloor or bare drywall, then ordering cabinets before flooring, tile, or other finish materials are installed. Finished flooring can add 3/8 to 3/4 inch of height, which changes your base cabinet level and toe kick visibility. If possible, wait until finish materials are down. If you must measure on subfloor, add the known thickness of the flooring material.
Pre-Ordering Appliances Before Cabinet Measurements
As contractor Mike Holmes puts it, “The general rule is to install the kitchen cabinets before you order your appliances, as you want to ensure your measurements are correct and that everything is going to fit.” Ordering a 36-inch range before verifying that 36 inches actually exist between cabinet runs is a recipe for returns or expensive modifications.
Measuring in Only One Scenario
Many guides assume you’re measuring an empty room. In reality, you may be measuring a kitchen with old cabinets still in place. The two scenarios require different approaches. With old cabinets present, you can measure overall wall lengths by running the tape along the top of existing uppers, but you won’t be able to check floor-level dimensions or rough-in locations until demolition. A video walkthrough from ProTradeCraft covers both scenarios in detail.
Practitioner Insights Worth Knowing
Real-world experience often reveals problems that textbook guides miss. Practitioners on Reddit report that one of the most overlooked aspects of measuring a kitchen for new cabinets is thinking about what will actually go inside those cabinets. One homeowner shared that “nearly all of my dishes, pots, pans are 10 to 12 inches in diameter,” but they chose 18-inch-wide drawers that created wasted space in every single drawer. The takeaway: before finalizing cabinet widths, measure your most-used cookware and dishware, then choose drawer and cabinet widths that match real usage.
Another common thread in online forums: homeowners who measured everything correctly but forgot to note the locations of electrical outlets, light switches, and GFCI receptacles. These need to be recorded with the same precision as plumbing rough-ins because they affect where filler strips, end panels, and backsplash cuts land.
Frequently Asked Questions
Do I measure the wall or the floor when planning base cabinets?
Measure the wall at counter height (about 36 inches from the floor). Then measure again at floor level and near the ceiling. The shortest of the three is the number you plan around. Floor measurements alone can mislead you because base cabinets contact the wall at multiple heights.
How accurate do my measurements need to be?
Ideally to 1/8 inch. A few millimeters might sound insignificant, but small errors compound across a run of five or six cabinets. A quarter-inch here and a quarter-inch there can mean an appliance that won’t slide into its opening or a filler that’s too narrow to look intentional.
What if my walls aren’t square?
Use the diagonal check (24/24/33-15/16 method) to confirm. If corners are out of square, plan for a filler strip in the corner and expect to scribe it for a tight fit. Out-of-square corners are normal, especially in older homes. Your cabinet designer can compensate as long as they know the actual measurements.
Should I measure myself or hire a professional?
Both. Homeowner measurements start the design conversation and help you get ballpark pricing. But professional field verification should happen before any order is placed. Even experienced contractors double-check their own numbers. The cost of a professional measurement visit is trivial compared to a reorder caused by a bad number.
What tools do I absolutely need?
At minimum: a 25-foot locking steel tape measure, a 4-foot carpenter’s level, a pencil, and graph paper. For better accuracy and speed, add a laser distance measurer and a laser level. A smartphone camera is also useful for documenting rough-in locations, window trim details, and anything else that a flat sketch can’t capture.
How do I measure when old cabinets are still installed?
Run your tape along the top of existing upper cabinets for overall wall length. Measure window and door openings independently. Note that floor-level wall dimensions and rough-in positions may be hidden until demolition. Plan to take a second round of measurements after old cabinets are removed.
What’s the difference between a filler strip and a scribe strip?
A filler strip is typically 3 or 6 inches wide and absorbs the leftover inches where a cabinet run doesn’t reach the wall. A scribe strip is thinner and trimmable, designed to follow the contour of an uneven wall surface. Fillers handle dimensional gaps; scribes handle surface irregularities. Many installs use both.
Where does measuring fit in the overall remodel timeline?
Measuring is one of the first steps, but it happens in stages. Initial measurements happen during the planning phase to start the design. Final verified measurements happen after demolition (if applicable) and before the cabinet order is placed. For a full breakdown of project phases, see our kitchen remodel timeline guide.
Next Steps
Knowing how to measure a kitchen for new cabinets, and knowing the vocabulary behind those measurements, puts you in a much stronger position whether you’re talking to a designer, comparing quotes, or verifying a contractor’s work. The glossary above covers what you’ll encounter from first sketch to final installation.
Ready to move from measurements to an actual cabinet layout? Get a free kitchen design and quote using the measurements you’ve taken, and the design team will translate your numbers into a working plan. Contractors looking for dealer pricing and fast lead times can explore our trade program for contractors to get started.