TL;DR
Learning to plan kitchen remodel projects means absorbing dozens of unfamiliar terms fast, from “scope of work” to “punch list,” while making hundreds of decisions in the right order. This guide defines every term you’ll hear, organized by the phase of your remodel where you’ll first encounter it, and walks through each planning step so nothing gets missed. Most kitchen remodels cost between $14,600 and $41,600, take three to five months of construction (not the four weeks most homeowners expect), and require permits for anything beyond basic cosmetic upgrades. Bookmark this page and return to it as your project progresses.
Quick Answer: How Do You Plan Kitchen Remodel Projects?
When you plan kitchen remodel work, start with setting clear project goals, then define your budget, layout, and design before contacting contractors. Most homeowners spend several months planning and three to five months in construction. Begin by deciding what you want the finished kitchen to do for you, creating a realistic budget with a 10% to 20% contingency fund, measuring your kitchen accurately, selecting cabinets before countertops, understanding permit requirements, choosing a color palette and materials, and finalizing every major decision before demolition begins. Careful planning reduces costly change orders, schedule delays, and unexpected expenses.
A kitchen remodel involves more decisions than most homeowners anticipate. Before you pick a single tile or cabinet color, you need to understand the vocabulary that contractors, designers, and permit offices use every day. Misunderstanding even one term, like confusing a “renovation” with a “remodel” or underestimating the impact of a “change order,” can cost thousands of dollars and weeks of delays.
This guide is organized differently from the alphabetical lists you’ll find elsewhere. Instead of sorting A to Z, every term is grouped by the phase of the remodel where you’ll actually encounter it, and each phase includes practical planning steps. Start at goal setting, work through budgeting, design, and materials, then move into construction and project management. Or jump straight to the phase you’re in right now.
Whether you’re a homeowner looking to plan kitchen remodel work for the first time or a contractor educating your clients, this is the reference you’ll keep coming back to.
Explore completed projects to see how these terms come together in real kitchens.
Kitchen Remodel Planning Timeline at a Glance
| Phase | Average Duration |
|---|---|
| Goal Setting and Research | 2 to 4 weeks |
| Budgeting | 2 weeks |
| Design and Color Selection | 3 to 8 weeks |
| Contractor Selection | 2 to 4 weeks |
| Permits | 2 to 12 weeks |
| Ordering Materials | 2 to 16 weeks |
| Construction | 3 to 5 months |
| Punch List and Finishing | 2 to 6 weeks |
Phase 1: Setting Project Goals
Before touching a budget spreadsheet, get clear on what you actually want this remodel to accomplish. Skipping this step is how homeowners end up $15,000 over budget with a kitchen that still doesn’t work for them.
Define Your “Why”
Sit down and write out the specific problems with your current kitchen. Not enough counter space? Poor lighting? A layout that forces everyone to squeeze past the refrigerator? Cabinets falling apart? Wanting to increase home value before selling?
Each goal shapes a different set of decisions. Someone optimizing for resale will make different choices than someone building their forever kitchen. A family with young kids needs different storage solutions than a couple who entertains regularly.
Practitioners on Reddit consistently advise ranking goals by priority. When budget pressure hits (and it will), the ranked list tells you what to protect and what to cut.
Set a Realistic Scope
Once your goals are defined, decide how far you’re willing to go. Are you keeping the same footprint and just updating surfaces, or are you moving walls and relocating plumbing? This distinction between renovation and remodel directly controls your budget, timeline, and contractor requirements.
A renovation updates or restores an existing kitchen without significantly changing the layout. New cabinet doors, fresh paint, updated hardware. A remodel changes the structure, layout, or functionality. Moving a wall, relocating plumbing, or adding an island all qualify as remodeling.
If you tell a contractor you want a “renovation” when you actually need a “remodel,” the quotes you receive won’t cover the work you actually need. Clarify this before your first phone call.
Phase 2: Budgeting and Pre Planning Terms
This is where every effort to plan kitchen remodel budgets gets real. Get these concepts right before you call a single contractor.
Kitchen Remodel Cost (2025 to 2026 Benchmarks)
According to Angi, the average kitchen remodel costs around $27,000, with most homeowners spending between $14,600 and $41,600. A 2025 study from Hanley Wood Market Intelligence puts the range wider: about $28,500 for a minor remodel up to over $160,000 for a major upscale project.
Cabinetry accounts for 30% to 40% of the total budget. Stock cabinets run $4,000 to $10,000, semi custom cabinets $12,000 to $25,000, and custom cabinets $25,000 to $60,000 or more. Labor typically makes up 20% to 30% of the total expense. For context on how cabinets affect your total budget in Washington State, see this breakdown of kitchen cabinet costs with regional pricing data.
Key Cost Factors That Move the Number
Several variables swing a kitchen remodel budget dramatically:
- Kitchen size and layout complexity. More square footage and layout changes (moving plumbing, gas lines, or walls) multiply costs fast.
- Cabinet quality tier. The gap between stock RTA cabinets and full custom is easily $20,000 or more.
- Countertop material. Laminate at $10 to $40 per square foot versus quartz at $50 to $150 per square foot creates a massive spread.
- Appliance grade. Standard appliances versus commercial style ranges and built in refrigerators can differ by $10,000 or more.
- Age of the home. Older homes often hide outdated wiring, lead paint, asbestos, or plumbing that doesn’t meet current code. These discoveries add cost.
- Permit and inspection fees. These vary by city. Seattle permits can take months and carry fees that add up.
- Geographic labor rates. Contractor rates in the Seattle metro run higher than national averages.
One YouTube walkthrough from a general contractor noted that the single biggest surprise cost for his clients is consistently “what’s behind the walls,” reinforcing why contingency budgets exist.
Average Kitchen Remodel Budget Breakdown
| Category | Typical Share of Budget |
|---|---|
| Cabinets | 30 to 40% |
| Labor | 20 to 30% |
| Countertops | 10 to 15% |
| Appliances | 10 to 20% |
| Flooring | 5 to 10% |
| Plumbing | 3 to 8% |
| Electrical | 3 to 8% |
| Lighting | 2 to 5% |
| Paint | 2 to 5% |
| Contingency | 10 to 20% |
Scope of Work
The scope of work is a detailed written description of everything your remodel will include. It covers demolition, construction, materials, finishes, fixtures, and the specific tasks each party is responsible for. A solid kitchen remodel contract should include scope of work, costs, payment schedule, timeline, change order process, warranties, insurance details, cleanup responsibilities, dispute resolution, and a final walkthrough clause.
An incomplete scope of work is the single most common cause of budget overruns. Every item not spelled out becomes a potential surprise charge later. When you plan kitchen remodel details, a thorough scope protects you from ambiguity. For a detailed checklist of what should be in your scope, see this kitchen remodel checklist.
Contingency Budget
A contingency budget is money set aside specifically for unexpected costs. Most remodeling professionals recommend reserving 10% to 20% of your total project cost as contingency.
A useful rule of thumb: if a cost increase is driven by your preference (upgrading to a different countertop mid project), that’s a change order. If it’s driven by existing conditions discovered during work, like water damage behind a wall or outdated wiring that doesn’t meet code, that’s contingency territory.
Change Order
A change order is a formal modification to your original construction contract. It adjusts the scope, cost, timeline, or all three. Change orders aren’t inherently bad, but they’re almost always expensive.
The majority of change orders in residential remodeling stem from one root cause: incomplete planning before construction begins. Every decision you finalize before demo day reduces your chance of costly mid project changes. For a deeper look at avoidable pitfalls, read about common kitchen remodel mistakes.
Allowance
An allowance is a dollar amount included in your contract for a specific item that hasn’t been selected yet, like a faucet, light fixtures, or tile. The contractor estimates a price, and you later choose the actual product.
Here’s the trap practitioners consistently warn about on remodeling forums: allowances that are unrealistically low make a contractor’s bid look cheaper. A bid with a $500 allowance for a kitchen faucet isn’t cheaper than one with a $1,200 allowance. The first one just hides the true cost. Always ask what each allowance covers and whether it’s realistic for the quality level you want.
Cost Plus vs. Fixed Price Contract
A fixed price contract (also called a lump sum contract) locks in a total price for the defined scope of work. You know exactly what you’ll pay, assuming no change orders.
A cost plus contract charges the actual cost of labor and materials plus a markup (usually 15% to 25%). This gives more flexibility, but the final number isn’t locked in. Cost plus contracts work well when the scope is uncertain. Fixed price contracts work better when you’ve planned every detail in advance.
Return on Investment (ROI)
ROI measures how much of your remodel cost you’ll recoup in added home value when you sell. Zonda’s Cost vs. Value 2025 report places minor kitchen remodel returns near 113% nationwide, making kitchens one of the highest ROI remodel projects available.
That said, ROI depends heavily on your local market, the quality of the work, and whether you over improved relative to neighborhood comps.
How to Optimize Your Remodel ROI
Not all kitchen upgrades return equal value. A few principles consistently hold true:
- Minor remodels outperform major ones on ROI percentage. Replacing cabinet fronts, updating hardware, adding a new countertop, and refreshing appliances often returns more per dollar spent than a gut renovation.
- Match improvements to your neighborhood. The most expensive kitchen on the block rarely recoups its full cost. Look at comparable sales within a half mile before finalizing your scope.
- Prioritize cabinets and countertops. These are the first things buyers notice. Quality cabinets with a durable countertop surface drive perceived value more than high end appliances.
- Neutral finishes sell faster. Bold design choices can hurt resale even if they look great in a magazine. If selling within five years, lean toward timeless materials and colors.
Financing (HELOC, Home Equity Loan)
A HELOC (Home Equity Line of Credit) works like a credit card secured by your home. You draw money as needed and pay interest only on what you use. A home equity loan provides a lump sum at a fixed interest rate. Both use your home as collateral.
Which one fits your needs when you plan kitchen remodel spending depends on your project timeline. If you’re making purchases over several months (cabinets now, countertops later), a HELOC’s flexibility helps. If you want one payment from day one, a home equity loan offers predictability.
10×10 Kitchen
A 10×10 kitchen is an industry standard benchmark, not an actual recommended kitchen size. It refers to a hypothetical L shaped kitchen measuring 10 feet by 10 feet, used to compare cabinet pricing across different brands and lines.
When a cabinet supplier quotes a “10×10 price,” they’re showing what a standardized set of cabinets costs for that specific layout. This makes apples to apples comparisons possible. Just know that your actual kitchen will almost certainly require a different configuration.
Phase 3: Design, Layout, and Color Selection
Once you have a budget, design decisions shape how you plan kitchen remodel aesthetics and function. These are the terms your designer or contractor will start using immediately.
Work Triangle
The kitchen work triangle is a design principle first introduced in the 1940s, when kitchens were small and appliances were bulky. It arranges the three most used stations (the range, sink, and refrigerator) in a triangle pattern for maximum efficiency.
In an ideal setup, the distance between any two points should be no less than four feet and no greater than nine feet. The total of all three sides should fall between 13 and 26 feet. The work triangle still makes strong sense in tighter kitchens.
Work Zones
Work zones are the modern evolution of the work triangle. Instead of three fixed points, the kitchen is divided into functional zones: prep, cooking, cleaning, storage, and serving.
Work zones are ideal for roomier kitchens and households where more than one person cooks at the same time. If two people are constantly bumping into each other in your current kitchen, you should plan kitchen remodel layouts around zone based design rather than a strict triangle.
Kitchen Layouts
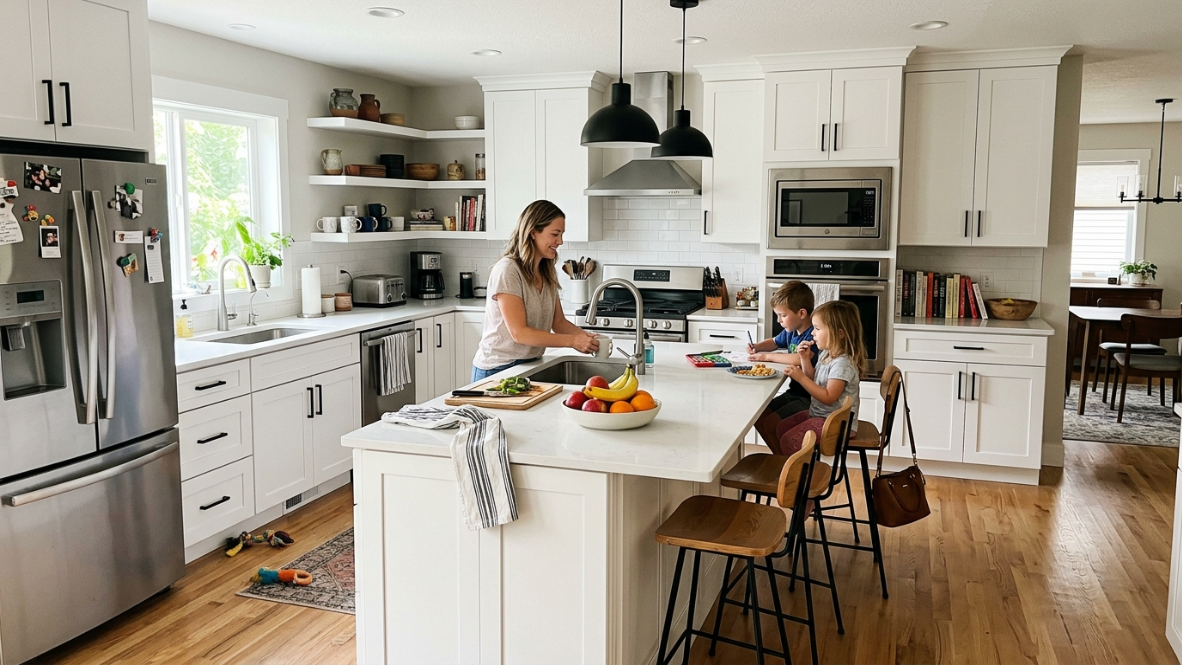
These are the standard configurations you’ll choose from:
- L Shaped: Two adjacent walls of cabinets forming an L. Efficient and flexible, works in most spaces.
- U Shaped (Horseshoe): Cabinets on three walls surrounding the cook. Maximum storage and counter space.
- Galley: Two parallel walls of cabinets with a walkway between them. Common in apartments and narrow spaces.
- One Wall: All cabinets and appliances along a single wall. Compact, often found in open concept spaces.
- Island: A freestanding work surface in the center of the kitchen, usually paired with an L shaped or U shaped perimeter layout.
- Peninsula: Like an island, but one end connects to a wall or cabinet run, forming a partial barrier.
Most Common Kitchen Layout Mistakes
- Blocking refrigerator doors with adjacent walls or cabinets
- Too little countertop space on either side of the stove or sink
- Narrow walkways (less than 36 inches for single cook, less than 42 inches for two people)
- Poor lighting placement that casts shadows on work surfaces
- Not enough electrical outlets, especially near prep zones
- Oversized islands that choke traffic flow
- Ignoring workflow between fridge, sink, and stove
- Choosing style over storage
Choosing a Color Palette
Color selection is where many homeowners stall. The approach that works best: pick your countertop and cabinet colors first, then build the rest of the palette around them. Backsplash, paint, flooring, and hardware should complement, not compete.
A few practical guidelines:
- Two to three dominant colors keep a kitchen feeling cohesive. More than that tends to look busy.
- Test samples in your actual kitchen lighting. Colors shift dramatically between showroom fluorescents and the window light in your space.
- Consider the sightlines. If your kitchen opens to a living or dining area, the palette needs to work with adjacent rooms too.
White and off white cabinets continue to dominate in 2026, but warm tones (sage green, navy, warm gray) are gaining ground. For pairing guidance, see this guide on matching quartz with cabinets.
Trend vs. Timeless: Making Choices That Last
Social media floods homeowners with trend driven ideas. Some trends have staying power. Others will look dated in three years. A good filter: if a design element has been popular for at least a decade (Shaker cabinets, subway tile, quartz countertops), it’s closer to timeless than trendy.
Elements that tend to age poorly include very specific paint colors tied to a single year’s trend cycle, ultra ornate hardware, and novelty backsplash patterns. If you love a bold trend, consider using it in elements that are easy and cheap to swap later (light fixtures, cabinet hardware, paint) rather than permanent installations like tile or countertops.
Cabinet Layout and Floor Plan
A cabinet layout is a design drawing showing the proposed locations of every cabinet in your kitchen. Each cabinet is typically designated by its width and style (base, wall, or tall). This layout drives everything: appliance placement, plumbing locations, electrical outlets, and workflow.
Getting accurate measurements before your cabinet layout is created prevents expensive mistakes during installation. A step by step guide to measuring kitchen cabinets can reduce errors significantly.
Open Concept
Open concept means removing walls or barriers between the kitchen, dining area, and living room to create a connected, flowing space. It’s been one of the most requested design features for over a decade.
Before you commit to open concept as you plan kitchen remodel changes, know that removing walls often triggers structural engineering reviews and permits, especially if any wall is load bearing. The design payoff is real, but so is the added cost.
Elevation Drawing
An elevation drawing shows a flat, straight on view of a wall, as if you were standing directly in front of it. It reveals cabinet heights, window and outlet placement, backsplash extents, and how upper and lower cabinets relate to each other. Where a floor plan shows your kitchen from above, an elevation shows it from the side. You need both to plan kitchen remodel dimensions and proportions accurately.
3D Rendering and Design Preview
A 3D rendering is a computer generated image that shows what your finished kitchen will look like from a realistic perspective. It lets you see material combinations, cabinet styles, and spatial relationships before any construction begins.
Many suppliers and designers now offer 3D previews as part of their quoting process. Krafter’s Land, for instance, provides free design and quotes with 2020 Design files and project previews so homeowners and contractors can visualize the finished space.
2020 Design Software
2020 Design is industry standard software used by kitchen designers, cabinet dealers, and manufacturers to create detailed kitchen and bath layouts. It produces floor plans, elevation drawings, 3D renderings, and generates accurate cut lists and order forms. If your designer or supplier uses 2020 Design, they can export files that other professionals on your project can import. This reduces miscommunication between designers, suppliers, and installers.
Phase 4: Cabinet and Material Selection
Cabinets are the workhorse of the kitchen. As designer Tennille Wood puts it, “The entire floor plan and function of the kitchen is built on them.” Expect to spend the most time, and the most money, on this phase.
Cabinet Selection or Refacing: Which Path?
Not every kitchen needs all new cabinets. If the existing cabinet boxes are structurally sound and the layout works, refacing (replacing doors, drawer fronts, and applying new veneer to exposed surfaces) can deliver a dramatically different look at roughly half the cost of full replacement.
Refacing makes sense when:
- The current layout is functional and doesn’t need changes
- Cabinet boxes are plywood or solid wood in good condition
- Budget is tight but the kitchen needs a visual overhaul
Full replacement makes sense when:
- The layout needs to change
- Cabinet boxes are particleboard, warped, or water damaged
- You want to add features like soft close, pull out organizers, or different cabinet depths
Request a free design and quote to compare refacing vs. replacement costs for your kitchen.
Base Cabinet, Wall Cabinet, Tall Cabinet
- Base cabinets sit on the floor and support countertops. Standard depth is 24 inches, standard height is 34.5 inches (36 inches with countertop).
- Wall cabinets mount to the wall above countertops. Standard depth is 12 inches, with heights varying from 12 to 42 inches.
- Tall cabinets (also called pantry or utility cabinets) extend from floor to near the ceiling, typically 84 to 96 inches tall. Used for pantry storage or to house built in ovens.
Framed vs. Frameless Cabinets
Framed cabinets are the traditional American construction style. Rails and stiles form a 1.5 inch face frame at the front of the cabinet box. This frame gives added dimension and a classic look.
Frameless cabinets (also called European style) have no face frame. The doors attach directly to the cabinet box, providing slightly more interior storage space and a sleek, modern appearance.
The choice affects aesthetics, hardware compatibility, and installation methods. For a full comparison, read this detailed guide on framed vs. frameless cabinets.
RTA (Ready to Assemble) Cabinets
RTA cabinets arrive flat packed with pre cut panels, pre drilled holes, and all necessary hardware. You (or your installer) assemble them on site before installation.
RTA cabinets typically save 20% to 50% compared to pre assembled counterparts. The trade off is assembly time and the need for some skill with basic tools. Quality varies widely across brands, so material thickness, joinery type, and compliance certifications matter.
Stock vs. Semi Custom vs. Custom Cabinets
- Stock cabinets come in fixed sizes and limited finishes. They’re the most affordable option and ship fastest.
- Semi custom cabinets start as stock units but allow modifications: different door styles, interior organizers, size adjustments within a range.
- Custom cabinets are built to unique specifications. Any size, any material, any feature, but at premium cost and longer lead times.
The decision comes down to budget, timeline, and how unusual your kitchen dimensions are. If you’re weighing RTA against custom, this comparison guide breaks down the trade offs in detail.
Storage and Smart Feature Planning
Cabinets are not just boxes with doors. Modern cabinet interiors can be configured to eliminate dead space and make daily cooking dramatically easier. Before finalizing your cabinet order, think through which of these features actually match how you use your kitchen:
- Pull out trash and recycling bins keep waste hidden and accessible without bending
- Lazy Susans or pull out shelves in corner cabinets recover otherwise wasted space
- Deep drawer organizers for pots, pans, and lids (far more accessible than stacking in a base cabinet)
- Built in spice racks on the inside of cabinet doors or in narrow pull outs beside the stove
- Appliance garages to hide countertop clutter like toasters, mixers, and coffee machines
- Charging drawers with built in outlets for phones and tablets
One project manager shared in a YouTube walkthrough that the features clients regret skipping most often are pull out shelves in base cabinets and a dedicated trash/recycling pull out. These are modest upgrades that cost $100 to $300 per cabinet during initial installation but are expensive and disruptive to add later.
Shaker Style
Shaker cabinets feature a five piece door with a recessed center panel and clean, simple lines. Named after the Shaker religious community known for functional, unadorned furniture, this style has dominated American kitchens for years because it works with both traditional and contemporary design schemes.
Soft Close Hinges and Drawer Slides
Soft close mechanisms use a built in dampener that catches the door or drawer just before it shuts, pulling it closed gently and silently. Once considered a luxury upgrade, soft close is now standard on most mid range and higher cabinet lines. If a quote doesn’t specify soft close, ask.
Cabinet Overlay (Full, Partial, Inset)
Overlay describes how much of the face frame a cabinet door covers:
- Full overlay: The door covers the entire face frame, leaving only thin gaps between doors. This is the most popular modern look.
- Partial (or standard) overlay: The door covers part of the frame, with visible frame between doors. More traditional.
- Inset: The door sits flush inside the face frame. A high end, furniture like look that requires precise craftsmanship.
Filler Strip
A filler strip is a piece of matching material placed between cabinets (or between a cabinet and a wall) to fill gaps. This is necessary whenever cabinets don’t perfectly fill the entire available space. Filler strips are standard practice, not a sign of poor planning.
Toe Kick
The toe kick is the recessed area at the bottom of base cabinets, typically 3.5 to 4 inches high and 3 inches deep. It creates space for your feet so you can stand comfortably at the counter without leaning forward. Also called toe space.
Countertop Materials
- Quartz: Engineered stone made from crushed quartz bound with resin. Non porous, consistent color, low maintenance. Still the market leader in 2026. For help choosing between the two most popular options, see this guide on quartz vs. granite countertops.
- Granite: Natural stone, each slab unique. Requires periodic sealing. Durable and heat resistant.
- Laminate: Budget friendly surface made from layers of paper or fabric bonded with resin. Modern laminates are more realistic than older versions.
- Butcher block: Solid wood surface, warm and workable. Requires oiling and maintenance. Best for prep areas rather than near sinks.
Countertop Comparison Table
| Material | Maintenance | Heat Resistant | Cost | Lifespan |
|---|---|---|---|---|
| Quartz | Low | Medium | $$$ | 25+ years |
| Granite | Medium | Excellent | $$$ | Lifetime |
| Laminate | Low | Poor | $ | 10 to 20 years |
| Butcher Block | High | Medium | $$ | 20+ years |
Backsplash
The backsplash is the surface between the countertop and the bottom of wall cabinets. It protects the wall from water, grease, and food splatter. Common materials include ceramic tile, glass tile, natural stone, and extended countertop material. The backsplash is often the last visual element installed, and it ties the design together.
Flooring Selection and Installation Planning
Kitchen floors take a beating: spills, dropped items, heavy foot traffic, and constant moisture near the sink and dishwasher. The flooring you choose needs to handle all of it.
The two dominant options for kitchen remodels in 2026:
- SPC (Stone Polymer Composite): Rigid core, extremely stable, waterproof, and click lock installation makes it fast to lay down. Works well over minor subfloor imperfections.
- LVP (Luxury Vinyl Plank): More flexible core, softer underfoot, also waterproof. Slightly less dimensionally stable with temperature swings.
Both are waterproof and practical for kitchens. For a deeper comparison, read about the key differences between SPC and LVP.
Installation sequence matters. In most kitchen remodels, flooring goes in before cabinets if you want a seamless look and easier future cabinet replacement. Some contractors install cabinets first and run flooring up to them, which saves on material cost but creates complications if cabinets are ever moved. Discuss this with your contractor before ordering materials.
CARB Phase 2 and TSCA Title VI Compliance
The California Air Resources Board (CARB) developed standards to reduce formaldehyde emissions from composite wood products like plywood and particleboard. CARB Phase 2 sets strict limits on how much formaldehyde these materials can emit.
TSCA Title VI is the federal rule that mirrors CARB Phase 2. If a product is TSCA Title VI compliant, it meets CARB Phase 2 standards nationwide. When you plan kitchen remodel materials, look for these certifications on any cabinets or closet systems that use composite wood. This matters for indoor air quality and code compliance.
Phase 5: Construction, Permits, and Installation Planning
Construction is when your effort to plan kitchen remodel details becomes physical reality. These terms cover what happens once the design is finalized and work begins.
Building Permit
A building permit is official government approval to perform construction work. A good rule of thumb: if you’re touching anything behind the walls, in the floor, or removing/adding walls, you need a permit.
For all but the most cosmetic upgrades (paint, hardware, minor fixture swaps), you’ll likely need one. Working without required permits can result in fines, forced removal of work, and problems when selling your home.
STFI Permit (Subject to Field Inspection)
This is a Washington State term that homeowners in the Seattle area will encounter. An STFI permit is a streamlined permit for projects that don’t require plan review. Seattle issues about 17,000 STFI permits per year. For many kitchen remodels that involve standard plumbing, electrical, or mechanical work without structural changes, an STFI permit may be sufficient.
Seattle specific note: According to the Seattle Department of Construction and Inspections, minor repairs or modifications costing less than $6,000 in any six month period (fair market value of labor and parts) may not require a permit at all. But most kitchen remodels exceed this threshold quickly.
Demolition Preparation and Safety
Demo is the phase where existing cabinets, countertops, flooring, appliances, and sometimes walls are removed before new construction begins. It’s loud, dusty, and often reveals surprises: water damage, outdated wiring, inadequate subfloor, or pest damage.
Before demolition starts:
- Set up a temporary kitchen. A microwave, paper plates, a folding table near a bathroom sink, and a coffee maker. Once the kitchen is gutted, you’ll be without it for weeks or months.
- Shut off water and gas to the kitchen and confirm shutoff locations with your contractor.
- Seal adjacent rooms with plastic sheeting to contain dust. Demo dust gets everywhere.
- Remove anything valuable from nearby rooms. Vibrations can knock items off shelves.
- Confirm dumpster or debris removal logistics. Demo generates a surprising volume of waste.
- Check for hazardous materials. Homes built before 1978 may contain lead paint. Homes built before 1990 may have asbestos in floor tiles or pipe insulation. Professional testing before demo is cheap insurance.
Practitioners on Reddit frequently report that asbestos discovery during demo is one of the most stressful and expensive surprises, requiring professional abatement that can cost $2,000 to $10,000 and add weeks to the timeline.
Rough In Planning for Plumbing, Electrical, and Gas
Rough in refers to the initial installation of plumbing, electrical, and HVAC systems before walls and floors are closed up. This is the phase where the infrastructure behind your walls gets built or modified.
Plumbing rough in means supply and drain lines extend out of the wall or floor where fixtures will later attach. If you’re moving the sink, adding a pot filler, or relocating the dishwasher, all of that pipe work happens now.
Electrical rough in means wiring and boxes are placed for outlets, switches, and lighting. Kitchen electrical codes have specific requirements: GFCI protected outlets within six feet of any water source, dedicated circuits for the refrigerator, dishwasher, and microwave, and adequate amperage for high draw appliances.
Gas rough in applies if you’re switching from an electric range to gas, or relocating a gas range. This requires a licensed plumber or gas fitter and always requires a permit and inspection.
The critical planning point: every fixture, appliance, and outlet location must be decided before rough in begins. Moving a gas line or electrical box after drywall is up costs three to five times more than getting it right the first time.
Load Bearing Wall
A load bearing wall supports the weight of the structure above it, transferring loads down to the foundation. Removing or modifying a load bearing wall requires engineering calculations and a permit, regardless of how small the project seems.
If you plan kitchen remodel work that includes opening up a wall, a structural engineer needs to confirm whether it’s load bearing and, if so, design an appropriate beam or header to replace its function.
Subfloor
The subfloor is the structural layer beneath your finished flooring. It’s typically plywood or oriented strand board (OSB) attached to the floor joists. The subfloor is the kitchen’s foundation: flooring, appliances, and base cabinets are only as good as the subfloor supporting them.
Practitioners on Reddit frequently report that subfloor damage discovered during demo is one of the most common drivers of change orders. Rotten or uneven subfloor requires repair before any new flooring or cabinets can be installed.
Drywall and Paint Planning
Drywall (also called sheetrock or gypsum board) is the material used to create interior walls and ceilings. In a kitchen remodel, drywall goes up after rough in inspections pass, enclosing plumbing, electrical, and any insulation.
A few planning notes that often get overlooked:
- Drywall seams need taping, mudding, and sanding before painting. This takes multiple days because each layer of joint compound needs to dry.
- Prime before painting. New drywall absorbs paint unevenly without primer.
- Choose paint finish strategically. Semi gloss or satin finishes are standard for kitchens because they resist moisture and are easier to clean than flat or eggshell finishes.
- Paint happens before backsplash tile and after cabinets are installed. Get the sequence wrong and you’ll be touching up or repainting.
Cabinet Installation Planning
Cabinet installation is the phase that defines the look and function of your kitchen. A few things to plan in advance:
- Verify all cabinets arrived undamaged and match the order before the installer starts. Open every box and check every piece. Discovering a missing or damaged cabinet mid installation causes delays.
- Confirm the installation sequence with your contractor. Upper (wall) cabinets typically go in first, then base cabinets, then tall cabinets.
- Ensure walls are straight and level. If walls are out of plumb (common in older homes), the installer needs shims and may need to scribe filler pieces.
- Have all hardware, hinges, and accessories on site before installation day.
For a detailed breakdown of the kitchen remodel timeline phase by phase, including cabinet installation sequencing, see the linked guide.
Countertop Installation Planning
Countertops are templated and fabricated after cabinets are fully installed and level. The sequence is non negotiable because templates are cut to the exact dimensions of the installed cabinets.
- Templating happens first: a fabricator visits, measures, and creates a template for the slab cuts.
- Fabrication takes one to two weeks after templating.
- Installation is usually completed in one day for most kitchens.
- Seams are unavoidable on L shaped or U shaped layouts. Discuss seam placement with your fabricator, as some locations are more visible than others.
Plumbing Fixture Installation
Plumbing fixtures (sink, faucet, garbage disposal, dishwasher connection) go in after countertops are set. This is the “finish plumbing” phase, distinct from the rough in work done earlier.
Plan for:
- Faucet hole count and placement. Single hole, three hole, or wall mounted? This must match your countertop cutout.
- Sink mounting style. Undermount sinks are cut into the countertop from below (clean look, no lip to trap debris). Top mount sinks drop in from above (easier to install, visible rim).
- Water supply connections and shutoff valves. Older homes may need new shutoffs installed during rough in.
Appliance Hookup Planning
Appliances are among the last items installed, but they need to be selected and purchased early because they dictate cabinet dimensions, electrical requirements, and ventilation.
- Measure the appliance openings in your cabinet layout. A 30 inch range needs exactly 30 inches of clearance, not 29.75.
- Confirm electrical requirements for each appliance. Some need dedicated circuits. Induction cooktops require higher amperage than standard electric.
- Plan ventilation. Range hoods should vent to the exterior when possible. Recirculating hoods are less effective but sometimes the only option in condos or apartments.
- Schedule delivery timing. Appliances should arrive after cabinets and countertops are installed, not before. Storing appliances on site during construction risks damage.
Phase 6: People, Communication, and Project Management
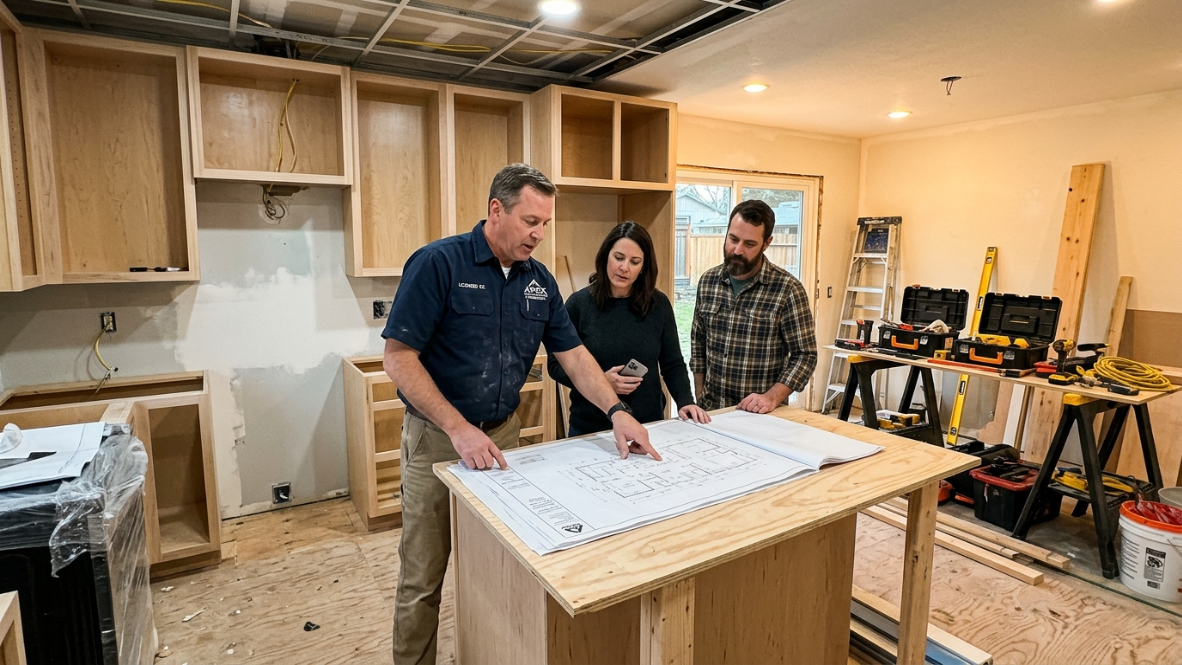
Knowing who does what, how to communicate, and how long things actually take is the final piece when you plan kitchen remodel projects from start to finish.
General Contractor (GC)
The GC is the primary person or firm responsible for managing your remodel. They hire and coordinate subcontractors, manage the schedule, pull permits, order materials, and serve as your main point of contact. A good GC prevents problems. A bad one causes them.
When evaluating GCs, ask for proof of licensing, insurance, and references from recent kitchen projects. In Washington State, verify their registration through the Department of Labor and Industries.
Subcontractor (Sub)
Subcontractors are specialists hired by the GC for specific trades: electrician, plumber, tile installer, painter, countertop fabricator. You typically don’t hire subs directly unless you’re acting as your own GC.
Kitchen Designer
A kitchen designer specializes in the functional layout and aesthetic design of kitchens. They create floor plans, select materials, and produce the drawings your contractor and cabinet supplier need to execute the project.
Some cabinet suppliers include design services. Krafter’s Land offers free design and quotes through their design support hub, including 2020 Design files that your contractor can work from directly.
Design Build Firm
A design build firm handles both design and construction under one roof. This reduces communication gaps between separate designers and contractors, often streamlining the process and reducing finger pointing when issues arise.
The trade off is less flexibility to shop around for the lowest construction bid, since design and build are bundled. For complex remodels, the coordination benefits usually outweigh this.
Building a Communication Plan with Your Contractor
Poor communication is the second most common source of remodel frustration, right after budget overruns. Establishing a communication plan before construction starts prevents most problems.
Key elements to agree on:
- Single point of contact. Decide who on each side (homeowner and contractor) is the primary communicator. Having multiple family members giving different instructions to different workers creates chaos.
- Update frequency. Weekly progress updates (written, with photos) are reasonable. Daily check ins during critical phases like rough in or cabinet installation.
- Decision deadlines. Agree in advance on how quickly you need to respond when the contractor asks a question. A 48 hour turnaround is typical. Slow decisions delay the entire project.
- Change order process. Every change should be documented in writing with the cost and timeline impact before work proceeds. Verbal agreements lead to disputes.
- Preferred communication method. Text, email, a project management app, or phone calls? Pick one primary channel and stick to it.
Practitioners on home improvement forums consistently say the best contractor relationships happen when expectations around communication are set explicitly before the first nail is pulled.
Lead Time
Lead time is the gap between ordering a product and its arrival on site. Cabinet lead times are a critical planning variable because they range from days (stock, in warehouse RTA) to 8 to 12 weeks (semi custom) to 16 or more weeks (full custom).
Your kitchen remodel timeline is only as fast as your slowest lead time. Order cabinets, countertops, and appliances as early as possible once designs are finalized. Trade pros looking for faster turnaround should evaluate suppliers based on in stock availability. This guide for trade professionals covers what to look for.
Finishing Details and the Punch List
The punch list is the final checklist of small items that need correction or completion before a project is considered done. A crooked outlet cover, a cabinet door that doesn’t align, a paint touch up, a missing piece of trim.
Don’t underestimate this phase. Completing the punch list typically extends the project by another month or two. Build this into your timeline expectations from the start.
Tips for managing the punch list effectively:
- Do the walk through with the contractor using a printed or digital checklist. Photograph every item.
- Number each item and assign a completion deadline.
- Hold a portion of final payment (typically 5% to 10%) until the punch list is complete.
- Be reasonable. Minor cosmetic imperfections visible only in extreme light are normal. Structural issues, functional problems, or obvious defects are not acceptable.
Walk Through and Final Inspection
The final walk through happens after all work is complete and the punch list is addressed. You and your contractor go through every room, every detail, checking that the work matches the contract and plans. This is also when the building inspector conducts a final review for permit sign off.
Don’t skip this step or rush through it. Document any remaining issues in writing before making the final payment.
Warranty (Limited vs. Lifetime)
A limited warranty covers defects in materials and workmanship for a specific period under specific conditions. A lifetime warranty covers the product for as long as the original purchaser owns it, but “lifetime” always has exclusions and limitations defined in the warranty document.
Read the actual warranty text. “Lifetime” doesn’t mean “everything, forever, no matter what.” It means something specific, and you need to know what.
Timeline Reality Check
One of the most important things to understand as you plan kitchen remodel timelines is how long the process actually takes.
A survey of homeowners planning kitchen remodels in 2026 found that 72% expect completion in four weeks or less. The reality: full kitchen remodels typically take three to five months of active construction, and that’s after a planning and design phase that often takes several months on its own. According to BLANCO’s data, homeowners spend an average of 8.3 months planning before construction even starts.
The expectation gap is massive. Account for permit processing (two to four months in Seattle), cabinet lead times, countertop fabrication, and the inevitable punch list phase. Six to twelve months from first conversation to final walk through is a realistic window for a full kitchen remodel.
Frequently Asked Questions
How much does it cost to plan kitchen remodel projects in 2026?
According to Angi, the average kitchen remodel costs around $27,000, with most homeowners spending between $14,600 and $41,600. Cabinetry accounts for 30% to 40% of the total budget. Set aside 10% to 20% as a contingency for unexpected costs.
Do I need a permit for a kitchen remodel in Seattle?
In most cases, yes. If your project involves plumbing, electrical, ventilation, or structural changes, a permit is required. Seattle issues about 17,000 STFI permits annually for smaller projects. Only minor work under $6,000 in a six month period may be exempt.
How long does a kitchen remodel actually take?
Full kitchen remodels take three to five months of active construction. Add the planning and design phase (often several months) and the punch list phase (another one to two months), and most projects span six to twelve months total.
What is the difference between RTA and pre assembled cabinets?
RTA cabinets arrive flat packed and need on site assembly. Pre assembled cabinets arrive ready to install. RTA typically costs 20% to 50% less but requires assembly time and basic tool skills. Quality varies by brand, so check material specs and certifications.
What is a 10×10 kitchen and why does it matter?
A 10×10 kitchen is a hypothetical L shaped kitchen layout (10 feet by 10 feet) used as an industry standard benchmark for comparing cabinet prices across brands. It’s a pricing tool, not a recommendation for kitchen size.
What is the biggest mistake homeowners make when they plan kitchen remodel projects?
Incomplete planning before construction starts. Most change orders, budget overruns, and timeline delays trace back to decisions that weren’t finalized before demo day. The more you plan, specify, and document upfront, the smoother the build phase goes.
Should I choose a work triangle or work zones for my kitchen layout?
It depends on the size of your kitchen and how many people use it. The work triangle works well in tighter spaces with a single cook. Work zones are better for larger kitchens and households where multiple people cook simultaneously.
What does CARB Phase 2 compliance mean for kitchen cabinets?
CARB Phase 2 limits formaldehyde emissions from composite wood products. TSCA Title VI is the equivalent federal regulation. Cabinets that meet these standards have been tested for low formaldehyde emissions, which matters for indoor air quality, especially in enclosed spaces like kitchens.
Should I pick trendy or timeless materials for my kitchen remodel?
For permanent elements (cabinets, countertops, tile), lean timeless. Shaker doors, quartz countertops, and neutral palettes have proven staying power. Save bold trends for easily swapped elements like hardware, light fixtures, and paint colors. This approach protects both your enjoyment and your resale value.
How do I plan kitchen remodel storage so it actually works?
Start by cataloging what you currently store in your kitchen and what doesn’t fit. Then design cabinet interiors around real usage: deep drawers for pots, pull out shelves in base cabinets, built in organizers for spices and utensils. Planning storage around your actual cooking habits, rather than defaulting to standard cabinet interiors, makes the biggest difference.
Start Your Kitchen Remodel Plan
Knowing the vocabulary and understanding each step is the foundation. The next move is connecting with the right products and partners. Now that you know how to plan kitchen remodel projects step by step, whether you’re a homeowner working with a contractor or a trade professional sourcing cabinets, countertops, and flooring for an upcoming project, request a free design and quote to start turning your plan into a real kitchen.