
TL;DR
Coordinating cabinets, countertops, and appliance rough-ins is about respecting a strict dependency chain. Appliance specs must be locked before cabinets are ordered. Rough-ins depend on the cabinet layout. Countertop templating can’t happen until cabinets are installed, leveled, and secured. Break the sequence, and you pay for rework.
A kitchen remodel is really a coordination problem. Three categories of work, cabinets, countertops, and mechanical rough-ins, interlock so tightly that a single out-of-sequence decision can cascade into weeks of delay and thousands in extra cost. The plumber needs to know where the sink base goes. The electrician needs to know what appliances draw power. The countertop fabricator needs cabinets to physically exist before measuring anything.
This guide walks through every term and concept you’ll encounter when coordinating these three systems, organized by the phase where each becomes relevant. It’s built for contractors, remodelers, and homeowners managing multi-trade kitchen projects.
If you’re still early in the planning process, our kitchen remodel checklist covers permits, budgeting, and timeline basics that feed into the coordination sequence below.
How Do You Coordinate Cabinets, Countertops, and Appliance Rough-Ins?
To coordinate cabinets, countertops, and appliance rough-ins, finalize appliance models and cabinet drawings before plumbing, electrical, and gas work begins. Complete and inspect rough-ins before closing the walls. Install cabinets according to the approved layout, then level and secure them before countertop templating. After countertop installation, complete finish plumbing, electrical connections, backsplash work, and appliance installation according to manufacturer instructions and the project schedule.
Kitchen Remodel Coordination Sequence: From Appliance Selection to Final Installation
Successful kitchen coordination follows a sequence in which each trade works from approved dimensions, product specifications, and completed work from the preceding phase.
Confirm appliance specifications. Select the actual refrigerator, range or cooktop, hood, dishwasher, sink, microwave, and wall oven models. Collect their installation manuals and utility requirements.
Finalize cabinet plans. Confirm cabinet widths, depths, elevations, fillers, finished panels, appliance openings, countertop dimensions, and island details.
Coordinate trades and permits. Have the contractor, cabinet supplier, plumber, electrician, HVAC contractor, and gas professional review the same drawings. Confirm permit and inspection requirements.
Complete demolition and rough-ins. Install plumbing, electrical wiring, gas piping, ventilation ductwork, and required blocking according to the approved plan.
Pass required rough-in inspections. Obtain the applicable approvals before closing walls or covering work that must remain accessible for inspection.
Close walls and complete finishes. Install drywall and complete painting. Coordinate flooring according to the selected material, cabinet manufacturer’s instructions, and the contractor’s installation plan.
Install and secure cabinets. Verify cabinet locations, level, plumb, fastening, appliance openings, finished panels, and island support requirements.
Template countertops. Schedule the fabricator after the cabinets and required supports are complete. Confirm sink and cooktop cutout specifications, edge profiles, and seam locations.
Fabricate and install countertops. Allow the fabricator’s stated production time and verify the site is ready for delivery and installation.
Complete finish work. Install the sink, faucet, dishwasher connections, cooktop, backsplash, and other components in the order appropriate to their mounting requirements.
Install and test appliances. Confirm final clearances, electrical and gas connections, water connections, ventilation, anti-tip protection where required, and manufacturer commissioning instructions.
Important: This is a coordination framework, not a universal installation order. Flooring, backsplash, appliance installation, and final plumbing can overlap or change order depending on the materials and design. Confirm the sequence with the responsible trades before work begins.
The Core Dependency Chain
Before getting into terms and definitions, here’s the sequence that governs every successful kitchen remodel:
Appliance specs → Cabinet layout and order → Rough-ins (plumbing, electrical, gas) → Rough inspection → Drywall and paint → Flooring → Cabinet installation → Countertop templating → Countertop fabrication and install → Finish plumbing and electrical → Backsplash → Appliance install
Each phase delivers a complete, approved condition to the next. Skip a step or swap the order, and something downstream breaks. The rest of this guide explains why.
Pre-Rough-In Kitchen Coordination Checklist
Before plumbing, electrical, gas, or ventilation rough-ins begin, confirm that the following items have been reviewed by the responsible trades.
Appliance and Cabinet Documents
Final appliance model numbers and installation manuals are available.
Refrigerator, range, cooktop, hood, dishwasher, microwave, and oven dimensions have been checked.
Cabinet plan views and wall elevations show the final layout.
Appliance openings, fillers, finished end panels, and required clearances are documented.
Sink, faucet, cooktop, and other countertop-mounted fixture specifications are confirmed.
Island dimensions, seating overhangs, and support requirements are established.
Plumbing and Gas
Sink, dishwasher, refrigerator water supply, and other plumbing connection locations are coordinated with the cabinet drawings.
Drain, waste, and vent routing has been reviewed for slope, venting, and structural conflicts.
Gas appliance connection locations match the selected appliance instructions.
Plumbing and gas work has been reviewed by the appropriately licensed or qualified professionals where required.
Electrical and Ventilation
Circuit requirements, voltage, amperage, and connection types are confirmed from appliance documentation.
Receptacle and switch locations are coordinated with cabinets, drawers, backsplash, and countertop surfaces.
Range hood duct size, route, termination, and makeup-air requirements have been reviewed.
Cabinet lighting, undercabinet outlets, and island receptacles are included where required.
Electrical, plumbing, and building permit requirements have been confirmed.
Scheduling and Approvals
The team has agreed on the flooring and cabinet installation sequence.
Required blocking and structural supports are identified before walls close.
Rough-in inspections are scheduled where applicable.
Appliance delivery dates and cabinet lead times have been checked.
The countertop fabricator has confirmed its templating prerequisites.
One person is responsible for approving layout changes and distributing updated drawings.
Coordination rule: Do not authorize rough-in work from outdated plans or verbal dimensions alone. Distribute the approved drawings and relevant manufacturer specifications to every affected trade, and document revisions before work proceeds.
Kitchen Rough-In Coordination: Who Needs What Information?
Trade or specialist | Information needed before work | Main coordination risk |
|---|---|---|
Cabinet supplier or designer | Appliance models, room measurements, plumbing and electrical constraints | Incorrect openings, cabinet sizes, or drawer clearances |
Plumber | Cabinet elevations, sink and dishwasher locations, fixture specifications | Misaligned supply lines, drains, or vents |
Electrician | Appliance electrical specifications, cabinet drawings, countertop and backsplash plans | Incorrect circuits, outlet positions, or connection locations |
HVAC contractor | Range hood specifications, duct route, cabinet elevations | Duct conflicts or inadequate ventilation provisions |
Gas professional | Selected gas appliance, connection location, cabinet and drawer layout | Connections obstructed by cabinets or appliance components |
Flooring contractor | Cabinet layout, flooring type, finished floor height, installation requirements | Incorrect finished heights or damaged flooring |
Cabinet installer | Approved cabinet plans, site measurements, finished floor conditions, blocking | Out-of-level cabinets, incorrect openings, or missing supports |
Countertop fabricator | Installed and secured cabinets, finished panels, sink and cooktop specifications | Incorrect templates, cutouts, seams, or overhangs |
General contractor or project manager | Approved drawings, delivery dates, inspection requirements, trade schedule | Work performed out of sequence or conflicting revisions |
The general contractor or designated project coordinator should maintain one current set of approved drawings and communicate changes to every affected trade. Any change to an appliance, cabinet dimension, or connection location should be checked for downstream effects before it is approved.
Planning-Phase Terms
Appliance Specification
Confirming the exact model numbers, dimensions, and utility requirements for every appliance before cabinets are ordered or trades begin rough-in work. This is not “picking a brand.” It means having the spec sheet in hand with width, depth, height, electrical amperage, gas BTU, water supply needs, and ventilation requirements.
Why it matters for coordination: This is the single most important step in the entire process. Every appliance decision locks in specific dimensions and rough-in locations. The refrigerator sets the opening width and depth. The range or cooktop determines whether you need a gas line or a 240V electrical circuit, plus the hood width. The dishwasher sets the plumbing location relative to the sink. A wall oven dictates cabinet height and a dedicated electrical circuit.
Practitioners on electrical trade forums share cautionary stories about this constantly. One electrician described wiring a kitchen where the homeowner said the existing gas range would be replaced with another gas range. He placed it on a small appliance circuit with GFCI protection. The new range turned out to have an electric warming oven requiring a dedicated circuit, forcing rework after the walls were closed up. Another electrician on the same forum was blunt: “I do a lot of custom kitchens, and I won’t rough in without cabinet and appliance details.”
The rule: choose appliances before finalizing cabinets, and well before demolition.
Cabinet Layout and Elevation Drawing
The plan that guides every trade on the job. A cabinet layout (plan view) shows the kitchen from above, marking where each cabinet sits along walls and islands. An elevation drawing shows each wall straight-on, with vertical dimensions for base cabinets, countertop height, upper cabinets, and appliance openings.
Why it matters for coordination: Without accurate elevation drawings, electricians don’t know where to place outlets behind cabinets, plumbers can’t set stub-outs at the right height, and the HVAC crew can’t route ductwork around cabinet soffits. Every trade works from this document.
The industry-standard format for sharing cabinet layouts between suppliers and trades is a 2020 Design file, a CAD package that most cabinet suppliers generate during the quoting process.
Lead Time
The time between placing an order and receiving product. For cabinets, lead times vary dramatically by type: in-stock RTA cabinets ship in 1 to 2 weeks, assembled stock cabinets take 2 to 4 weeks, and custom builds run 6 to 12 weeks or longer. NKBA data puts the national average around 6 to 7 weeks. Refrigerators currently average about 5 weeks. Countertop fabrication adds another 2 to 4 weeks after cabinets are installed and templated.
Why it matters for coordination: Lead times determine when you need to make decisions. If custom cabinets take 10 weeks and countertop fabrication takes 3 weeks after install, your appliance specs and cabinet order need to be locked months before you want a functioning kitchen. Underestimating lead times is one of the most common causes of project delays.
For a deeper breakdown, see our guide on cabinet lead times across stock, semi-custom, and custom tiers.
Work Triangle
A layout concept that positions the sink, range, and refrigerator at three points of a triangle, with each leg measuring between 4 and 9 feet. It’s a planning heuristic, not a code requirement.
Why it matters for coordination: The work triangle drives appliance placement, which drives rough-in locations. Moving the sink from one wall to an island, for example, means rerouting supply lines, drain, and vent through the floor instead of the wall, a much more complicated rough-in.
Rough-In Terms
Rough-In
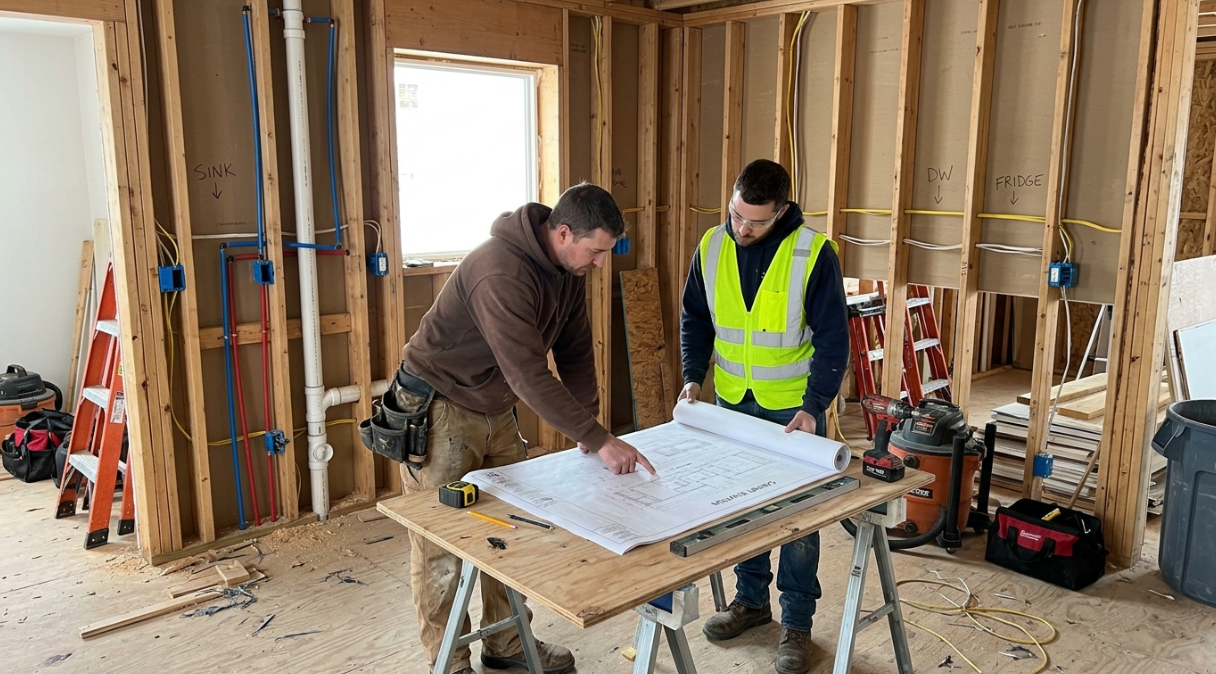
The installation of supply pipes, drain lines, vent pipes, gas lines, and electrical wiring before walls are sealed with drywall. This is the hidden infrastructure that makes a kitchen function.
Why it matters for coordination: The timing of rough-ins is critical because once the wall is sealed, moving a drain even a couple of feet can mean opening ceilings, cutting into finished rooms below, or rebuilding cabinet runs. Rough-in work depends entirely on having a finalized cabinet layout and confirmed appliance specs.
The standard order within rough-in work itself: plumbing first (because drain lines have the least flexibility in routing), then electrical, then HVAC.
Stub-Out
A pipe or wire that extends from the wall or floor, capped and ready for eventual fixture connection. Think of it as a placeholder that says “the sink connects here” or “the dishwasher supply hooks up here.”
Why it matters for coordination: Stub-out locations must align precisely with cabinet positions. Standard kitchen sink supply line stub-outs sit at 22 inches above the finished floor, measured to center. The drain stub-out for the sink should be at 18 to 20 inches above the finished floor. A refrigerator waterline stub-out is commonly placed 24 to 48 inches high and centered behind the appliance. Get these wrong, and they’ll conflict with cabinet shelves, drawer boxes, or appliance bodies.
Story Pole
A field layout tool, usually a 12-inch-wide strip of cardboard floor-protection material cut to the length of each kitchen wall, on which the lead carpenter marks the position of every cabinet box, appliance, and mechanical connection. This horizontal story pole gets stapled level across the wall above the highest mechanical point, and each trade plumbs their work down from it.
Each wall also gets a vertical story pole (often a rip of plywood) showing layouts from the floor up: top of base cabinet, top of counter, range hood height, bottom of upper cabinet, undercabinet light wiring, and so on. These are color-coded by trade. The cardboard poles can be rolled up and stored as living documents that guide work from framing through final install.
Why it matters for coordination: This technique, described in detail by JLC Online, is the best field method for making sure every trade references the same master layout. Most homeowners and many newer contractors have never heard of it, but experienced lead carpenters swear by it. When you’re figuring out how to coordinate cabinets, countertops, and appliance rough-ins on a complex project, a story pole is cheap insurance against misalignment.
Rough-In Inspection
A code inspection performed after all rough plumbing, electrical, and gas work is complete but before drywall goes up. The inspector verifies that work meets code and issues approval to proceed.
Why it matters for coordination: This is a hard “no going back” point. Once you pass rough-in inspection and close the walls, changes become exponentially more expensive. Everything before this point, appliance specs, cabinet layout, mechanical placement, needs to be final.
Dedicated Circuit
An electrical circuit that serves only one appliance. Kitchen appliances that typically require dedicated circuits include the dishwasher, garbage disposal, wall oven, cooktop (electric), microwave, and refrigerator.
Why it matters for coordination: Each dedicated circuit needs its own home run back to the panel. The electrician needs to know during rough-in exactly which appliances require dedicated circuits, what amperage they draw, and where they’ll be located. This is another reason appliance spec sheets must be in hand before electrical rough-in begins.
Drain Waste Vent (DWV)
The three-part system that handles water removal (drain and waste lines) and prevents sewer gas from entering the home (vent). The vent pipe connects to the drain line and runs up through the roof.
Why it matters for coordination: DWV routing is the least flexible element in a kitchen remodel. Drain lines need slope (typically 1/4 inch per foot), and vents have strict distance-from-trap requirements. When a sink moves to an island, the vent route gets complicated fast, sometimes requiring an air admittance valve or a complex loop vent that affects the cabinet and countertop layout.
Gas Rough-In
The gas supply line stub for a range, cooktop, or other gas appliance. Location must match the specific appliance’s connection point and clear the cabinet framing behind it.
Why it matters for coordination: New cabinets often change drawer locations, sink centers, appliance openings, and the space available behind each box. A gas connection that worked with old cabinets may interfere with a new drawer slide or the back panel of a different cabinet. Practitioners on remodeling forums regularly flag this as a coordination failure that’s easy to prevent with accurate drawings but painful to fix after the fact.
If you’re evaluating how different cabinet types, specifically framed vs. frameless cabinets, affect the space behind boxes, that decision can impact where gas and plumbing connections land relative to interior shelving and drawer clearances.
Cabinet Installation Terms
Base Cabinet
The lower cabinet unit that sits on the floor and supports the countertop. Standard dimensions: 24 inches deep, 34.5 inches tall (which becomes 36 inches with the countertop).
Why it matters for coordination: Base cabinet dimensions determine countertop depth, backsplash height, and the rough-in zone for plumbing behind the sink base. Every stub-out height is measured relative to the base cabinet interior.
Wall (Upper) Cabinet
Cabinets mounted to the wall above the countertop. Standard depth is 12 inches. The bottom of upper cabinets typically sits 54 inches above the finished floor, creating 18 inches of clearance above the countertop.
Why it matters for coordination: Upper cabinet height determines undercabinet outlet placement, undercabinet lighting wire locations, and the minimum clearance above cooking surfaces. IRC-referenced guidance notes that clearance between the bottom of upper cabinets and stovetop should be 30 inches for electric ranges and 36 inches for gas ranges. This number needs to be confirmed against your specific range hood manufacturer specs.
Blocking
Wood framing (typically 2×6 or plywood strips) installed inside wall cavities during the rough-in phase to provide solid anchoring points for cabinets, heavy fixtures, or wall-mounted appliances.
Why it matters for coordination: If blocking isn’t installed before drywall, you’ll need to find studs or, worse, open walls later. Wall cabinets, heavy microwave brackets, and pot-filler faucets all need blocking at specific heights. The lead carpenter should mark blocking locations using the cabinet elevation drawings.
Filler
A narrow strip (usually 1.5 to 6 inches wide) that closes gaps between cabinet runs and walls or between two cabinet sections that meet at a corner.
Why it matters for coordination: Fillers affect the final countertop template dimensions. If a filler gets wider or narrower during installation because the wall isn’t plumb, the countertop fabricator needs to account for that difference at template time. This is one reason templating happens on-site from installed cabinets, not from drawings.
End Panel
A finished panel applied to the exposed side of a cabinet run, typically where a cabinet meets an open doorway, a refrigerator, or the end of an island.
Why it matters for coordination: End panels must be installed before countertop templating. They define the edge that the countertop wraps around or terminates against. If they’re missing on template day, the fabricator either can’t measure accurately or has to make assumptions that might be wrong.
Shimming and Leveling
The process of using small wedges (shims) to get cabinet boxes plumb (vertically straight) and level (horizontally flat) on imperfect walls and floors. Nearly every real-world kitchen has walls that are out of plumb and floors that are out of level.
Why it matters for coordination: Cabinets that aren’t level create countertop problems. An out-of-level base means the countertop will have uneven overhangs, visible gaps, or rocking. This is why countertop templating can’t happen until cabinets are fully secured and verified level, not just sitting in place.
For contractors handling cabinet installation themselves, our step-by-step measurement guide covers the field measurements that feed directly into accurate cabinet ordering.
Countertop Coordination Terms
Templating
The on-site precision measurement of installed cabinets to create a cutting guide for stone countertop fabrication. The fabricator visits the jobsite, measures every angle, wall irregularity, and cabinet position, and produces a template (often using laser-guided digital tools or physical template strips).
Why it matters for coordination: Templating is the schedule hinge point for the entire kitchen. Everything before it is preparation. Everything after it runs on a fixed timeline. You cannot template from drawings. The template is taken off the actual installed cabinets because real-world conditions always differ from plans.
What must be ready for template day: base cabinets fully installed, secured, and leveled. End panels and tall cabinet panels that meet the counter should be complete. Any supports for islands or seating overhangs need to be in place. The sink and cooktop should be physically on-site so the fabricator can verify cutout dimensions.
Cabinet Installation Handoff: What to Verify Before Templating
The cabinet installer and countertop fabricator should confirm that the installed cabinets are ready to receive the selected countertop material.
Check | What to verify |
|---|---|
Cabinet position | Boxes match the approved plan and are properly fastened. |
Level and alignment | Cabinet tops are level, with transitions and support conditions checked. |
Finished panels | Exposed ends and panels that affect countertop edges are complete. |
Island support | Brackets, corbels, or other specified support systems are installed. |
Appliance openings | Dimensions and clearances match the approved appliance specifications. |
Sink and cooktop | Cutout details and mounting requirements are confirmed. |
Countertop overhang | Dimensions and structural support requirements are agreed upon. |
Site conditions | Access, installation area, and any required substrate or support work are ready. |
Document any outstanding items and confirm who is responsible for resolving them. The fabricator should determine whether the site meets its templating requirements before measurements are taken.
Fabrication
Cutting, edging, and polishing stone to the template specifications in the fabricator’s shop. This is the step between templating and final countertop installation.
Why it matters for coordination: Standard fabrication time runs 5 to 10 business days from the template visit. For stone (granite, quartz), total time from template to install is often 2 to 4 weeks, stretching to 3 to 4 weeks during busy spring and fall remodel peaks. This is dead time on the jobsite where no kitchen work can proceed, which is why every phase before it needs to be buttoned up.
If you’re still deciding between prefab quartz and slab quartz, that choice directly affects fabrication timelines and seam placement options.
Cutout
An opening in the countertop for sinks, cooktops, faucets, or soap dispensers. Cutouts are made during fabrication based on the template and the exact fixture specs.
Why it matters for coordination: This is another reason appliance and fixture specs must be confirmed before template day. The fabricator needs the actual sink, cooktop, and faucet models to determine cutout dimensions. A standard 30-inch cooktop, for instance, requires a cutout of roughly 28.5 to 29 inches wide by 19 to 20 inches deep. But “roughly” isn’t good enough when you’re cutting into a $4,000 slab of quartz.
Seam Placement
Where two pieces of countertop material join. Seam locations are decided during the template visit based on slab size, layout geometry, and (for natural stone or veined quartz) pattern matching.
Why it matters for coordination: Seam placement affects both aesthetics and structural integrity. Seams shouldn’t land directly over a dishwasher (steam exposure) or at the front corner of an island where they’ll be visible. The fabricator needs to see the full installed cabinet layout to make these decisions intelligently.
Edge Profile
The shaped edge of the countertop, ranging from a simple eased (slightly rounded) edge to more ornate profiles like ogee or bullnose.
Why it matters for coordination: The edge profile must be confirmed before fabrication begins. It can’t be changed after the stone is cut. For a complete overview of edge options and their practical tradeoffs, our edge profile guide covers the most common styles.
Overhang
How far the countertop extends past the cabinet face. Standard overhang is about 1 to 1.5 inches. Eating bars and raised counters with seating typically have 10 to 12 inches of overhang and require support brackets or a structural corbel underneath.
Why it matters for coordination: Overhang support needs to be in place before templating. For islands with seating overhangs, the support structure (steel brackets, plywood subtop, or corbels) must be attached to the cabinet and ready when the fabricator arrives. This is a detail that gets missed when the cabinet installer and the countertop company don’t communicate.
Backsplash
The vertical surface between the countertop and upper cabinets, protecting the wall from splashes.
Why it matters for coordination: Backsplash goes in after countertop installation. If you’re doing tile, the tiler needs the countertop in place to start their layout from the top of the counter up. If you’re using a stone backsplash that matches the countertop, it gets templated and fabricated at the same time but installed after the counter.
Countertop Templating Checklist: Is the Kitchen Ready?
Before confirming the fabricator’s template appointment, verify the following:
All base cabinets are installed, fastened, level, and in their final positions.
End panels and other components affecting countertop edges are installed.
Island cabinets, support brackets, and seating overhang structures are complete.
Sink, faucet, cooktop, and other cutout specifications are confirmed.
The sink and cooktop are available on-site if the fabricator requires physical verification.
Sink mounting style, edge profile, backsplash details, and seam preferences are documented.
Appliance openings and adjacent cabinet dimensions have been checked.
Any remaining changes to the cabinet layout have been resolved.
The fabricator has confirmed access, measurement requirements, and the expected production schedule.
Do not template until the fabricator confirms the site is ready. If a cabinet, panel, support, or appliance specification changes after templating, ask the fabricator whether the change affects the template, cutouts, or production schedule before proceeding.
Appliance Rough-In Terms
Rough Opening
The framed space an appliance slides into. This must match the manufacturer’s specifications for each specific model, not “standard” guesses.
Standard rough openings for reference: a 30-inch slide-in range needs 30 inches wide by 36 inches high by 25 to 27 inches deep. A standard dishwasher needs 24 inches wide by 34 inches high by 24 inches deep. An over-the-range microwave needs 30 inches wide by 16 to 17 inches high by 15 to 16 inches deep. But these are starting points. Always use the spec sheet for the actual model being installed.
Why it matters for coordination: The rough opening is defined by the cabinets on either side of the appliance. Cabinet widths must account for the exact appliance model plus any required clearance. If the cabinets are ordered with the wrong opening width, the only fix is new cabinets or a different appliance.
Clearance
Minimum space around an appliance for ventilation, door swing, and service access. Each appliance has different requirements specified in its installation manual.
Why it matters for coordination: Clearance is not the same as the rough opening. A refrigerator might fit physically into a 36-inch opening, but the manufacturer may require 1/8 inch on each side for ventilation and the door hinge radius might need 2 more inches for a full 90-degree swing. Ignoring clearance specs leads to overheating, doors that won’t open fully, or appliances that can’t be serviced without pulling out the adjacent cabinet.
Landing Space
Counter area adjacent to appliances designated for setting items down. The NKBA recommends a minimum of 15 inches of landing space on each side of a cooktop and at least 24 inches on one side of the sink.
Why it matters for coordination: Landing space requirements affect cabinet layout, which affects where rough-ins go. If you need 15 inches of counter next to the range, you can’t put a tall pantry cabinet immediately adjacent.
Make-Up Air
A fresh air system required when a range hood exhausts more than a certain CFM (commonly 400 CFM, though local codes vary). The make-up air system replaces the air the hood removes to prevent negative pressure in the house.
Why it matters for coordination: This is a code requirement that gets discovered too late in a surprising number of remodels. If you’re upgrading to a powerful range hood, you may need HVAC ductwork for make-up air that wasn’t in the original scope. That ductwork needs to be roughed in before walls close.
Anti-Tip Bracket
A safety device anchored to the floor or wall that prevents a freestanding range from tipping forward when weight is applied to the open oven door.
Why it matters for coordination: The bracket position depends on the final range location and the specific range model. It gets installed after flooring is in but must be planned during rough-in so any required floor anchoring can be accommodated.
Island Kitchen Rough-In Complications
Island sinks and cooktops deserve their own section because they make coordination significantly harder. The drain run gets longer, the vent route gets more complicated, the supply line has farther to travel, and gas layout may compete with cabinet framing and appliance clearances.
For plumbing, the drain must run through the floor and below the subfloor to reach the main stack, requiring adequate joist depth and slope. The vent may need a loop vent or air admittance valve if it can’t route directly up through the roof. For electrical, you may need floor outlets for island receptacles or conduit running through the slab.
All of this needs to be resolved during the design phase, before rough-in, because the cost and complexity difference between a wall sink and an island sink is substantial. If the structural situation below the floor makes island plumbing impractical, you want to know that before cabinets are ordered, not after.
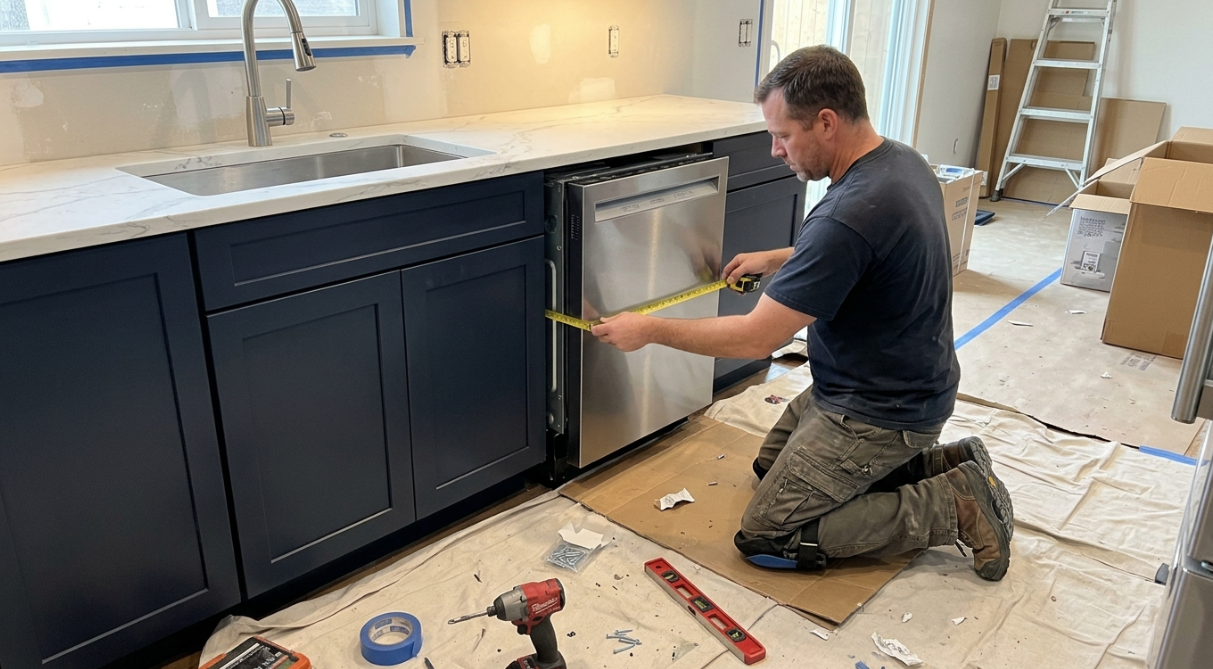
Common Coordination Failures
Understanding how coordination breaks down is just as important as knowing the right sequence. These are the failures that contractors and remodelers report most often.
Rough-ins done before appliance specs are finalized. This forces rework after drywall is up. An electrician on a trade forum put it simply: “Even a slight change can mess up the alignment, and cabinet guys typically make a mess out of the box when trying to line up the hole they cut out.”
Countertops templated before cabinets are fully secured. If cabinets shift after templating, the template is no longer accurate. That means either refabricating the countertop (at your cost) or making compromises during installation that show up as uneven gaps or poor fit.
Gas line conflicts with new cabinet layouts. New cabinets often change drawer locations, sink centers, and the space available behind each box. A gas connection that worked with the old layout may interfere with a new drawer. This is avoidable if the plumber has the cabinet elevation drawings during rough-in.
Outdated wiring not upgraded. Older kitchens rarely meet current electrical code. If the existing kitchen has two circuits and the new design calls for six dedicated circuits plus the required small-appliance branch circuits, that’s a significant scope addition that needs to be caught at the planning stage, not discovered during rough-in.
Flooring and cabinet sequencing confusion. Hardwood and tile often go in before cabinets so the floor runs continuously underneath, simplifying future cabinet replacement. But some contractors install flooring after cabinets to avoid damage during the build. Either approach works if planned in advance. Problems arise when the decision isn’t made until mid-project, throwing off countertop heights and appliance clearances.
For more on these pitfalls and how to avoid them, our kitchen remodel mistakes guide covers the most expensive errors we see across projects.
How to Manage Kitchen Layout Changes Without Causing Rework
Kitchen remodel plans often change after appliance selections, demolition, or cabinet installation. The key is to evaluate each change against every system it affects before authorizing the work.
Step 1: Identify the original constraint
Determine why the change is needed. Common reasons include an appliance being discontinued, unexpected plumbing or wiring, uneven walls, structural obstructions, or a revised cabinet selection.
Step 2: Check downstream dependencies
Before approving the change, review its effect on:
Cabinet widths, drawer locations, fillers, and appliance openings.
Plumbing supply lines, drains, and vent routing.
Electrical circuits, receptacles, and connection locations.
Gas connections and range clearances.
Range hood ductwork and ventilation requirements.
Countertop dimensions, cutouts, seams, and support requirements.
Flooring heights, finished surfaces, and installation dates.
Step 3: Obtain approval from affected trades
Ask each affected contractor or supplier to confirm whether the change is workable. A cabinet adjustment may appear minor but still affect a drawer, a gas connection, an appliance door swing, or the countertop template.
Step 4: Update the drawings and schedule
Revise the relevant cabinet plans, elevations, specifications, and rough-in drawings. Distribute the approved revisions and identify any work that must be paused until the change is resolved.
Step 5: Verify the completed change
Before the next phase begins, check the revised dimensions and connection locations against the approved plans and manufacturer requirements.
Example: Replacing a standard range with a different model may change the electrical connection, required clearances, ventilation needs, and cabinet opening. Confirm those requirements before the electrician or cabinet installer proceeds. If the countertop has already been fabricated, check whether the new appliance affects the cutout or surrounding surfaces.
Best practice: Treat every layout change as a coordination decision, not an isolated product substitution.
IRC Electrical Code References for Kitchen Coordination
A few IRC (International Residential Code) electrical provisions directly affect how cabinets, countertops, and rough-ins coordinate:
E3901.4.1, Wall Countertop Space: A receptacle outlet must be installed at each wall countertop and work surface that is 12 inches or wider. No point along the wall line can be more than 24 inches (measured horizontally) from a receptacle outlet.
E3901.4.5: Outlets must be located not more than 20 inches above the countertop.
These code requirements mean the electrician needs to know the exact countertop height and upper cabinet bottom height to position outlets correctly. On a standard 36-inch-high counter, outlets go between 40 and 56 inches above the finished floor. The lead carpenter can use these IRC sections, along with the story pole technique, to coordinate outlet placement with cabinet and tile layouts on the same wall.
Coordination Timeline Quick Reference
Here’s how the dependency chain plays out with typical timeframes. Actual durations vary by project scope, product selections, and local permit schedules.
Phase | Typical Duration | What It Depends On | “No Going Back” Point? |
|---|---|---|---|
Appliance specification | 1 to 4 weeks | Design preferences, budget | Yes, locks rough-in scope |
Cabinet order | 1 to 12 weeks (varies by type) | Appliance specs, finalized layout | Yes, locks cabinet dimensions |
Permits | 1 to 4 weeks | Completed plans, local jurisdiction | — |
Demo | 1 to 3 days | Permits approved | — |
Rough-ins (plumbing, electrical, gas) | 1 to 2 weeks | Cabinet layout, appliance specs | — |
Rough-in inspection | 1 to 5 days (scheduling) | All rough-in work complete | Yes, walls close after this |
Drywall and paint | 1 to 2 weeks | Passed inspection | — |
Flooring | 2 to 5 days | Drywall complete | — |
Cabinet installation | 1 to 3 days | Flooring done (if floor-first method) | — |
Countertop templating | 1 day | Cabinets installed, level, secured | Yes, starts fabrication clock |
Countertop fabrication | 1 to 4 weeks | Template complete | — |
Countertop installation | 1 day | Fabrication complete | — |
Finish plumbing and electrical | 1 to 2 days | Countertop installed | — |
Backsplash | 1 to 3 days | Countertop installed | — |
Appliance installation | 1 day | All finishes complete | — |
The critical path runs through three bottleneck decisions: appliance specs (locks everything), cabinet delivery (longest lead time item for most projects), and template day (starts the final countdown). Miss any one of these, and the entire schedule shifts.
Explore contractor pricing and lead times for a more detailed look at how cabinet sourcing decisions affect your project schedule.
Kitchen Remodel Coordination Timeline: Typical Phases and Dependencies
The following durations are planning estimates, not guaranteed completion times. Product availability, inspection scheduling, project complexity, and contractor workloads can change the schedule.
Phase | Illustrative duration | Must be confirmed first |
|---|---|---|
Appliance selection and specification | 1–4 weeks or longer | Budget, design requirements, product availability |
Cabinet design and ordering | Design time plus supplier lead time | Appliance models, final measurements, approved layout |
Permit review | Varies by jurisdiction | Required plans and permit applications |
Demolition | Several days for many projects | Site preparation, utility isolation, required approvals |
Rough-ins | Several days to 2 weeks or longer | Approved plans, framing conditions, product requirements |
Rough-in inspections | Depends on local scheduling | Completed work and required inspection requests |
Drywall and painting | Several days to 2 weeks or longer | Required inspections passed and walls approved for closure |
Flooring | Several days or longer | Selected flooring material and agreed installation sequence |
Cabinet installation | Several days or longer | Cabinets delivered, site ready, floor and wall conditions verified |
Countertop templating | Often one appointment | Cabinets secured and level, required panels and supports complete |
Countertop fabrication | Supplier-specific; often 1–4 weeks | Approved template and material availability |
Countertop installation | Often one day | Fabrication complete and site ready |
Finish plumbing and electrical | Several days, depending on scope | Surfaces and fixtures ready for installation |
Backsplash | Several days or longer | Countertop installed and layout confirmed |
Appliance installation and testing | Often one day for a straightforward installation | Finished openings, utilities, clearances, and delivery readiness |
Schedule note: These phases are not all independent. Some can overlap, while others cannot start until a specific inspection, delivery, or installation is complete. Obtain actual lead times and installation windows from your suppliers and contractors before setting the final completion date.
Putting It All Together
Coordinating cabinets, countertops, and appliance rough-ins is not complicated in theory. The dependency chain is logical: specs drive layout, layout drives rough-ins, rough-ins get inspected and sealed, cabinets go in, countertops get measured from the cabinets, and finishes follow.
The difficulty is execution across multiple trades, lead times, and decision-makers. The story pole technique gives you a physical coordination tool. The dependency chain gives you a decision sequence. The specific measurements and code references in this guide give you the standards to check each phase against.
Whether you’re a contractor managing subs or a homeowner trying to understand why your GC insists on having the range spec sheet before framing begins, the answer is the same: every downstream trade needs the information from the phase before it. No shortcuts.
For hands-on coordination support, including free design services, 2020 Design files, and access to in-stock cabinet and countertop inventory, visit a Krafter’s Land showroom in the Seattle metro or Spokane area.
Frequently Asked Questions
Can I order cabinets before choosing appliances?
You can, but you shouldn’t. Appliance dimensions determine cabinet opening widths, rough-in locations, and circuit requirements. Ordering cabinets first risks getting openings that don’t match your final appliance selections, which means either buying different appliances to fit or reordering cabinets.
What happens if countertops are templated before cabinets are fully leveled?
The template will be inaccurate. If cabinets shift even slightly after templating (from settling, incomplete securing, or missing shims), the fabricated countertop won’t fit properly. That typically means refabrication at your expense or visible gaps and overhangs that look wrong.
How long does a full kitchen remodel take from design to completion?
A typical gut remodel runs 8 to 16 weeks from demo to final appliance install, not counting the planning and ordering phase that precedes it. Our phase-by-phase timeline guide breaks this down in detail.
Do rough-in heights change if I install flooring before cabinets?
Yes. If you install flooring first, your rough-in heights should be measured from the finished floor surface. If cabinets go in before flooring, rough-in heights are measured from the subfloor, and you need to account for the flooring thickness when calculating final appliance and cabinet heights. Confirm the sequencing decision before rough-in begins.
What is a story pole, and do I really need one?
A story pole is a marked strip of cardboard or plywood that serves as a master reference for every cabinet, appliance, and mechanical connection on a given wall. It’s the cheapest and most effective coordination tool available. You don’t strictly need one for a simple galley kitchen with no layout changes, but for any project involving new appliance locations, island plumbing, or multiple trades, it pays for itself many times over in prevented mistakes.
Why can’t the countertop fabricator just work from my cabinet drawings?
Because real-world conditions always differ from plans. Walls aren’t perfectly straight. Cabinet installation involves shimming that shifts positions slightly. The template captures what’s actually there, not what was planned. Even a quarter-inch discrepancy between the drawing and reality can produce a visible gap or a countertop that doesn’t sit flat.
What’s the most common coordination mistake contractors make?
Starting rough-in work without confirmed appliance specs. It’s understandable because there’s schedule pressure to keep trades moving, but it’s the mistake most likely to cause expensive rework after walls are closed. The second most common is failing to have the sink and cooktop on-site for template day, which delays fabrication and pushes the entire completion date.
Should plumbing and electrical rough-ins happen before cabinets are installed?
In many kitchen remodels, plumbing and electrical rough-ins are completed before cabinet installation because connections must be placed within the planned cabinet and appliance layout. The exact sequence depends on the project design, accessibility requirements, and local inspection rules. Trades should work from approved cabinet drawings and appliance specifications rather than estimating connection locations.
When should I schedule the countertop fabricator?
Schedule countertop templating after the cabinets are installed, secured, and level, and after the required panels and supports are complete. Confirm the fabricator’s prerequisites in advance, including whether the sink or cooktop must be on-site. Fabrication typically begins after the template is finalized and approved.
What documents should I give my plumber and electrician?
Provide the current cabinet plan, wall elevations, appliance model numbers, manufacturer installation manuals, and relevant fixture specifications. Include the locations of the sink, dishwasher, refrigerator water supply, cooktop, hood, wall oven, and other appliances. The responsible trades should identify any additional information needed for code-compliant installation.
Can I change appliances after rough-in work is complete?
Sometimes, but the replacement must be checked against the existing cabinet openings, electrical circuits, plumbing connections, gas supply, ventilation, and clearance requirements. A similar-looking appliance may have different utility or installation requirements. Have the affected trades verify compatibility before ordering the replacement or modifying the installation.
Who is responsible for coordinating cabinets, countertops, and rough-ins?
The general contractor or designated project coordinator usually manages the overall sequence and communication between trades. The cabinet designer, appliance supplier, plumber, electrician, HVAC contractor, and countertop fabricator each verify the requirements within their scope. Responsibilities should be agreed upon before work starts so that changes and unresolved conflicts have a clear owner.