
TL;DR
Prefabricated quartz countertops come in standard sizes with factory-finished edges, but they still need careful measuring, cutout planning, and installation. To template prefab quartz, verify cabinet dimensions and level, check the wall contours, confirm sink and cooktop specifications, plan seams and overhangs, and compare the measurements with the available countertop pieces. Installation then involves dry-fitting the pieces, making any approved adjustments, joining seams with compatible color-matched adhesive, securing the countertop as specified by the manufacturer, and sealing the wall joint.
The most important rule is to confirm the exact countertop model, cabinet layout, cutout requirements, and installation instructions before fabrication or cutting begins. Prefabricated quartz is not automatically a drop-in fit for every kitchen.
How to Template and Install Prefabricated Quartz Countertops
Templating and installing prefabricated quartz countertops involves measuring the cabinet layout, checking that the cabinets are level and properly supported, confirming fixture dimensions, and verifying that standard-size countertop pieces will fit the space. Unlike custom slab quartz, prefab quartz comes with predetermined dimensions and usually has one or more finished edges, so the layout must work around the available sizes.
The basic process is to prepare the cabinets, measure the countertop runs, map the sink and cooktop cutouts, plan seams and overhangs, confirm the layout with the supplier, dry-fit the pieces, and install them using the manufacturer’s approved methods. Professional templating is recommended for layouts involving multiple seams, sink cutouts, irregular walls, or expensive custom modifications.
Before ordering, confirm whether the selected prefab pieces can cover the entire layout without unacceptable seams or unsupported overhangs. Standard dimensions vary by manufacturer, and some pieces cannot be cut or modified without affecting their finished edges or warranty.
If you’re still deciding between prefabricated and custom slab quartz, read the prefab quartz vs. slab quartz comparison before choosing a countertop system.
Tools and Materials for Templating and Installing Prefabricated Quartz
Before templating or installing prefabricated quartz countertops, gather the measuring tools, fixture specifications, handling equipment, and installation materials required for the selected countertop system. The exact list depends on the countertop manufacturer, cabinet layout, and whether a professional fabricator will perform the cutting and seam work.
Tools for Measuring and Templating
Tape measure for recording cabinet lengths, depths, and clearances.
Long straightedge or level for checking cabinet alignment.
Framing square for checking corners and reference lines.
Pencil and removable labels for identifying countertop sections.
Graph paper or a digital drawing tool for recording the layout.
Manufacturer-approved physical or digital templating equipment, when required.
Camera or smartphone for photographing the cabinet layout, plumbing, and appliance locations.
Materials and Information to Prepare
Exact countertop product specifications, including thickness and finished-edge locations.
Sink model, mounting type, and manufacturer-approved cutout template.
Cooktop model and required cutout dimensions, if applicable.
Faucet and accessory specifications.
Cabinet layout and appliance measurements.
Written seam locations and overhang requirements.
Manufacturer-approved support materials, adhesives, and sealants.
Installation instructions and warranty requirements.
Equipment for Professional Installation
Professional installers may also need appropriate lifting equipment, suction lifters rated for the material and surface, transport supports, seam-setting equipment, and personal protective equipment.
Quartz slabs are heavy and can crack if handled incorrectly. Large sections, cutout pieces, and long unsupported spans require particular care. Follow the manufacturer’s handling instructions and use a qualified installer when the work exceeds your equipment or experience.
Important: Do not assume that a standard tape measure and a few clamps are sufficient for every installation. Cutting, modifying, lifting, and joining engineered stone require the correct equipment and procedures for the specific product.
Prefabricated Quartz Countertop
A prefabricated quartz countertop is a factory-cut piece of engineered stone manufactured to standard dimensions with one or more edges already profiled and polished. It uses the same material as custom slab quartz (approximately 90-95% crushed natural quartz crystals bound with 5-10% polymer resins and pigments) but costs 30-40% less because the factory handles cutting and edge finishing in bulk rather than one kitchen at a time.
The quartz crystals rank 7 on the Mohs hardness scale, harder than most kitchen knives or cookware, which is why quartz has become the dominant countertop material in new construction and remodels.
Standard Prefabricated Quartz Countertop Dimensions
Prefabricated quartz countertops are sold in predetermined sizes, but there is no single dimension that applies to every manufacturer or product line. Length, depth, thickness, finished-edge configuration, and available cutouts should be confirmed using the selected product’s specifications.
The following table provides examples of dimensions to check when comparing prefab quartz products. These are planning references, not guaranteed specifications for every supplier.
Countertop type | Example dimensions to investigate | What to verify before ordering |
|---|---|---|
Standard kitchen counter run | Approximately 96–112 inches long and 25.5–26 inches deep | Actual product length, finished edges, and usable cutting area |
Island countertop | Product-dependent; some designs use pieces around 108 inches long | Island depth, seam requirements, overhang, and support |
Bathroom vanity top | Common product lengths vary by supplier, often including compact vanity sizes | Sink opening, faucet holes, backsplash, and cabinet compatibility |
Thickness | Common options include 2 cm and 3 cm | Actual thickness, edge construction, support requirements, and warranty |
Before ordering, compare the product’s actual dimensions with the measured cabinet layout. Account for wall irregularities, corner conditions, overhangs, finished edges, cutouts, and seams.
A countertop that is long enough on paper may still be unsuitable if its factory-finished edge falls in the wrong place or a required cutout would compromise the available material.
Some 2 cm products use a built-up or laminated edge to create the appearance of a thicker countertop. Others use a different edge construction. Check the specific product rather than assuming all prefab countertops use the same design.
What Prefab Gets You (and Doesn’t)
You get speed, lower cost, and finished edges. You typically don’t get exotic edge profiles (ogee, full bullnose, waterfall). Prefab edges are almost always flat or eased. If your design calls for a specific profile, read up on quartz countertop edge profiles to see whether custom fabrication makes more sense.
Templating (Countertop Template)
Templating is the on-site measurement step that creates an exact pattern of your countertop layout. A technician visits your kitchen or bathroom after cabinets are installed and captures the precise shape, dimensions, cutout locations, and overhang requirements.
Here is the critical distinction that most guides miss: with custom slab quartz, templating designs the countertop from scratch. With prefab quartz, templating verifies that a pre-sized piece will fit your specific layout. The fabricator is checking alignment, marking where sink and cooktop cutouts go, confirming overhangs, and identifying any walls that bow or corners that aren’t square.
Prefab still needs templating because no kitchen is perfectly square. Walls curve. Cabinets settle. A corner that should be 90 degrees is often 89 or 91. Skipping the template and assuming the factory dimensions will just work is how you end up with gaps, misaligned seams, and expensive rework.
Practitioners on DIY forums are blunt about this. Members on DIYChatRoom noted that “diy’ing the templating/installation process is a bit risky,” even when the quartz itself is only $500, because the templating and installation alone can cost $300, and getting it wrong means replacing a piece you can’t return.
Digital Templating
Digital templating uses a portable laser or structured-light device to capture point-cloud measurements of the countertop area. The data becomes a DXF or CAD file that feeds directly into CNC software at the fabrication shop, eliminating the manual transfer step where human error creeps in.
Key Equipment
The two brands heard most often in fabrication shops are the Proliner (made by Prodim) and the LT-2D3D (made by Laser Products Industries). A technician sets reference points around the countertop perimeter, sweeps the device, and the system builds a precise 2D or 3D file in real time.
Numbers That Matter
Metric | Digital | Physical |
|---|---|---|
Accuracy | ±1/32″ to ±1/16″ | ±1/8″ typical |
Template time (average kitchen) | 30 to 60 minutes | 90 to 180 minutes |
Callbacks reduced | 60-80% fewer | Baseline |
Equipment cost | $8,000 to $40,000 | Under $200 in materials |
The accuracy gap is the real story. Digital systems commonly hold tolerances near a sixteenth of an inch, and because the output is a file, it can be reviewed on screen before anything gets cut. Physical templates can drift, and errors only surface after the slab is already on the saw.
The switch from physical to digital templating typically cuts template time by 50-70% and eliminates the need to haul bulky physical templates back to the shop in a truck. Over time, shops report that digital fabrication workflows cut labor costs 20-40%.
Physical (Manual) Templating
Physical templating means building a pattern on-site using flat material, then transporting that pattern to the fabrication shop where it’s traced onto the slab.
Materials
Material choice matters more than most guides let on. One well-circulated piece of fabricator advice puts it simply: cheap poster board and thin cardboard creep over time, warping after they leave the jobsite. Luan plywood does not. MDF, rigid plastic strips, and Coroplast (corrugated plastic) are also stable options.
When Physical Templates Still Make Sense
Small shops without digital equipment, unusual geometry where a laser struggles to get line of sight, or one-off projects where the $8,000+ investment in digital gear isn’t justified. For contractors who template and install prefabricated quartz countertops regularly, the ROI on digital gear pays back within months.
Site Preparation Before Templating
Everything downstream depends on what’s ready before the templater arrives. A cabinet sitting a quarter inch low on one end produces a countertop that rocks or gaps at the wall. Here is the non-negotiable checklist:
Cabinets installed, leveled, and secured. Check level in both directions, front-to-back and side-to-side, on every cabinet. This is the single most common source of post-install problems. If you need guidance on getting cabinets right first, the cabinet installation process glossary covers it in detail.
Flooring completed (or shimmed to final height). If flooring goes in after countertops, the cabinet height changes.
Sink, cooktop, and faucet models on-site or specs confirmed. Not placeholder models. The actual units you plan to install. Cutout placement gets finalized at the templating stage, and using approximate specs instead of exact ones is one of the most common, most expensive mistakes.
Appliances in final positions. Dishwashers, ranges, and refrigerators need to be where they’ll live permanently so the templater can verify clearances.
Plumbing rough-in complete. Supply lines and drain positions affect cutout placement.
Clear countertop area. No tools, no clutter, no boxes on the cabinets.
If you’re managing a full remodel, the kitchen remodel checklist shows where countertop templating fits in the broader project sequence.
How to Measure for Prefabricated Quartz Countertops
Measuring for prefab quartz starts with documenting the cabinet layout and comparing it with the available countertop sizes. The goal is to determine whether the standard pieces can cover the layout and identify the locations of seams, cutouts, and exposed edges before ordering.
For complex kitchens, use these measurements as preliminary planning information and have the final layout verified by the fabricator or installer.
Step 1: Measure Each Countertop Run
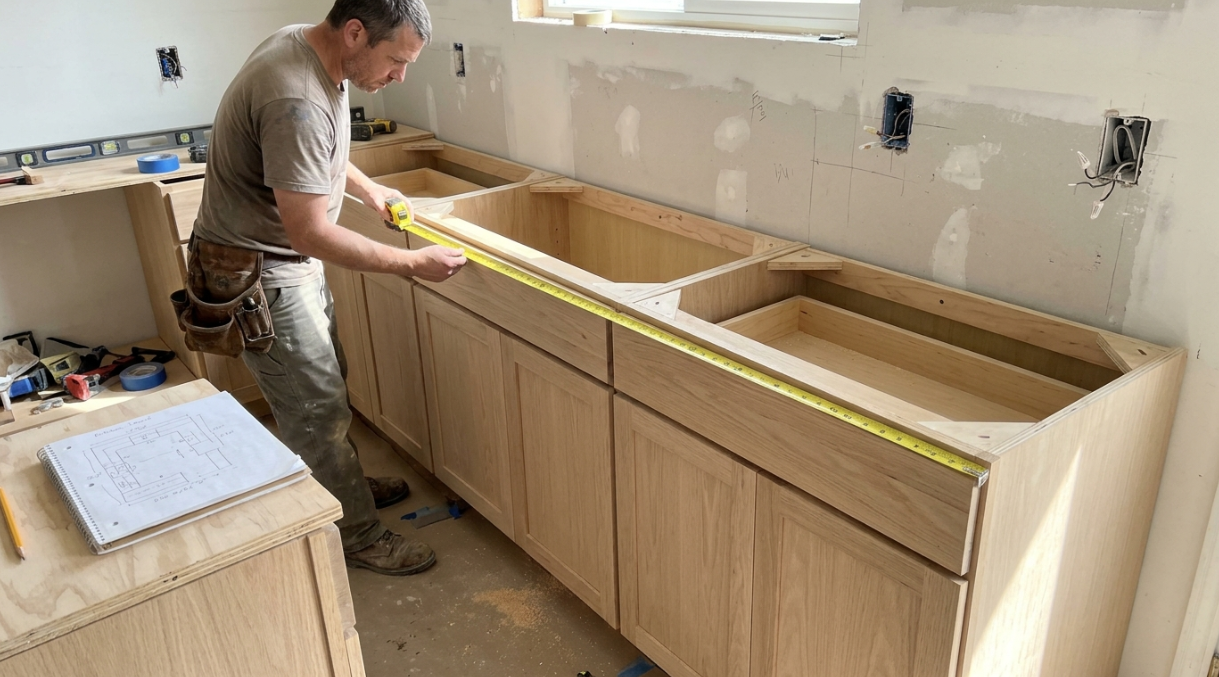
Measure each continuous section of cabinetry along the front edge. Record separate runs for straight counters, L-shaped corners, peninsulas, and islands.
Do not assume that two adjoining runs can be combined without a seam. Their lengths, corner geometry, finished edges, and available prefab sizes determine how the pieces can be arranged.
Step 2: Record the Countertop Depth
Measure from the back of the cabinet toward the front. Record the intended countertop depth and the desired projection beyond the cabinet face.
Confirm whether the selected prefab product has enough usable depth to accommodate the layout. Factory-finished edges and existing cutouts can limit the areas available for modification.
Step 3: Check Cabinet Level and Wall Conditions
Use a suitable level to check the cabinet tops from front to back and from side to side. Inspect corners and walls for bows, irregularities, or protrusions.
Record any uneven areas for the installer. Do not use the countertop to compensate for improperly installed or inadequately supported cabinets.
Step 4: Document Sink and Cooktop Requirements
Record the manufacturer, model number, mounting type, and cutout specifications for every sink or cooktop.
A sink’s overall dimensions are not necessarily the same as its required countertop cutout. The same principle applies to cooktops, which may have specific opening dimensions and clearance requirements.
Use the manufacturer’s installation documentation to establish the correct specifications.
Step 5: Plan Seams and Finished Edges
Mark the locations of walls, corners, appliances, sinks, and exposed countertop edges on a simple drawing.
Ask the fabricator to show where each prefab piece will meet another piece. Confirm which edges are factory-finished and which edges, if any, require additional finishing.
Step 6: Confirm the Layout Before Ordering
Submit the measurements, layout drawing, fixture specifications, and photographs to the supplier or fabricator.
Request confirmation that the proposed pieces will fit the layout and that all cutouts, seams, overhangs, supports, and finished edges are feasible.
Measurement Worksheet
Measurement or detail | Record |
|---|---|
Countertop run A length | ______ |
Countertop run B length | ______ |
Countertop run C length | ______ |
Island length and depth | ______ |
Desired countertop depth | ______ |
Desired front overhang | ______ |
Cabinet level or alignment concerns | ______ |
Sink manufacturer and model | ______ |
Cooktop manufacturer and model | ______ |
Faucet and accessory requirements | ______ |
Planned seam locations | ______ |
Exposed edges requiring finishing | ______ |
Selected prefab product and thickness | ______ |
Manufacturer’s support requirements confirmed | Yes / No |
Final layout approved by fabricator | Yes / No |
Before ordering: Treat this worksheet as a planning aid, not a fabrication template. The final dimensions, cutouts, and installation details must be verified against the selected countertop product and the manufacturer’s requirements.
The Templating Process, Step by Step
Whether digital or physical, the core sequence for templating prefabricated quartz countertops follows the same logic:
Verify cabinet level and alignment. The templater checks what the cabinet installer should have already confirmed. Any issues get flagged now, not on installation day.
Trace the wall line. Walls are never perfectly straight. The templater follows the actual wall contour so the countertop’s back edge can be cut to match.
Mark appliance cutouts. Using the specific sink, cooktop, and faucet models (not guesses), the templater records exact cutout positions, including corner radii and setback distances.
Record overhang dimensions. Standard is 1.5 inches past the cabinet face, but this gets confirmed with the homeowner or designer before it’s locked in.
Note seam locations. Because prefab pieces come in fixed lengths, most kitchens require at least one seam. The templater identifies where seams will fall, ideally in low-visibility zones.
Label everything. Every template piece gets marked with its position (left of sink, right of cooktop, island), and the templater photographs the full cabinet run for reference back at the shop.
Final check. Before the template leaves the site, a careful templater holds it against the wall and cabinet one more time. Any gap larger than 1/8 inch on the wall side means re-scribing before leaving. Ten minutes at the site saves a $600 redo.
One practitioner tip from fabrication guides: label whether overhang and edge profile dimensions are included in your measurements or added later. This small ambiguity has caused countless mis-cuts.
Dry Fit
A dry fit means placing the countertop slab on the cabinets before applying any adhesive. It is the last chance to catch errors before anything becomes permanent.
During a dry fit, the installer checks overhang consistency on all exposed edges, seam alignment between adjacent pieces, level across the full countertop run, and clearance for appliances. If something is off, it gets corrected now. After silicone goes down, adjustments become dramatically harder and more expensive.
Overhang
The overhang is how far the countertop extends past the front face of the cabinet. Standard overhang for kitchen counters is 1.5 inches, which protects the cabinet doors from spills running down the countertop edge.
Island overhangs can be much larger, especially when the island doubles as a breakfast bar. But any overhang beyond 10 to 12 inches needs structural support: steel brackets, corbels, or a knee wall underneath. Unsupported overhangs on quartz will crack over time, and quartz manufacturers will void the warranty if their support guidelines aren’t followed.
HomeAdvisor reviews show a recurring complaint: overhang inconsistency (1 inch in some spots, 1.5 inches in others) traced directly to templating-stage errors. Confirm the overhang dimension at every edge before the templater leaves.
Seam and Seam Placement
A seam is the joint where two countertop pieces meet. Because prefab quartz comes in fixed lengths (typically maxing out at 112 inches), any kitchen with more than about 9 feet of continuous counter will have at least one seam.
Where to Place Seams
The best practice is to hide seams where they’ll draw the least attention: behind the sink (where faucet hardware distracts the eye), at inside corners, or centered on a cooktop cutout where the appliance covers part of the joint. Never place a seam directly over an unsupported span or at a point where the countertop changes direction without support underneath.
Seam Gap Tolerance
For quartz, the target is 1/32 inch or less. Wider gaps are harder to fill invisibly and tend to collect debris over time.
Confirm seam placement in writing before fabrication begins. One forum user on AnandTech shared a smart payment approach: “They came out and did a template. Then a week later came and installed it. Only after I was happy did I pay anymore. If they had screwed up the template that would have been their problem, not mine.” Paying in stages, tied to completed milestones, protects against templating and seam errors.
Seam Adhesive (Color-Matched Epoxy)
Seams between quartz pieces use a two-part polyester or epoxy resin, not silicone, not grout, not construction adhesive. The fabricator mixes a colorant into the resin to match the slab’s background tone. They apply it to both mating edges, clamp the pieces together with seam setter clamps, and let it cure.
Working Times
Most two-part epoxies have an open time of 5 to 15 minutes and reach handling strength in 20 to 40 minutes at room temperature. There is no room for hesitation once the adhesive is mixed.
Why Color Matching Is Hard on Quartz
Quartz is harder to color-match than natural stone because the material is uniform. There’s no veining pattern to help disguise the seam. Many quartz manufacturers offer pre-mixed color-matched adhesive kits for their specific colors. Use them. Generic tinting rarely nails the exact shade.
Done right, seams on quartz are nearly invisible from standing height. Done wrong (wrong color, visible gaps, adhesive overfill), the seam becomes the first thing anyone notices.
Silicone Adhesive (Mounting)
Neutral-cure silicone is the adhesive used to bond the quartz slab to the cabinet tops. It is not the same as seam adhesive, and the two should never be swapped.
The installer applies a bead of silicone along the tops of the cabinets and around the sink area, then carefully positions the countertop. Silicone allows a small amount of flex, which accommodates the minor expansion and contraction quartz undergoes with temperature changes.
After installation, wait 24 hours before placing anything on the countertop. The silicone needs a full cure to reach its bonding strength. Using the countertop too early risks shifting the slab before the adhesive sets.
Scribing
Scribing is the technique of tracing the actual wall contour onto the template (or directly onto the slab edge) so the countertop’s back edge fits tight against the wall.
Most walls are not straight. They bow, bump, and taper. A countertop cut to a straight line will show gaps against any wall that deviates even slightly. Proper scribing eliminates those gaps, which matters especially if you’re installing a countertop-mounted backsplash. One Trustpilot review documented a fabricator who mismeasured the countertop depth, leaving a large gap between the counter and wall that made a proper backsplash install impossible, costing the homeowner an extra $1,000 in tile backer board to compensate.
Sink Cutout
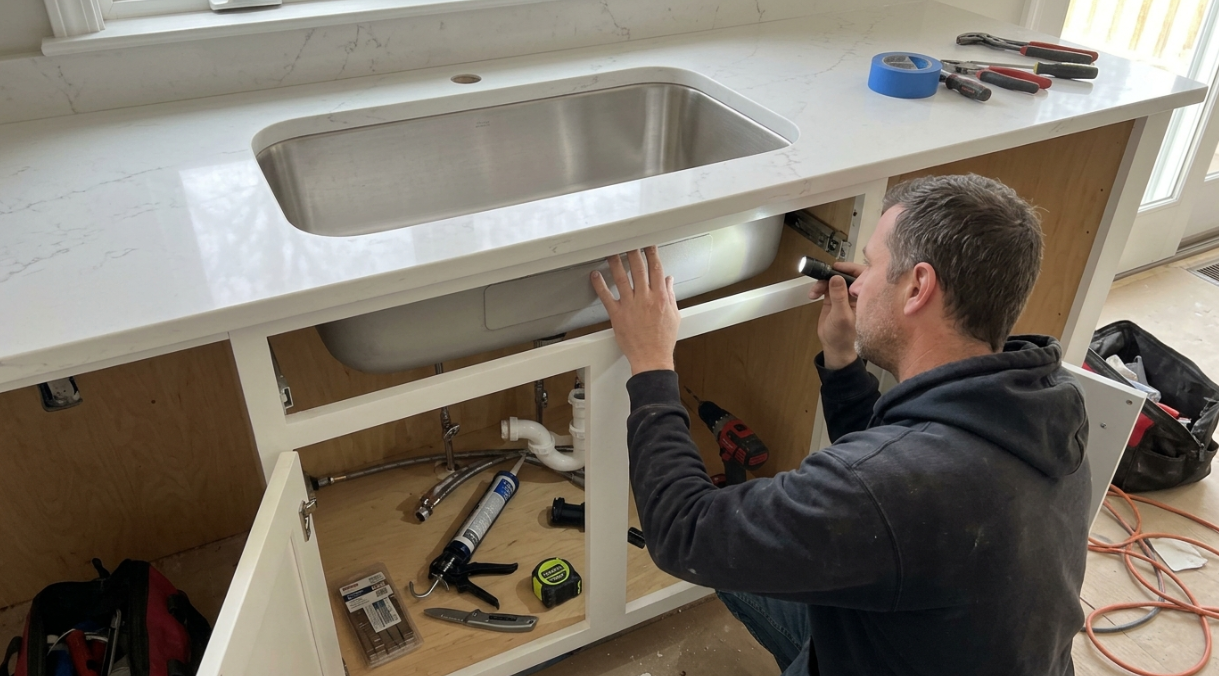
The sink cutout is the hole fabricated in the countertop for an undermount or drop-in sink. For prefab quartz, many pieces come with a pre-cut sink opening matched to common undermount sizes. If your sink doesn’t match the standard cutout, the fabricator modifies it during the templating-to-fabrication stage.
The cutout must be specified at templating using the exact sink model, not a generic dimension. Corner radius matters too: a minimum of 3/8 inch is standard for quartz to prevent stress cracking at sharp inside corners.
If you’re still choosing a sink, the kitchen sink sizing guide covers compatibility with standard prefab cutouts.
Edge Profile
The edge profile is the shape of the countertop’s exposed front edge. Prefab quartz almost always ships with a flat (eased) edge, meaning the top and bottom corners are slightly softened but the face is essentially square.
Custom slab fabrication offers ogee, bullnose, bevel, dupont, and other decorative profiles. With prefab, those options generally aren’t available unless you find a fabricator willing to re-profile a factory-finished edge, which adds cost and partially defeats the purpose of going prefab. For design coordination between countertop edges and cabinet styles, the guide on matching quartz with cabinets is worth reviewing.
Acclimation
Before a quartz slab gets cut, it should be stored in the installation environment for a minimum of 48 hours. This allows the material to reach ambient temperature.
Why it matters: quartz is engineered with polymer resins that respond to temperature changes. Cutting a cold slab (straight off a delivery truck in winter, for example) increases the risk of breakage from the heat and pressure of diamond blades. Acclimation is cheap insurance against a cracked slab.
CNC Router and Bridge Saw
These are the computer-controlled cutting machines that fabricate quartz slabs. A bridge saw makes straight cuts and miters. A CNC router handles cutouts, edge profiles, and curved shapes.
The relevance to templating: digital templates feed directly into CNC software as cutting paths. No one re-measures, re-draws, or re-interprets the template by hand. The file from the laser device becomes the instruction set for the machine. This direct connection is why digital templating produces tighter results.
The fabrication process between template and installation typically runs 2 to 3 weeks. It includes slab selection, digital file import, cutting, shaping, reinforcing, polishing, and quality inspection before the pieces are loaded for transport.
Lippage
Lippage is a height mismatch where one slab sits higher than an adjacent slab at a seam. You feel it when you run your finger across the joint and one side is raised.
Causes: unlevel cabinets (the most common), uneven silicone application, or skipping the back-grinding step where the fabricator flattens the underside of the slab near the seam. Prevention starts at site preparation. If cabinets are level, lippage rarely happens.
Weight and Handling
No discussion of how to template and install prefabricated quartz countertops is complete without addressing weight. Quartz is heavy.
A 3 cm slab weighs 18 to 20 pounds per square foot. A standard kitchen’s countertops total roughly 850 pounds. Even a single 8-foot section of prefab counter weighs over 250 pounds. This is why professional installation is standard. Moving and placing these pieces requires at least two people, proper lifting technique, and often A-frame transport carts and suction cup lifters.
For DIY-inclined homeowners, the weight alone should be the deciding factor on whether to hire a pro.
Installation Day: What Happens
The sequence for installing prefabricated quartz countertops:
Final cabinet check. The installer re-verifies level and secures any loose cabinets.
Dry fit. Slabs are placed without adhesive to verify alignment, overhangs, and seam positions.
Silicone application. A bead of neutral-cure silicone goes along cabinet tops and around the sink area.
Slab placement. The countertop is carefully lifted and positioned. This step usually requires two or three installers.
Seam assembly. Where pieces meet, color-matched epoxy is applied, edges are clamped with seam setters, and the joint cures.
Sink securing. Undermount sinks attach using threaded clips inserted at the fabrication shop.
Backsplash attachment. If included, backsplash pieces are bonded with silicone adhesive.
Caulking. Perimeter caulk seals the joint between countertop and wall.
24-hour cure. No use, no heavy objects, no sitting on the countertop for a full day.
How Much Does It Cost to Install Prefabricated Quartz Countertops?
The cost of installing prefabricated quartz countertops depends on the countertop product, the size and shape of the kitchen, the number of seams, cutout requirements, labor rates, and any additional cabinet or plumbing work. Prefab quartz may reduce fabrication costs compared with custom slab quartz, but the total project price depends on more than the countertop material alone.
Before comparing quotes, confirm whether each price includes templating, fabrication, delivery, installation, sink cutouts, seam work, and installation materials.
What Affects Prefab Quartz Countertop Installation Costs?
Cost factor | What can increase the cost? | What to confirm in the quote |
|---|---|---|
Countertop material | Premium colors, finishes, or product lines | Product name, thickness, and quantity |
Countertop dimensions | Larger areas or additional pieces | Total measured area and piece count |
Templating | Complex layouts or multiple separate sections | Whether templating is included |
Cutouts | Sink, cooktop, and accessory openings | Which cutouts are included in the price |
Seams | Multiple joints or difficult seam locations | Number, location, and finishing of seams |
Edge finishing | Modifications to factory-finished edges | Whether additional fabrication is required |
Delivery and handling | Difficult access, stairs, or special handling | Delivery charges and site-access requirements |
Installation labor | Complex layouts or challenging installation conditions | Labor scope and installation exclusions |
Cabinet preparation | Leveling, reinforcement, or cabinet repairs | Whether corrective work is included |
Plumbing and electrical | Disconnecting or reconnecting fixtures | Whether licensed trades are required separately |
Backsplash and caulking | Additional materials or installation work | Included materials and finishing scope |
How to Compare Installation Quotes
Request itemized quotes from at least two qualified suppliers or installers. Ask each provider to price the same countertop specification and installation scope.
Check whether the quote includes the selected prefab pieces, templating, fabrication modifications, cutouts, delivery, installation, seam adhesive, mounting materials, and final sealing.
A lower material price does not necessarily mean a lower installed cost. Additional seams, unusual cutouts, cabinet repairs, or modifications to finished edges can reduce the savings associated with prefab quartz.
For a more detailed comparison of material costs, sizes, and seams, read the guide to prefabricated quartz vs. slab quartz.
What to do with your existing price figures
Your current article estimates $50–$100 per square foot installed for prefab quartz and $50–$150 for custom quartz.
You can retain these ranges if you verify them against credible, appropriately dated pricing sources. Specify the relevant market, what the price includes, and whether the figures represent a national estimate or a local quote.
Do not add material, fabrication, and installation prices together if the quoted installed price already includes those items. That can lead to misleading cost estimates.
Common Mistakes When Templating and Installing Prefab Quartz
Skipping professional templating. Even with prefab’s standard sizes, every kitchen is different. The $300 templating cost prevents the $600+ cost of a miscut piece that can’t be returned.
Templating before cabinets are level. A quarter-inch deviation at the cabinet becomes a visible gap or rocking countertop. Always level first. The cabinet measurement guide covers the process.
Using placeholder fixture specs. Telling the templater “we’ll get a 33-inch undermount sink” without providing the exact model and its template sheet is how cutouts end up wrong. Have the physical product or the manufacturer’s spec sheet on hand.
Not confirming seam placement in writing. Verbal agreements about where seams fall get forgotten. Get it documented, signed, and photographed.
DIY seam joining without proper tools. Seam setter clamps, color-matched epoxy, and a steady hand within a 5-to-15-minute open time are not optional. Standard clamps and generic adhesive produce visible, ugly seams.
Ignoring the 24-hour cure. Setting a heavy KitchenAid mixer on fresh silicone shifts the slab. Wait the full day.
For a broader view of what goes wrong in remodels, the kitchen remodel mistakes guide covers the full range.
FAQ
Do prefab quartz countertops need templating?
Yes, always. Prefab arrives in standard sizes, but your kitchen isn’t standard. Walls bow, corners aren’t square, and cutout positions vary by sink and cooktop model. Templating verifies that the pre-sized pieces will actually fit your specific layout.
How long does countertop templating take?
Digital templating takes 30 to 60 minutes for a typical kitchen. Physical templating takes 90 to 180 minutes. Complex layouts with islands, multiple seams, or unusual angles take longer.
Can I install prefab quartz countertops myself?
Technically possible, but the weight alone (18 to 20 pounds per square foot at 3 cm thickness) makes it a two-person minimum job, and seam work requires specialized adhesive and clamps. Community members on DIY forums consistently flag this as high-risk for the savings involved.
How long from template to installation?
Custom slab fabrication typically takes 2 to 3 weeks. Prefab can be faster because the major cuts are already done. Simple layouts with no custom cutouts can sometimes go from template to install in under a week. Complex kitchens still take 1 to 2 weeks.
What overhang is standard for quartz countertops?
1.5 inches past the cabinet face is standard. Island eating bars often extend 12 to 15 inches but require bracket or corbel support for anything beyond 10 to 12 inches.
What’s the difference between digital and physical templating?
Digital uses a laser device to create a computer file accurate to ±1/16 inch that feeds directly into CNC cutting equipment. Physical uses cardboard or luan to create a pattern accurate to about ±1/8 inch that must be manually traced at the shop. Digital is faster, more accurate, and reduces callbacks by 60-80%.
How are seams on quartz countertops hidden?
Fabricators use two-part epoxy tinted to match the slab color. The seam gap target is 1/32 inch or less. Many manufacturers offer pre-mixed color-matched adhesive kits for their specific quartz colors, which produce better results than generic tinting.
What should I have ready before the templater arrives?
Cabinets must be installed, leveled, and secured. Flooring should be completed. Your sink, cooktop, and faucet (or their spec sheets) need to be on-site. Appliances should be in final positions, and plumbing rough-in should be complete. Clear everything off the cabinet tops.
Coordinating cabinets, countertops, and installation timelines is easier when your materials come from a single supplier. Krafter’s Land offers prefab quartz countertops with a 15-year limited warranty and works through authorized contractors who handle templating and installation. Explore quartz countertop options or visit a showroom to see materials in person before your project begins.