
TL;DR
A cabinet spec sheet is a structured document that lists every detail about a cabinet order, from SKU codes and dimensions to materials, finishes, hardware, and compliance certifications. Creating one before handing off to subcontractors prevents wrong orders, costly change orders, and project delays. This guide defines every term and field you need, explains why each one matters, and gives you a pre-order checklist to follow.
A cabinet spec sheet is the single most important document you hand to a subcontractor, supplier, or installer. It translates everything in your head (and on your napkin sketches) into a standardized, unambiguous record that anyone on the project can follow.
Without one, mistakes multiply. The wrong cabinet gets ordered above the fridge. Fillers are forgotten. An entire wall of shelving arrives backwards because measurements were texted instead of documented. Practitioners on contractor review sites report these errors constantly, and every one of them traces back to the same root cause: no formal spec sheet.
How Do You Create a Cabinet Spec Sheet for Subcontractors?
To create a cabinet spec sheet for subcontractors, document every cabinet’s identification code, type, dimensions, construction material, door style, finish, hardware, accessories, and installation requirements. Start with verified jobsite measurements and the approved cabinet layout, assign each cabinet a unique identification number, and list all specifications in a standardized table. Include project information, supplier details, appliance clearances, compliance requirements, and revision dates. Before ordering, have the cabinet supplier, general contractor, and relevant subcontractors review the document to confirm that the specifications match the approved plans and site conditions.
This guide walks through every term and field that belongs on a cabinet spec sheet, explains the documents you’ll encounter alongside it, and flags the mistakes that cost real money on real jobsites.
Placing your first trade cabinet order? See contractor cabinet pricing and lead times for what to expect from a trade-focused supplier.
Example of a Completed Cabinet Specification
Consider a kitchen renovation requiring a standard base cabinet, a sink base, and an upper wall cabinet.
The following example demonstrates how individual cabinet specifications can be documented for a subcontractor. These are illustrative specifications, not manufacturer-specific product codes.
Field | Example specification |
|---|---|
Cabinet ID | B01 |
Cabinet type | Standard base cabinet |
Manufacturer SKU | Manufacturer-confirmed SKU |
Dimensions | 36″W × 34.5″H × 24″D |
Construction | Framed |
Box material | Plywood |
Side panel thickness | 1/2 inch |
Door style | Shaker |
Door overlay | Full overlay |
Finish | White, manufacturer finish code to be confirmed |
Hinges | Concealed soft-close |
Door swing | Right-hand |
Drawer slides | Full-extension undermount |
Finished sides | Right side |
Toe kick | 4.5-inch height, manufacturer-approved configuration |
Hardware | Brushed nickel pull |
Accessories | One adjustable interior shelf |
Installation notes | Verify finished floor height and adjacent appliance clearance |
Document Types You’ll Encounter
Before building a spec sheet, it helps to understand what it is and what it isn’t. Contractors and designers work with several overlapping documents, and confusing them leads to communication breakdowns.
Spec Sheet (Specification Sheet)
The umbrella document. A cabinet spec sheet outlines every detail about the cabinetry required for a project: materials, dimensions, finishes, hardware, and installation requirements. It is the document a general contractor uses to communicate cabinet requirements to a supplier and subcontractor alike. Think of it as the contract between what you want and what gets built.
Shop Drawing
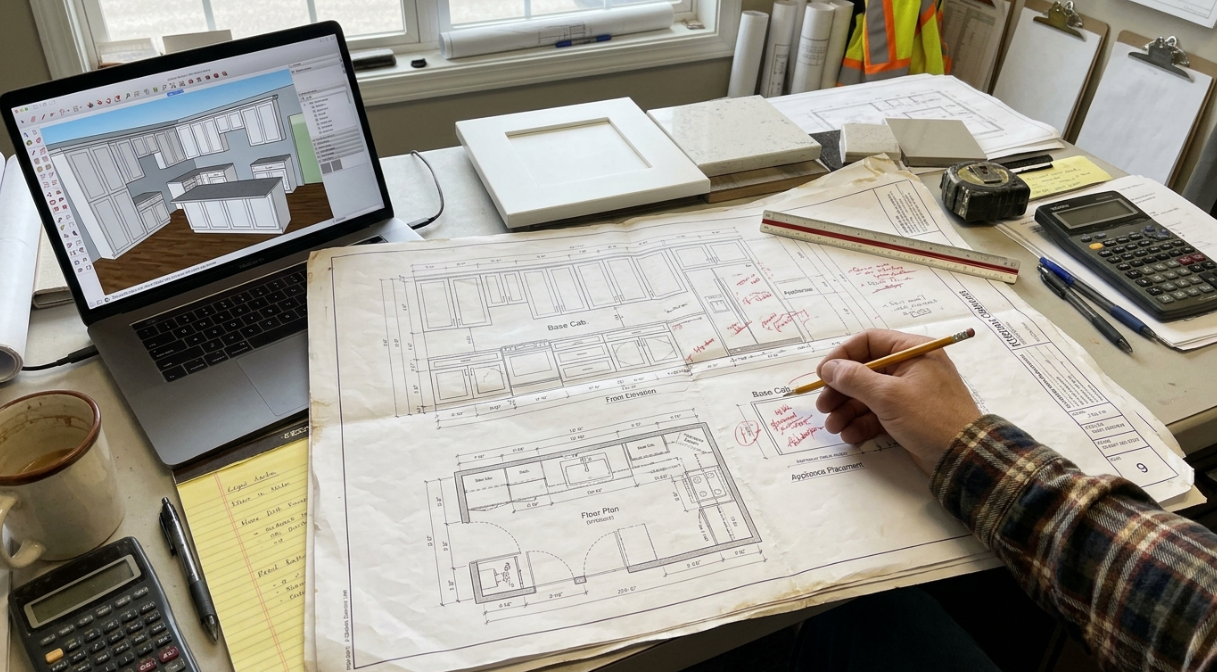
Shop drawings are project-specific documents prepared by or for the fabricator. They show exactly how each cabinet will be built, finished, and installed on your particular jobsite. The key distinction: a spec sheet says “what we need,” a shop drawing says “how we’re building it.” Product data (manufacturer catalogs, cut sheets) says “what we’re using.” All three work together, but they are not interchangeable.
Bill of Materials (BOM)
The BOM is a line-by-line list of every component needed to fulfill the order. Each entry typically includes an item number, part number, manufacturer, description, and quantity. While the spec sheet describes the cabinets conceptually, the BOM describes them as purchasable parts. If you want to learn how to read cabinet specification sheets and part codes, that skill pairs directly with understanding BOMs.
Cabinet Schedule
A cabinet schedule is a tabular summary that appears alongside a kitchen or bath floor plan. It lists each cabinet by tag number, configuration, finish, and installation detail. Architects and designers produce these. If you’re a GC, the schedule is often your starting point when learning how to create a spec sheet for cabinet orders for subcontractors.
Cabinet Order Form
The order form is the purchasing document. It collects the final selections (styles, dimensions, finishes, accessories, assembly options) into an official purchase request. A good spec sheet makes filling out the order form nearly automatic.
2020 Design Files
Over 80% of North American cabinet dealers use 2020 Design (now part of Cyncly) as their primary layout tool. These files contain the cabinet plan, 3D renderings, and manufacturer-specific catalogs. When a supplier provides a 2020 Design package, the spec sheet data is embedded in it, but you still need a standalone document for field reference.
Project Header Fields
Every spec sheet starts with a header block. These fields seem administrative, but they prevent the kind of mix-ups that happen when a supplier is processing dozens of orders simultaneously.
Project name and address. The jobsite address, not the client’s mailing address. Subcontractors need to know where the cabinets are going.
Client name. The homeowner or property owner, separate from the GC.
PO number or quote number. This ties the spec sheet to a specific bid or purchase order. Without it, revisions get applied to the wrong version.
Order date and expected delivery date. Cabinet lead times vary dramatically depending on whether you’re ordering stock, semi-custom, or custom. Understanding cabinet lead times before specifying a delivery date saves everyone frustration.
Supplier contact and sales rep. Name, phone, email. If a question comes up at 6 AM on install day, the installer needs to know who to call.
Designer name. If a kitchen designer produced the layout, their name goes here. They’re the person who can answer “why” questions about the plan.
Cabinet Specification Fields, Defined
This is the core of the document. Each field below should appear on every cabinet spec sheet. Skipping even one creates ambiguity, and ambiguity creates change orders.
Cabinet Code / SKU
The manufacturer’s specific identifier for each unit. Most cabinet codes follow a naming convention: B36 means a 36-inch base cabinet, W3015 means a wall cabinet 30 inches wide by 15 inches tall. Getting the nomenclature right matters enormously. One digit off and you receive the wrong cabinet.
Cabinet Type
Base, wall, tall/pantry, vanity, or specialty (lazy susan corner, sink base, appliance garage). Each type has different default dimensions, interior configurations, and installation requirements.
Dimensions (W x H x D)
Width, height, and depth for every unit. Standard base cabinet depth is 24 inches per NKBA guidelines, and standard counter height is 36 inches (34 inches for ADA compliance). List dimensions in the order your supplier expects. Some use W x H x D, others use W x D x H. Confirm the convention before filling in numbers.
Construction Type: Framed vs. Frameless
This is not cosmetic. Framed vs. frameless construction affects panel thickness, hinge mounting, drawer slide compatibility, and filler calculations. Framed cabinets have a face frame that provides structural rigidity. Frameless (European-style) cabinets rely on thicker side panels, typically 3/4-inch instead of the 1/2-inch panels common on framed boxes. Specify which one. Do not assume your subcontractor knows.
Door Style
Shaker, slab, raised panel, slim shaker, beaded inset, the list goes on. The door style is one of the most visible decisions in a kitchen, and it must be written on the spec sheet, not communicated verbally. Include the manufacturer’s exact style name, not a generic description.
Door Overlay
Three options: partial overlay (typically 1/2 inch of frame showing), full overlay (1-1/4 inches of coverage, minimal frame visible), or inset (door sits flush within the frame). Overlay type affects hinge selection, reveal dimensions, and the overall aesthetic. It also affects cost.
Finish and Color
Specify the exact finish name, code, and sheen level. “White” is not a specification. “Arctic White, SW-01, matte” is. If the project requires grain matching or a specific stain direction, note it here.
Box Material and Panel Thickness
Get this in writing with a number. Practitioners on woodworking forums are blunt about this: “all-plywood” with no thickness attached is not a specification. Half-inch side panels are normal on a framed box, three-quarter-inch on a frameless one. For a deeper look at how material choice affects durability and cost, see this plywood vs. particle board guide.
Hinge Type and Direction
Common options include 110-degree soft-close hinges, which balance accessibility with space efficiency. But the critical detail is direction: does the door swing left or right? Practitioners report that cabinets ordered “backwards” or wrong-handed are one of the most common and most preventable mistakes. One HomeAdvisor review described an entire section of shelving that arrived backwards because hinge direction wasn’t specified.
Drawer Slides
Specify the slide type (side-mount, under-mount, center-mount), extension (full-extension vs. 3/4 extension), and load rating. A high load rating means drawers handle more weight without sagging. One cabinetmaker put it plainly in a forum post: “Specify drawer slide type for drawers and roll-outs regardless of whether we are supplying them or not, so we can size the drawer appropriately and bore the cabinet side for the slide. All slides were not created equal.”
Finished Sides
Select which sides need a finished panel. This is critical for exposed end cabinets, the ones at the end of a run or next to a doorway. It’s a field that is frequently missed on spec sheets, and it’s immediately visible when the installer realizes the exposed side is raw particleboard.
Toe Kick Height and Depth
Standard toe kick dimensions are 4.5 inches high by 3 inches deep, but frameless lines often use adjustable legs with separate toe kick panels. Failing to verify toe kick height and depth is a frequent error that creates problems during installation, especially when flooring transitions are involved.
Grain Direction
For wood-grain finishes or natural wood doors, specify whether grain runs vertically or horizontally. This applies to door panels, end panels, and drawer fronts. Miss it and you get a kitchen where half the grain runs one way and half runs the other.
Edge Banding
One experienced cabinetmaker offered this advice: ask whether every cut edge is banded, including the sink base bottom and any holes drilled for under-cabinet lighting. This is the spec nobody advertises, but it’s the one that decides whether a water leak is a quick repair or a full cabinet replacement.
Finishing Pieces and Accessories
These items are easy to overlook because they don’t always appear in the main cabinet layout rendering. But a spec sheet without them is incomplete.
Fillers
Fillers close gaps between cabinets and walls or between adjacent cabinets that don’t align perfectly. You need to specify filler type (wall filler, base filler, tall filler), width, material, and finish. Filler calculations depend on accurate kitchen measurements, and getting them wrong means a visible gap or a cabinet that won’t fit.
End Panels and Skin Panels
An end panel covers the exposed side of a cabinet run with a material that matches the door finish. A skin panel covers a side that’s partially visible (next to a refrigerator, for instance). Both need to be listed separately from the cabinets themselves.
Toe Kick Material
If you’re using a frameless line with separate toe kick strips, specify the material, finish, and length. This is a separate line item from the cabinets.
Crown Molding and Light Rail
Crown molding finishes the top of wall cabinets. Light rail attaches to the bottom of wall cabinets and hides under-cabinet lighting. Both need a style, finish, and linear footage count.
Hardware
Knobs and pulls require a style, finish, size, and quantity per cabinet and drawer. Do not assume the subcontractor will match what’s in the rendering. Specify it.
Interior Accessories
Pull-out shelving, waste bin inserts, lazy susans, spice racks, cutlery dividers. A critical note from multiple contractor forums: do not assume an organizer shown in a catalog photo comes with the cabinet. If you want it, specify it. If it’s not on the spec sheet, it’s not in the box.
For a deeper understanding of what goes into the box itself, this cabinet box construction guide covers materials, joinery methods, and quality indicators.
Compliance and Certification Terms
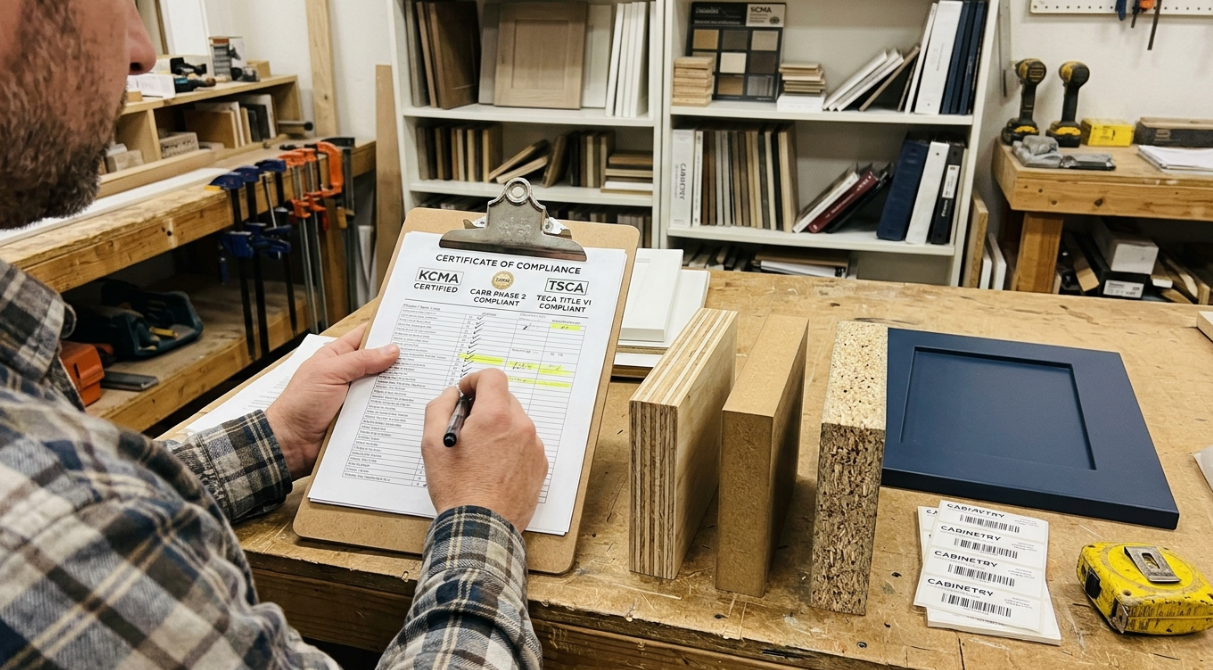
These terms appear on professional spec sheets and in supplier documentation. Understanding them matters for permitting, inspections, and liability.
KCMA A161.1 Certification
The KCMA (Kitchen Cabinet Manufacturers Association) A161.1 standard is the only performance standard specifically for kitchen and bath cabinets. To earn the certification seal, cabinets must pass a battery of 14 tests that simulate a lifetime of use, including a 600-pound wall load test. Between 40% and 50% of manufacturers fail on their first attempt.
Here’s the catch: certification is voluntary and granted line by line. “We are a certified manufacturer” is not the same claim as “this specific cabinet line is certified.” Ask about the exact line you’re ordering.
CARB Phase 2 / EPA TSCA Title VI
Any cabinet containing composite wood panels sold or installed in the United States must meet formaldehyde emission limits. CARB Phase 2 originated in California, and TSCA Title VI adopted those same limits at the federal level on June 1, 2018.
The specific limits by panel type:
Panel Type | Emission Limit (ppm) |
|---|---|
Hardwood plywood | 0.05 |
Particleboard | 0.09 |
MDF | 0.11 |
Thin MDF | 0.13 |
This matters for permitting. Building departments can request compliance documentation, and your supplier should be able to provide it. A practical spec sheet line to include: “Supplier warrants that all composite wood products delivered under this order meet TSCA Title VI / CARB Phase 2 formaldehyde emission standards.”
Warranty Terms
Document the warranty period and what it covers. Common exclusions include water damage from plumbing leaks, improper installation, and normal wear on moving parts. If your supplier offers a 5-year limited warranty on cabinets, note it on the spec sheet so the subcontractor knows the stakes of a bad install.
Measurement and Layout Terms
A spec sheet is only as good as the measurements behind it. Here are the terms that govern dimensional accuracy.
Field measurements vs. plan dimensions. Plan dimensions come from architectural drawings. Field measurements come from the actual jobsite. They rarely match perfectly. Always use field measurements as the final authority before placing an order.
Appliance clearances. Triple-check that cabinet dimensions accommodate all appliances with proper clearances. One of the most common complaints in contractor reviews involves installing the wrong size cabinet above a refrigerator, only to discover the doors won’t open. Get the appliance spec sheets and cross-reference them with your cabinet layout.
Filler calculations. The difference between wall-to-wall dimension and total cabinet width equals filler width. Measure at the top, middle, and bottom of the wall because walls are never perfectly plumb.
Ceiling height. This determines wall cabinet height and crown molding clearance. Measure in multiple spots.
High spot. The highest point on the floor within the cabinet run. This is the reference point for leveling. If you don’t identify it, the installer will, and it might change your filler calculations. For a step-by-step walkthrough, refer to this guide on how to measure kitchen cabinets.
Step-by-Step Process for Creating a Cabinet Spec Sheet
Creating a cabinet specification sheet involves more than recording cabinet dimensions. Contractors must verify site conditions, coordinate product selections, confirm manufacturer specifications, and obtain approval before releasing the order.
Follow these steps to prepare a complete cabinet spec sheet.
Step 1: Collect Project Drawings and Site Measurements
Start with the latest architectural drawings, kitchen or bathroom layout, cabinet elevations, and appliance specifications.
Then verify the actual jobsite conditions.
Record:
Wall-to-wall dimensions.
Ceiling height at multiple locations.
Floor level and high points.
Window and door locations.
Plumbing and electrical locations.
Appliance dimensions and required clearances.
Wall obstructions and unusual conditions.
Use verified field measurements for final ordering rather than assuming architectural plan dimensions reflect the completed jobsite.
Step 2: Create a Cabinet Identification System
Assign a unique identification number to each cabinet.
Use a consistent naming convention, such as:
Prefix | Cabinet category | Example |
|---|---|---|
B | Base cabinet | B01 |
W | Wall cabinet | W01 |
T | Tall cabinet | T01 |
V | Vanity cabinet | V01 |
S | Specialty cabinet | S01 |
Make sure the cabinet IDs match the floor plan, elevations, and specification sheet.
This allows installers to identify the correct cabinet without interpreting the entire layout.
Step 3: Confirm Manufacturer SKUs and Available Options
Select the cabinet manufacturer and product line before finalizing the specifications.
Verify:
Exact SKU or model number.
Available cabinet widths and heights.
Construction type.
Box material and thickness.
Door styles and finishes.
Hardware compatibility.
Available accessories.
Manufacturer-specific installation requirements.
Do not assume that two manufacturers use the same SKU naming convention or offer identical cabinet configurations.
Step 4: Document Every Cabinet and Accessory
Enter each cabinet as a separate line item.
Include the dimensions, quantity, finish, door configuration, hardware, and any special requirements.
List fillers, end panels, toe kicks, molding, and accessories separately when they are separate orderable items.
This prevents small but essential components from being excluded from the purchase order.
Step 5: Cross-Check the Cabinet Layout Against Appliances and Building Conditions
Compare the cabinet schedule with appliance cut sheets, plumbing plans, electrical drawings, and relevant installation requirements.
Pay particular attention to:
Refrigerator height and door clearance.
Dishwasher opening width and height.
Range and cooktop clearances.
Sink base dimensions and plumbing access.
Hood and microwave cabinet requirements.
Electrical outlets and under-cabinet lighting.
Wall and ceiling obstructions.
Resolve conflicts before approving the final cabinet order.
Step 6: Request and Review Supplier Shop Drawings
Send the specification sheet and supporting drawings to the cabinet supplier.
Review the returned shop drawings for:
Cabinet dimensions and placement.
Door and drawer configurations.
Finished end locations.
Filler and panel dimensions.
Appliance openings.
Installation details.
Special modifications.
The supplier’s shop drawings should be reviewed against the approved project requirements. A drawing generated from the order does not automatically mean that every dimension or design decision is correct.
Step 7: Approve the Final Specifications and Release the Order
Once all discrepancies have been resolved, document the final approval.
Record the revision number, approval date, and person authorizing the purchase.
Distribute the approved specification package to the relevant parties, including the general contractor, supplier, installer, and other trades that need the information.
Keep previous revisions for reference, but clearly identify the current approved version to prevent outdated documents from being used.
Who Is Responsible for Cabinet Specifications?
Cabinet specification responsibilities are typically shared between the general contractor, kitchen designer, cabinet supplier, and installation subcontractor. The exact division of responsibility depends on the project contract and supplier agreement.
The following table provides a practical responsibility guide.
Task | Primary responsibility | Supporting party |
|---|---|---|
Initial kitchen layout | Designer | General contractor |
Jobsite measurements | Assigned site measurer | Installer / GC |
Cabinet selection | Designer / Client | Supplier |
SKU verification | Cabinet supplier | Designer |
Material and finish confirmation | Supplier | Designer / Client |
Appliance coordination | Designer / GC | Appliance supplier |
Shop drawing preparation | Cabinet supplier | Designer |
Shop drawing review | GC / Designer | Installer |
Final order authorization | Authorized purchaser | GC / Client |
Delivery inspection | GC / Installer | Supplier |
Installation verification | Installer | GC |
Why Responsibility Assignments Matter
A specification sheet can contain accurate information and still result in an incorrect order if nobody is responsible for reviewing it.
For example, the designer may select the cabinet configuration, but the supplier must verify that the selected SKU exists in the specified product line. Similarly, the installer may identify a site condition that requires a dimensional adjustment.
Establish responsibility for each review stage before the order is released. This reduces duplicated work, conflicting instructions, and disagreements about who approved a particular specification.
Common Spec Sheet Mistakes That Cost Money
These are not hypothetical problems. They come from contractor reviews, installer forums, and supplier complaint data.
Texting measurements instead of documenting them. Multiple practitioners on HomeAdvisor reported receiving wrong cabinets because measurements were sent via text message with no context. The supplier assumed which cabinet the measurements referred to. A formal spec sheet eliminates that guessing game.
Omitting fillers, end panels, and toe kicks. Accessories like fillers, end panels, and crown molding are easy to overlook because they’re not always visible in the main cabinet layout. One forum user described showing up to a jobsite with every cabinet accounted for but no fillers, no end panels, and no toe kick material. The project stalled for a week.
Not specifying hinge direction. An entire section of cabinets ordered backwards because hinge direction was left blank. The replacement parts added weeks to the timeline.
Ignoring appliance dimensions. The cabinet above the refrigerator is the most common casualty. If the fridge spec sheet says 69 inches tall and you install a standard 12-inch wall cabinet at 84 inches off the floor, you have 3 inches of clearance. That might not be enough for the doors to open.
Assuming construction type. If you don’t specify framed or frameless, the supplier will pick one. And it might not be the one your subcontractor planned for. To understand the structural and cost differences, see this framed vs. frameless comparison.
For more on errors that derail kitchen projects, check out these kitchen remodel mistakes to avoid.
How a Supplier’s Design Service Speeds Up the Process
Learning how to create a spec sheet for cabinet orders for subcontractors from scratch is valuable. But you don’t always have to start from a blank page.
Trade-focused suppliers often provide free design and quoting services that generate spec-ready documentation. The workflow typically looks like this: you send measurements and preferences, the supplier’s design team builds the layout in 2020 Design, and you receive back a package that includes a floor plan, cabinet elevations, a BOM, and 3D renderings. The spec sheet data is built into these files.
This approach reduces errors because the supplier’s catalog is embedded in the software. The SKUs, dimensions, and compatibility rules are enforced automatically. A B36 in the 2020 file is always a 36-inch base cabinet in that specific manufacturer’s line, with the correct depth, construction type, and available finishes already populated.
For contractors who want to see materials in person before finalizing a spec, visiting a showroom allows you to verify door styles, finishes, and hardware against the actual product.
Ready to turn your measurements into a spec sheet? Krafter’s Land offers free design and quoting with 2020 Design packages for trade professionals.
Cabinet Spec Sheet Quick-Reference Checklist
Use this table as a pre-order review. Every field should have a clear answer before you submit an order.
Spec Sheet Field | Included? |
|---|---|
Project name and address | ☐ |
Client name | ☐ |
PO / quote number | ☐ |
Order date and delivery date | ☐ |
Supplier and rep contact info | ☐ |
Cabinet code / SKU for every unit | ☐ |
Cabinet type (base, wall, tall, vanity, specialty) | ☐ |
Dimensions (W x H x D) | ☐ |
Construction type (framed or frameless) | ☐ |
Door style and manufacturer style name | ☐ |
Door overlay (partial, full, inset) | ☐ |
Finish / color with code and sheen | ☐ |
Box material and panel thickness | ☐ |
Hinge type and swing direction | ☐ |
Drawer slide type, extension, and load rating | ☐ |
Finished sides noted per unit | ☐ |
Toe kick height, depth, and material | ☐ |
Grain direction (if applicable) | ☐ |
Edge banding on all exposed edges | ☐ |
Fillers (type, width, finish) | ☐ |
End panels / skin panels | ☐ |
Crown molding (style, finish, linear feet) | ☐ |
Light rail (style, finish, linear feet) | ☐ |
Hardware (style, finish, size, quantity) | ☐ |
Interior accessories (pull-outs, bins, racks) | ☐ |
KCMA certification confirmed for this line | ☐ |
CARB Phase 2 / TSCA Title VI compliance | ☐ |
Warranty terms documented | ☐ |
Appliance clearances verified | ☐ |
Field measurements (not plan dimensions) used | ☐ |
Treat this checklist the way a pilot treats a pre-flight checklist. The cabinet spec sheet is where you catch mismatches before they become change orders, and where a cabinet’s real construction is spelled out in writing.
Looking for a trade-only supplier that provides spec-level documentation with every order? Explore cabinet options for contractors with pricing, lead time, and compliance information already built in.
Frequently Asked Questions
What is the difference between a cabinet spec sheet and a shop drawing?
A spec sheet describes what you need: the cabinet types, dimensions, materials, finishes, and hardware. A shop drawing describes how it will be built, with fabrication details, installation notes, and project-specific dimensions. The spec sheet comes first. The shop drawing is produced from it.
Who is responsible for creating the cabinet spec sheet?
Typically the general contractor, project manager, or kitchen designer creates the spec sheet. On trade orders, the supplier’s design team often generates the spec documentation from your measurements and selections using 2020 Design software.
How do I know if my cabinets need to be CARB Phase 2 compliant?
If the cabinets contain any composite wood panels (plywood, particleboard, MDF) and are sold or installed in the United States, they must meet CARB Phase 2 / TSCA Title VI formaldehyde emission limits. This has been federal law since June 1, 2018. Your supplier should provide compliance documentation upon request.
What’s the most common mistake contractors make on cabinet spec sheets?
Omitting finishing pieces. Fillers, end panels, toe kicks, and crown molding are consistently the most forgotten items because they don’t always appear prominently in cabinet layout renderings. The second most common mistake is not specifying hinge direction, which leads to cabinets that open the wrong way.
Should I use field measurements or architectural plan dimensions on my spec sheet?
Always use field measurements taken at the actual jobsite. Architectural plans are a starting point, but walls are rarely perfectly plumb, floors are rarely perfectly level, and as-built conditions almost always differ from drawings. Measure at multiple heights and depths for accuracy.
What does KCMA certification actually test?
The KCMA A161.1 standard puts cabinets through 14 performance tests that simulate years of use, including structural loading, door and drawer cycle tests, and finish resistance. It is a pass/fail protocol. Certification is voluntary and applies to specific product lines, not to the manufacturer as a whole.
Can a supplier generate a spec sheet for me?
Yes. Many trade-focused suppliers offer free design services that produce complete spec documentation, including floor plans, elevations, BOMs, and 3D renderings. These packages are built from manufacturer catalogs in 2020 Design, so the SKUs, dimensions, and compatibility rules are enforced automatically.
What should I do if my spec sheet doesn’t match what arrives on site?
Document the discrepancy immediately with photos and reference the spec sheet line items. Contact the supplier before the installer modifies anything. Most suppliers have defined processes for claims and replacements, but acting quickly preserves your options and keeps the project timeline intact.