TL;DR
A bathroom remodel checklist is more than a shopping list. It’s a phased sequence of layout decisions, contractor coordination, permit requirements, material specs, and budget benchmarks that prevent costly surprises. This guide covers every term and task homeowners and contractors encounter from planning through final walkthrough, with 2026 cost data and real world advice woven throughout. Mid range bathroom remodels now recoup 80% of their cost at resale, the strongest interior ROI since 2007.
Quick Answer
A bathroom remodel checklist is a step by step plan that guides homeowners from budgeting, layout planning, and contractor selection through demolition, plumbing, waterproofing, installation, inspections, and final walkthrough. Following the correct order helps prevent expensive mistakes, keeps contractors coordinated, reduces project delays, and ensures the finished bathroom meets local building codes. Most complete bathroom remodels take between six weeks and three months from planning to completion, while mid range projects currently return around 80% of their cost at resale.
Bathrooms pack a remarkable amount of complexity into a small footprint. Breakable materials like tile and mirrors sit alongside plumbing and electrical systems, and every trade involved brings its own vocabulary. When your contractor mentions “rough in” or your designer references a “curbless shower,” knowing what those terms mean is the difference between a smooth project and an expensive misunderstanding.
National bathroom remodel costs range from $6,456 to $24,715 for spaces measuring 40 to 150 square feet. About 1 in 3 homeowners in a 2026 survey reported their project cost more than expected, often because of plumbing upgrades, water damage, or structural repairs. The common thread? Miscommunication and missed steps.
This bathroom remodel checklist is organized by project phase, not alphabetically. Each term gets a plain language definition, practical context, and (where relevant) a cost benchmark. Think of it as the glossary your contractor wishes every client had read before the first meeting.
Browse completed bath projects for visual reference as you read through each phase.
Bathroom Remodel Checklist at a Glance
| Phase | Main Tasks |
|---|---|
| Planning & Layout | Set budget, define scope, plan layout, create design |
| Contractor Selection | Vet contractors, compare bids, verify licenses |
| Permits | Obtain permits if required |
| Material Selection | Order vanity, tile, fixtures, lighting, specify allowances |
| Demolition | Remove old fixtures and finishes |
| Rough In | Plumbing, electrical, HVAC |
| Waterproofing | Membrane, shower prep |
| Tile & Wall Treatments | Floors, walls, moulding |
| Fixture Installation | Vanity, toilet, bathtub, shower, mirrors |
| Finish Work | Paint, trim, hardware, accessories, window treatments |
| Final Inspection | Punch list and walkthrough |
Planning and Design Terms
Before anyone picks up a sledgehammer, the planning phase sets the trajectory for your entire project. Getting the vocabulary right here prevents scope creep and budget overruns later.
Bathroom Remodel vs. Renovation vs. Refresh
These three words get used interchangeably, but they describe different scopes of work. A refresh is cosmetic: new paint, updated accessories, maybe swapping out a light fixture. A partial remodel means replacing at least one of the three main bathroom fixtures (toilet, shower/tub, vanity). A full renovation involves gutting the space down to studs and rebuilding, often changing the layout entirely.
Why this matters: the scope you choose determines your permit requirements, timeline, and budget. A mini remodel that retains existing fixtures might cost $3,000 to $5,000. A full renovation easily reaches $15,000 to $25,000.
Bathroom Layout Planning
Layout planning is where you decide where every fixture, cabinet, and electrical outlet will sit. This step happens before permits, before material orders, and before any contractor swings a hammer. The goal is to map your bathroom’s footprint so that plumbing runs are efficient, clearances meet code, and daily use feels natural.
Key layout considerations include:
- Fixture placement zones: Toilets need a minimum 15 inches of clearance from center to any side wall or obstruction (21 inches is preferred). Showers need at least 30 inches of clear entry width.
- Door swing direction: A door that swings inward and hits the toilet is a common layout mistake. Pocket doors solve tight spaces but cost more to install.
- Wet zone vs. dry zone separation: Keeping the toilet and vanity away from direct shower spray reduces moisture damage and simplifies waterproofing.
- Traffic flow: In a shared bathroom, two people should be able to use the vanity area and toilet area simultaneously without collision.
Practitioners on Reddit’s r/HomeImprovement frequently warn that changing fixture locations after rough in is the single most expensive mid project change. One user put it plainly: “Move the toilet two feet and you’ve added $2,000 to $4,000 in plumbing alone.” Finalizing layout on paper (or in a 3D rendering) before demolition begins saves real money.
For vanity placement specifically, knowing standard vanity dimensions prevents ordering a unit that doesn’t fit the space.
Scope of Work (SOW)
The written document detailing every task included in the project. A good SOW specifies what’s included and, just as importantly, what’s excluded. If your contractor’s SOW doesn’t mention paint touch ups after vanity installation, don’t assume they’re included.
Design Build
A project delivery model where one firm handles both design and construction. This approach is faster because it manages design and build under one roof, eliminating the back and forth between separate architects and contractors. For bathroom remodels specifically, design build firms can coordinate plumbing changes with layout decisions in real time.
3D Rendering
Software generated visual layouts of your bathroom before construction starts. Programs like 2020 Design allow designers to create realistic previews so you can see how cabinet finishes, countertop colors, and tile patterns work together. This step catches problems that are cheap to fix on screen and expensive to fix on site.
Mood Board
A visual inspiration collage gathering colors, textures, fixtures, and finishes in one place. Practitioners on Reddit consistently recommend mood boards as a critical first step before meeting with contractors, because they translate vague preferences (“I want something modern”) into concrete visual direction.
Universal Design
Features that promote accessibility for users of all ages and abilities: wider doorways, grab bars, lower counter heights, and barrier free showers. Universal design bathroom remodels gained 12 ROI points in a single year, now recouping 61% at resale according to the 2025 Zonda Cost vs. Value Report. That’s the largest single year increase in the report’s interior projects category.
ADA Compliance
The process of ensuring a bathroom is accessible for people with disabilities. This often involves installing grab bars, barrier free showers, and ensuring proper spacing for wheelchairs. ADA compliance isn’t just about current needs. It future proofs your home as household members age.
Budget Contingency
The 10% to 20% cushion above your base budget reserved for unexpected issues. Every experienced contractor will tell you this isn’t optional. Water damage behind walls, outdated plumbing that doesn’t meet code, corroded subfloors: these discoveries are common once demolition begins. The median spend on a primary bathroom climbed to $15,000 in 2025, up from $13,000 the prior year, and contingency budgets are a big reason why.
ROI Context for Planning Decisions
A midrange bathroom remodel now recoups 80% of its cost at resale, the strongest interior ROI in the Zonda 2025 Cost vs. Value Report. Compare that to upscale remodels, where ROI drops to roughly 36% to 50% because spending outpaces what most buyers will pay back. The takeaway: mid range finishes and smart material choices consistently outperform luxury splurges at resale. If you’re weighing quartz vs. granite countertops for your vanity top, this ROI difference is worth keeping in mind.
Contractor Selection and Vetting
Choosing the right contractor is arguably the most consequential decision in a bathroom remodel, more impactful than any tile or fixture selection. A bad contractor can turn a $15,000 project into a $25,000 nightmare.
How to Vet a Bathroom Remodel Contractor
Start with these non negotiable steps:
- Verify active state licenses. In Washington State, contractors must hold a valid license through the Department of Labor & Industries. Search the L&I contractor database by name or license number. An expired or missing license is an immediate disqualifier.
- Confirm insurance coverage. Ask for a current certificate of insurance showing both general liability (minimum $1 million) and workers’ compensation. Call the insurance company to verify the policy is active. If a worker gets injured on your property and the contractor has no workers’ comp, you could be liable.
- Check bond status. Washington requires contractor bonds. This protects you if the contractor abandons the project or fails to pay subcontractors.
- Request at least three recent references from projects similar in scope to yours, and actually call them. Ask about communication, timeline accuracy, and how the contractor handled unexpected problems.
One project manager shared in a YouTube walkthrough that the single biggest red flag is a contractor who pressures you to sign before you’ve had time to compare bids. Good contractors expect comparison shopping.
Bid Comparison Checklist
When comparing contractor bids, evaluate more than just the bottom line number. A lower bid often means a thinner scope. Use this checklist to compare apples to apples:
- Scope match: Does each bid cover the same tasks? One contractor might include demolition and haul away while another excludes it.
- Material specifications: Are specific products listed (brand, model, grade), or does the bid say “standard” or “builder grade” without details?
- Material allowances: An allowance is a budget line set aside for items you haven’t selected yet (tile, fixtures, hardware). If one bid includes a $500 tile allowance and another includes $1,500, the total prices aren’t comparable until you normalize the allowance.
- Labor breakdown: Bids that lump everything into one number make it hard to identify where costs differ. A line item breakdown lets you see if one contractor is charging significantly more for plumbing rough in or tile installation.
- Timeline with milestones: Look for specific dates or durations per phase, not just “approximately six weeks.”
- Payment schedule: More on this below, but the structure of payments matters as much as the total price.
- Exclusions: What’s explicitly not included? Common exclusions include mold remediation, asbestos abatement, structural repairs, and permit fees.
Practitioners on Reddit’s r/HomeImprovement frequently recommend getting at least three bids and discarding any bid that’s dramatically lower than the others. As one commenter put it: “The cheapest bid is usually the most expensive project.”
Material Specification and Allowance
A material specification is a detailed description of exactly what product will be used (manufacturer, model number, color, size). An allowance is a placeholder dollar amount in the contract for materials not yet selected. The danger of vague allowances is that they often underestimate actual costs. If your contractor includes a $200 allowance for a bathroom faucet but you choose one that costs $450, you owe the $250 difference as a change order.
Always ask: “What happens if my selections exceed the allowance?” The answer should be documented in writing.
Timeline and Payment Schedule
A healthy payment schedule protects both parties. The standard structure looks like this:
- 10% to 15% deposit at contract signing (never more than a third up front)
- 25% to 30% after demolition and rough in completion
- 25% to 30% after tile and major installations
- Remaining balance after final walkthrough and punch list completion
Holding back 10% to 15% of the total until after the final walkthrough gives you real negotiating power to ensure punch list items get resolved. Washington State law limits contractor deposits, and any contractor asking for 50% or more up front is a serious red flag.
Labor Warranty
A labor warranty covers the contractor’s workmanship for a specified period after project completion. This is separate from manufacturer warranties on products. Typical labor warranties for bathroom remodels range from one to two years. Ask what’s covered, whether it includes return visits for issues like grout cracking, caulk separation, or loose tile. Get the warranty terms in writing as part of the contract.
Financing Options
Common financing methods for bathroom remodels include:
- Home equity loan or HELOC: Lower interest rates because your home serves as collateral. Best for larger projects ($15,000+).
- Personal loan: No collateral required, faster approval, but higher interest rates.
- Contractor financing: Some contractors offer payment plans through third party lenders. Read the terms carefully, especially deferred interest promotions that charge full retroactive interest if the balance isn’t paid by the promotional deadline.
- Credit cards: Suitable only for smaller purchases or if you can pay the balance quickly. Interest rates make this the most expensive long term option.
- Cash/savings: No interest, no debt, but depletes reserves. Factor in your contingency budget before committing all available cash.
The 2025 Houzz study found that 44% of homeowners financed at least a portion of their bathroom remodel, with HELOCs being the most popular financing method for projects over $10,000.
Permits and Code Terms
Permits are the part of a bathroom remodel checklist that homeowners most want to skip and most regret skipping. The consequences of getting this wrong are severe.
Building Permit
Adding or remodeling a bathroom normally requires building, plumbing, electrical, and mechanical permits. A building permit is required if you’re adding or relocating walls, or if you’ve removed wall or ceiling finishes down to studs and joists. Even projects that feel cosmetic can cross the permit threshold once you open up a wall and discover something that needs fixing.
STFI Permit (Subject to Field Inspection)
Many straightforward bathroom remodels qualify for a Subject to Field Inspection permit, which is a faster approval process. Instead of submitting full plans for review, the inspector evaluates the work on site. This permit type is particularly relevant in the Seattle/King County area.
Washington State Permit Specifics
In Seattle, all bathroom remodels requiring more than $5,000 in work need permits, even cosmetic upgrades. King County has stricter requirements than Spokane County. Getting this wrong can cost more than $10,000 in fines, force you to tear out completed work, or kill a future home sale. One Redmond homeowner’s insurance denied a $180,000 fire claim in 2024 because the fire started in an unpermitted electrical circuit installed during a DIY remodel.
If you’re planning a kitchen remodel alongside your bathroom, permit requirements often overlap, and bundling them can streamline the inspection process.
GFCI (Ground Fault Circuit Interrupter)
An electrical safety device required on all bathroom circuits. If a bathroom outlet is added or relocated, it must be on a dedicated GFCI circuit with nothing else on the circuit except bathroom outlets. GFCI outlets detect ground faults (like a hair dryer falling into water) and cut power in milliseconds.
Exhaust Fan and Ventilation Requirements
A new bathroom, or one that’s had its ceiling opened during remodeling, must have a minimum 50 CFM exhaust fan vented to the outside if there’s no exterior window. Proper ventilation prevents mold growth and moisture damage to finishes. This requirement catches many homeowners off guard because it applies even if the original bathroom had no fan.
CARB Phase 2 and EPA TSCA Title VI
Emissions compliance standards for composite wood products used in cabinets and vanities. These regulations limit formaldehyde emissions from plywood, particleboard, and MDF. When selecting bathroom cabinetry, verify that products meet these standards, especially for enclosed bathroom spaces where air circulation is limited.
Demolition and Structural Terms
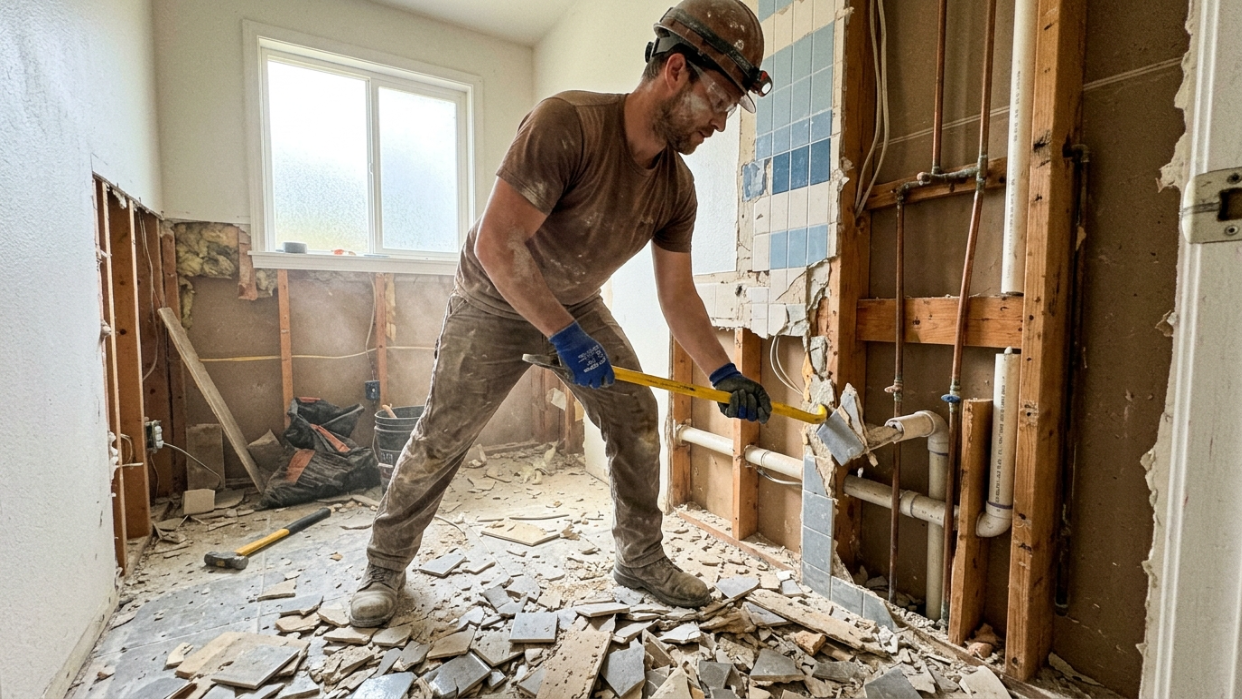
Demolition is where your bathroom remodel checklist transitions from planning to action. It’s also where hidden problems reveal themselves.
Demolition (Demo)
The removal of existing fixtures, tiles, drywall, and sometimes structural elements. This phase is messy and noisy, typically lasting 1 to 2 days for a standard bathroom. The critical task during demo isn’t destruction, it’s documentation. Smart contractors photograph everything behind walls before covering it back up.
Load Bearing Wall
A wall that supports structural weight above it. Identifying load bearing walls before any wall removal is non negotiable. Removing or modifying a load bearing wall without proper engineering requires a structural beam, additional posts, and a building permit. This is not a DIY assessment.
Subfloor
The structural layer beneath your finished flooring, typically plywood or OSB. During demolition, the subfloor must be inspected for water damage, rot, and levelness. Bathroom subfloors are notoriously vulnerable because years of minor leaks around toilets and tubs go unnoticed until the finished floor comes up.
Backer Board (Cement Board)
A rigid substrate installed behind tile in wet areas. Moisture resistant drywall works in general bathroom areas, but cement board or foam board is required for shower and tub surrounds. Standard drywall in a shower enclosure will eventually fail, no matter how well the tile is installed over it.
Rough In Terms
After demolition, rough in work begins. This phase happens before walls and floors are closed back up, making it your only opportunity to change plumbing and electrical layouts affordably.
Rough In
The installation or relocation of plumbing pipes, drains, electrical wiring, outlets, switches, and lighting locations while walls are open. If you’re changing the bathroom layout (moving the shower to a different wall, relocating the vanity), this is when it happens. Once drywall goes up, changes become exponentially more expensive.
Practitioners on Reddit’s r/HomeImprovement consistently emphasize that the order of operations matters more than product choices. The most upvoted sequencing advice follows this pattern: demo, rough in plumbing, rough in electrical, waterproofing, shower tile, floor tile, vanity, toilet. Deviating from this sequence creates rework.
Electrical Plan and Lighting
The electrical plan is your blueprint for every outlet, switch, light fixture, and fan location in the bathroom. This plan must be finalized before rough in begins because wiring behind closed walls is far cheaper than retrofitting.
Key elements of a bathroom electrical plan:
- GFCI outlets: Required within 3 feet of every sink. Plan outlet placement for hair dryers, electric razors, and toothbrush chargers.
- Vanity lighting: Wall sconces flanking a mirror at eye level (roughly 60 to 65 inches from the floor) provide the most flattering and functional light. A single overhead bar light casts shadows under the chin and eyes.
- Recessed lighting: Common for general illumination. Wet rated (IC rated) recessed cans are required in shower areas.
- Dimmer switches: Increasingly popular for bathrooms. A dimmer on the main light lets you go from bright morning prep to soft nighttime ambiance.
- Heated floor thermostat: If you’re installing radiant floor heating, the thermostat and dedicated circuit must be planned during rough in.
- Exhaust fan wiring: Often combined with a light and/or humidity sensor. Some codes now require humidity sensing fans that turn on automatically.
One YouTube walkthrough by a licensed electrician stressed that bathroom circuits should never share a breaker with hallway or bedroom outlets, a code requirement that DIYers frequently violate.
Supply Lines
The pressurized pipes that deliver hot and cold water to every fixture: shower valve, faucet, toilet fill valve, and bidet if you have one. During a remodel, supply lines are evaluated for material (copper vs. PEX), condition, and code compliance. Older galvanized steel supply lines are almost always replaced.
Drain Lines and DWV (Drain Waste Vent)
The plumbing system that carries wastewater away and allows air venting. The “vent” part is often overlooked, but without proper venting, drains gurgle, flow slowly, and sewer gas can enter the bathroom. DWV modifications are among the most expensive rough in changes because they often require cutting into floor joists or concrete slabs.
P Trap
The curved section of pipe beneath sinks and drains that holds standing water to block sewer gas from entering the room. P traps seem like small details, but they often need replacing when a new vanity or sink has different drain positioning.
Shut Off Valves
Valves that control water flow to individual fixtures. The lifespan of a main shut off valve is typically 10 to 25 years, which means that right around the time you decide to renovate, your shut off valves may need replacing too. Upgrading to quarter turn ball valves during a remodel is a low cost improvement that prevents future leaks.
Plumbing Cost Context
Plumbing typically represents 10% to 15% of total bathroom remodel costs. Licensed plumbers now command $85 to $175 per hour (up 8% to 10% from 2025), while electricians charge $60 to $145 per hour. These labor rates explain why preserving your existing plumbing layout, when possible, is the single biggest budget saving decision.
Waterproofing Terms
Waterproofing failures are the most expensive bathroom remodel mistakes because the damage often stays hidden until it’s catastrophic. This section of the bathroom remodel checklist deserves careful attention.
Waterproof Membrane
A barrier applied to substrates (backer board, subfloor) before tile installation to prevent water penetration. Two main types exist. Liquid membranes are applied like paint and create a seamless, flexible barrier once cured. Sheet membranes are pre formed layers that are cut and installed over the substrate. Both work, but liquid membranes are more forgiving on complex surfaces with many corners and penetrations.
Skipping or rushing this step is the most common cause of premature bathroom failure.
Moisture Barrier (Vapor Barrier)
Material that prevents moisture vapor from migrating into wall cavities. This is distinct from waterproofing membranes. A vapor barrier addresses humidity and condensation; a waterproof membrane addresses liquid water. Bathrooms need both in wet area walls.
Curbless Shower (Zero Threshold Shower)
A shower with no step or curb between the bathroom floor and the shower floor. This design is popular for two reasons: it serves households with restricted mobility (wheelchair access, aging in place), and it creates a clean, open aesthetic. Curbless showers require careful floor slope engineering (typically 1/4 inch per foot toward the drain) and particularly rigorous waterproofing, since there’s no physical barrier to contain water.
For bathroom floors in general, waterproof flooring options are essential. If you’re weighing rigid core vinyl, the SPC flooring guide covers what makes it waterproof and how it performs in wet areas.
Fixtures and Materials Terms
This is the section of the bathroom remodel checklist where most homeowners want to start, but experienced contractors insist it should come after the structural and waterproofing decisions are locked in.
One practitioner tip echoed across multiple remodeling professionals: “Make sure all procurement and fabrication are completed 100% prior to the construction start date.” Waiting for a backordered vanity or a custom cut countertop is the number one cause of project delays.
Request a free design quote to get help with vanity, countertop, and fixture selections before construction begins.
Vanity
A bathroom cabinet that includes a sink and countertop, often serving as the focal point for bathroom design. Vanities come in freestanding, wall mounted, and built in configurations. Size ranges from 24 inches for powder rooms to 72 inches or more for primary bathrooms. For a deeper look at sizing, our bathroom vanity guide covers style, storage, and configuration options.
A cautionary note from forum discussions: one homeowner shared their frustration about receiving a damaged vanity from a manufacturer, noting the importance of inspecting all deliveries immediately upon arrival. Real wood vanities in particular need to be unboxed and checked before the installer shows up.
Base Cabinet vs. Vanity Cabinet
Both are lower cabinetry, but vanity cabinets are specifically designed for bathroom use with sink cutouts and plumbing accommodations. Base cabinets from kitchen lines can sometimes be repurposed, but they’re typically 36 inches tall (standard kitchen height) versus 32 to 34 inches for traditional vanity height. “Comfort height” vanities at 36 inches are increasingly popular, matching kitchen counter height.
Framed vs. Frameless Cabinets
Framed cabinets have a face frame (a wooden border) attached to the front of the cabinet box. Frameless cabinets (European style) have no face frame, offering wider drawer and door openings and a more contemporary look. Frameless cabinets typically provide about 10% to 15% more interior storage space. For a detailed comparison of construction, aesthetics, and pricing, see the framed vs. frameless cabinets guide.
RTA Cabinets (Ready to Assemble)
Cabinets shipped flat pack and assembled on site. RTA cabinets significantly reduce shipping costs and allow for faster delivery (sometimes next day pickup for in stock lines). The trade off is assembly time and the need for basic tools and skills. For contractors handling multiple projects, RTA cabinets can accelerate timelines. The RTA cabinets guide breaks down the pros, cons, and cost differences.
Quartz Countertop
Engineered from roughly 90% ground quartz crystals bonded with polymer resins. Unlike natural stone, quartz is non porous and requires no sealing, making it ideal for bathroom vanity tops where water, toothpaste, and cosmetics are constant. Quartz comes in two formats. Prefab quartz arrives pre cut in standard sizes, keeping costs lower. Slab quartz is custom cut from full slabs for a seamless look on larger vanities. The cost and installation differences between these options are significant, which the prefab vs. slab quartz comparison covers in detail.
Undermount Sink
A sink mounted underneath the countertop, creating a seamless edge that makes cleanup easier. Undermount sinks require a solid countertop material (quartz, granite, or solid surface) because the rim of the countertop is exposed. They won’t work with laminate countertops.
Toilet Selection
Toilets aren’t interchangeable boxes. The right choice depends on your bathroom layout, water usage goals, and comfort preferences.
- Two piece toilets have a separate tank and bowl. They’re the most common, easiest to repair, and least expensive ($150 to $500).
- One piece toilets integrate the tank and bowl into a single unit. They’re easier to clean (no seam between tank and bowl) and sit slightly lower, costing $250 to $800.
- Wall hung toilets mount to a carrier inside the wall, leaving the floor beneath completely open. They simplify cleaning and make small bathrooms feel larger, but installation costs are significantly higher because of the in wall carrier system ($500 to $1,500 for the unit, plus $300 to $600 for the carrier and installation).
- Elongated vs. round bowls: Elongated bowls (about 2 inches longer) are more comfortable for most adults. Round bowls save space in tight powder rooms.
- Rough in measurement: The distance from the wall to the center of the drain (usually 12 inches, but older homes may have 10 or 14 inch rough ins). Measure before ordering.
WaterSense labeled toilets use 1.28 gallons per flush or less, compared to the federal maximum of 1.6 GPF. Over a year, this difference saves a family of four roughly 2,000 to 4,000 gallons.
Bathtub Components
If your remodel includes a tub (whether keeping, replacing, or adding one), understanding the components helps you communicate with your contractor:
- Alcove tub: The most common type, enclosed on three sides by walls. Standard sizes are 60 inches long by 30 to 32 inches wide.
- Freestanding tub: Not attached to any wall. Requires floor reinforcement (a filled cast iron tub can weigh over 500 pounds) and freestanding tub filler plumbing that comes up through the floor or wall.
- Drop in tub: Installed into a framed surround or deck. The tub rim rests on the surrounding structure.
- Tub surround: The wall panels or tile surrounding the tub. This area needs the same waterproofing treatment as a shower. For options beyond traditional tile, shower wall panels offer lower maintenance alternatives.
- Overflow drain: A safety feature near the top of the tub that prevents flooding if the tub is overfilled. This drain connects to the main drain line and must be watertight.
- Tub shoe (drain assembly): The mechanism at the bottom of the tub that opens and closes the drain. Trip lever, toe touch, and push/pull are the three common types.
Shower Door Types
There are six main shower door types, each suited to different bathroom sizes and layouts:
- Sliding (bypass): Two panels that slide past each other. Best for tub shower combos.
- Single sliding: One panel slides while the other stays fixed. Perfect for smaller spaces.
- Pivot: Door swings from a central point. Requires clearance space.
- Hinged: Traditional swing out door. Clean look but needs the most clearance.
- Frameless fixed panel: A stationary glass panel with an open entry. Minimalist aesthetic.
- Neo angle: Designed for corner showers with angled fronts.
For a side by side analysis of glass doors versus shower curtains, the shower doors vs. curtains guide breaks down costs, maintenance, and aesthetics.
SPC Flooring
Stone Polymer Composite flooring, a rigid core vinyl plank that is 100% waterproof and dimensionally stable. SPC won’t swell, warp, or buckle from bathroom moisture, making it a popular alternative to tile. It installs as a floating floor (no adhesive to the subfloor), which simplifies bathroom renovations. For more on thickness options, see the SPC flooring thickness guide.
Porcelain Tile vs. Ceramic Tile
Both are fired clay products, but porcelain is fired at higher temperatures, making it denser, harder, and more water resistant (below 0.5% absorption rate). Porcelain is the better choice for shower floors and walls. Ceramic tile is more affordable and easier to cut, making it suitable for dry area walls and backsplashes. The price difference is typically $2 to $5 per square foot.
Soft Close Hinges
Cabinet hardware with a built in damping mechanism that prevents doors and drawers from slamming. Beyond the noise benefit, soft close hinges reduce wear on cabinet boxes and finishes. They’re standard on most quality vanity lines and a worthwhile upgrade on budget cabinets.
Aerator
A device screwed onto the end of a faucet that mixes air into the water stream. Aerators reduce water usage (sometimes by 30% or more) without noticeably reducing water pressure. They also minimize splashing. Most modern bathroom faucets include aerators, but older faucets may not.
Wall Treatments, Moulding, and Trim
Beyond tile, the surfaces and finishes in your bathroom contribute significantly to both durability and aesthetics. These elements are often planned late but should be specified early.
Wall Treatments
Bathroom walls outside the direct wet zone (shower, tub surround) have several finish options:
- Paint: The most affordable option. Use a satin or semi gloss finish rated for high humidity. Flat or matte paint in bathrooms absorbs moisture and develops mildew faster.
- Wainscoting: Paneling applied to the lower portion of walls (typically 32 to 48 inches high), often topped with a chair rail. Beadboard wainscoting adds texture and protects lower walls from water splashes near the vanity and tub.
- Accent tile: A section of decorative tile on a feature wall (behind the vanity or as a niche backdrop). Accent tile is installed during the tiling phase.
- Wallpaper: Vinyl backed or peel and stick wallpaper rated for bathrooms can work in well ventilated spaces. Traditional paper wallpaper will peel in bathroom humidity.
Moulding and Trim
Moulding is the finishing touch that makes a bathroom look intentional rather than unfinished:
- Baseboard: The trim piece where the wall meets the floor. In bathrooms, PVC or primed MDF baseboards resist moisture better than bare wood.
- Crown moulding: Decorative trim where the wall meets the ceiling. Optional in most bathrooms, but it elevates the look in primary bath remodels. Keep profiles simple in small bathrooms to avoid a cramped feel.
- Chair rail: A horizontal moulding placed mid wall, often marking the transition between two wall treatments (tile below, paint above).
- Door and window casing: The trim framing doorways and windows. Matching casing profiles throughout the bathroom (and ideally the rest of the home) creates visual consistency.
- Quarter round or shoe moulding: Small trim covering the gap between baseboard and flooring. Particularly useful with floating floors like SPC that require an expansion gap.
The key with bathroom trim: use moisture resistant materials. Solid wood moulding in a poorly ventilated bathroom will eventually swell, crack, and need replacement.
Mirrors, Medicine Cabinets, Hardware, and Accessories
These items get selected last but should be planned early because they affect electrical rough in locations and wall blocking.
Mirror and Medicine Cabinet
- Flat mirror: A simple mirror mounted directly to the wall above the vanity. Available frameless or with decorative frames. Standard sizing follows vanity width (a 36 inch vanity gets a 30 to 36 inch mirror).
- Medicine cabinet: A recessed or surface mounted cabinet with a mirrored door, providing hidden storage for toiletries. Recessed medicine cabinets require wall cavity space (at least 3.5 inches deep between studs) and must be planned during the framing stage before drywall goes up. Surface mounted versions bolt directly to the wall and require no cavity.
- Lighted mirrors: Mirrors with integrated LED lighting around the perimeter. These require an electrical connection behind the mirror location, which must be included in the electrical rough in plan. Lighted mirrors have become one of the most requested bathroom upgrades in recent years.
- Double mirrors vs. single span: For double vanities, two separate mirrors with a sconce between them generally look better proportioned than one oversized mirror. This is a design preference, but it also simplifies installation since a single large mirror requires more wall support.
Hardware and Accessories
Hardware covers every functional and decorative metal piece in the bathroom:
- Cabinet pulls and knobs: Measured by center to center distance (the space between screw holes). Common sizes are 3 inch, 4 inch, and 5 inch pulls. Coordinate the finish with your faucet and shower fixtures for a cohesive look (brushed nickel with brushed nickel, matte black with matte black).
- Towel bars and hooks: Mount height for towel bars is typically 48 inches from the floor. Hooks work better in small bathrooms because they take up less wall space and are easier for kids to use.
- Toilet paper holder: Standard mounting height is 26 inches from the floor and 8 to 12 inches from the front edge of the toilet. This seems trivial until it’s installed in the wrong spot.
- Robe hooks: Plan these near the shower entry, not behind the door where they’re forgotten.
- Shower accessories: Built in niches (planned during the tile phase), corner shelves, and grab bars. A shower niche eliminates the need for a hanging caddy and looks cleaner, but it must be waterproofed as carefully as the rest of the shower.
Practitioners on Reddit note that forgetting to install wall blocking for towel bars and grab bars during framing is one of the most common oversights. Towel bars anchored only into drywall will eventually pull out of the wall.
Window Treatments
Bathroom windows need treatments that handle moisture while providing privacy:
- Faux wood blinds: Moisture resistant and available in standard window sizes. Real wood blinds warp in humid bathrooms.
- Cellular (honeycomb) shades: Available in top down/bottom up configurations that provide privacy while allowing natural light from the top. Moisture resistant versions exist specifically for bathrooms.
- Frosted or textured glass: A permanent solution that eliminates the need for any window covering. Frosted film applied to existing glass is the budget version; replacing the pane with factory frosted glass is the premium option.
- Shutters: Interior plantation shutters in composite or PVC materials resist moisture. They also add perceived value at resale.
- No treatment needed: If the window is in the shower enclosure, it should be frosted glass with no fabric treatment. Fabric near a shower gets wet, grows mold, and deteriorates.
Plan window treatments during the design phase so any needed electrical (motorized shades) or framing adjustments are included in rough in.
Construction and Installation Terms
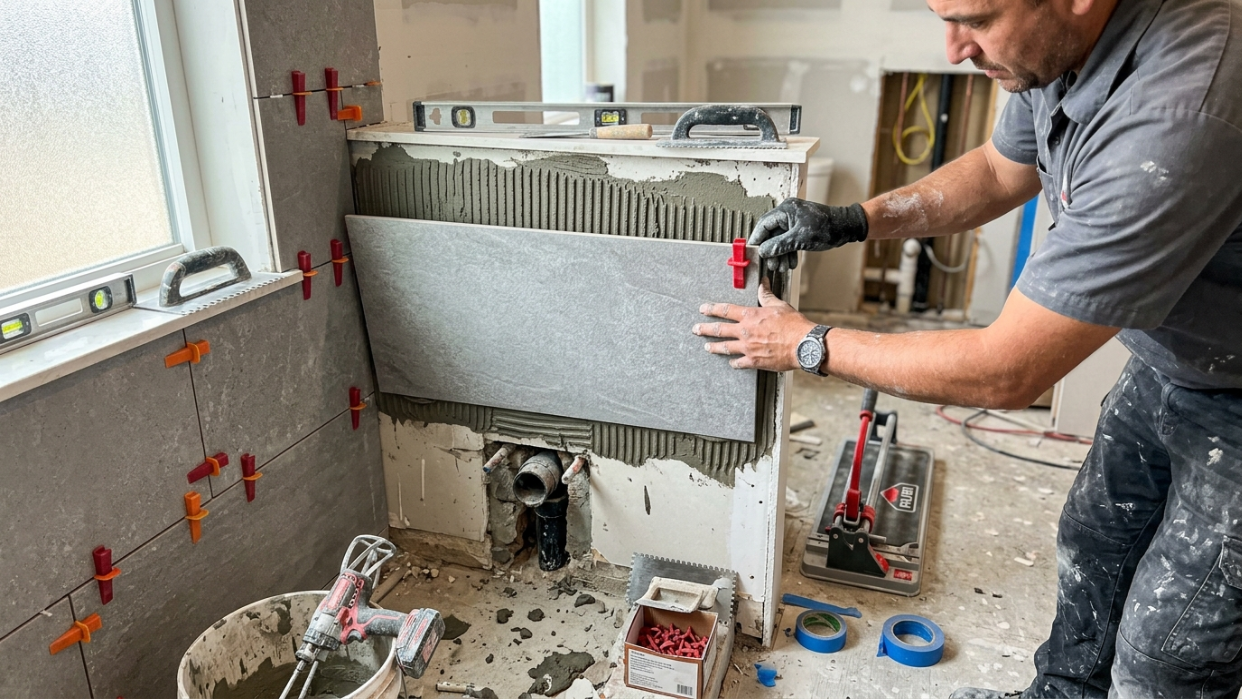
With rough in complete and materials on site, installation begins. This is where timeline estimates get tested against reality.
Thinset
A cement based adhesive used to bond tile to surfaces. Thinset comes in modified (polymer enhanced, more flexible) and unmodified (standard) varieties. The wrong thinset for your substrate and membrane combination can cause tile failure. This is a decision your tile installer should make, not a homeowner.
Grout
The material filling joints between tiles. Sanded grout is used for joints wider than 1/8 inch. Unsanded grout fills narrower joints. Epoxy grout is waterproof and stain resistant but harder to work with and more expensive. Grout color choices affect the visual impact of tile work more than most homeowners expect: dark grout with light tile creates a graphic grid pattern, while matching grout blends the tiles together.
Tile Installation Timeline
The tiling process typically takes 5 to 10 days. This phase includes waterproofing shower walls, laying tiles, and letting grout cure. Grout curing is critical for a lasting, watertight finish. Walking on floor tile too soon or grouting before thinset has fully set are common mistakes that compromise the entire installation.
Shower Valve
The mixing valve installed behind the wall that controls water temperature and flow. Shower valves are a rough in decision, not an installation phase choice, because they’re buried behind tile. Choosing a thermostatic shower valve (which maintains constant temperature even when other fixtures are used) costs more upfront but prevents scalding.
Steam Shower
A shower system that fills the stall with thick steam via a dedicated steam generator. This upgrade must be planned before major remodeling begins because the generator needs to be installed in a nearby space (closet, vanity cabinet, or adjacent room) with access to water and electrical connections. The entire shower enclosure must be fully sealed, typically requiring a ceiling that slopes to prevent cold drip.
Project Management and Completion Terms
The final phase of any bathroom remodel checklist covers the administrative and quality control steps that separate professional projects from problematic ones.
Punch List
A detailed list of remaining tasks, defects, or touch ups to complete before final payment. Common punch list items include paint touch ups around fixtures, caulking gaps, hardware adjustments, and grout haze removal. Creating the punch list during a walkthrough with your contractor ensures nothing gets forgotten.
Change Order
A formal written modification to the original scope of work, with documented cost and timeline adjustments. Change orders are a normal part of remodeling, especially when demolition reveals unexpected conditions. The key word is “formal.” Verbal agreements to add or change work, without a written change order, are the leading cause of contractor homeowner disputes. To avoid the most expensive surprises, review common remodel mistakes before your project starts.
Final Walkthrough
The inspection where homeowner and contractor together review all completed work against the original scope and any change orders. Bring your original SOW, check every fixture for proper operation (flush toilets, run faucets, test GFCI outlets, open and close all cabinet doors), and document anything that needs correction before releasing final payment.
Timeline Benchmarks
Most full bathroom remodels take 6 weeks to 3 months from initial planning to final walkthrough. Active on site construction typically runs 2 to 5 weeks for a standard full renovation. The standard phase by phase sequence looks like this:
- Site protection and demolition: 1 to 2 days
- Rough in plumbing and electrical: 2 to 5 days
- Waterproofing: 1 to 2 days (plus curing time)
- Tile installation: 5 to 10 days
- Vanity, toilet, and fixture installation: 1 to 3 days
- Paint, trim, moulding, and accessories: 1 to 2 days
- Final inspection and punch list: 1 day
Reddit users in r/HomeImprovement are blunt about timelines. One commenter noted that “it will take longer than you expect,” and another added important context: “Supply chains, plumbing, electrical, and tile will surprise you.” Building schedule buffer into your bathroom remodel checklist is not pessimism. It’s realism.
Budget and ROI Terms
Understanding cost terminology helps you interpret contractor bids and make informed trade off decisions.
Cost Per Square Foot
The 2026 national average for bathroom remodeling costs is $180 to $280 per square foot for mid range projects. Budget renovations start at $80 to $120 per square foot, while luxury remodels reach $500 or more. This metric is useful for ballpark comparisons but can be misleading for small bathrooms, where fixed costs (plumbing, permits) represent a larger share of the total.
Labor Rate Benchmarks (2026)
Licensed plumbers command $85 to $175 per hour (up 8% to 10% from 2025). Electricians charge $60 to $145 per hour (up 6% to 8%). General contractors typically charge a markup of 15% to 25% on top of subcontractor costs. These rates vary significantly by region; Washington State rates tend to run above national averages.
ROI (Return on Investment)
A midrange bathroom remodel costs an average of $26,138 and yields $20,915 at resale, producing an 80% ROI. This is the highest bathroom ROI since 2007. Upscale remodels, however, tell a different story: ROI drops to approximately 36% to 50% because spending outpaces what buyers will pay back.
The lesson is consistent across all the data. Timeless, mid range finishes (white subway tile, neutral colors, classic chrome or brushed nickel hardware, simple tile patterns) deliver better returns than trendy or ultra luxury choices.
Material Lead Time
The time between ordering materials and receiving them on site. This is arguably the most underestimated variable in any bathroom remodel. Custom quartz countertops can take 2 to 3 weeks for fabrication. Special order tile may need 4 to 6 weeks. Stock cabinet lines with fast lead times can ship in days, while custom orders stretch to weeks or months. The single most impactful scheduling advice from experienced remodelers: complete 100% of procurement and fabrication before the construction start date.
Typical Bathroom Remodel Cost Breakdown (2026)
| Expense | Average Share |
|---|---|
| Labor | 40% to 60% |
| Cabinets & Vanity | 15% to 20% |
| Plumbing Fixtures | 10% to 15% |
| Tile | 10% to 20% |
| Countertop | 5% to 10% |
| Electrical | 5% to 10% |
| Paint, Trim & Accessories | 3% to 5% |
| Permit Fees | 1% to 5% |
| Contingency | 10% to 20% |
Common Bathroom Remodel Mistakes to Avoid
Even experienced homeowners make costly mistakes during a bathroom renovation. The most common include:
- Ordering materials after demolition starts
- Skipping waterproofing beneath tile
- Underestimating plumbing costs
- Forgetting ventilation upgrades
- Buying fixtures before confirming rough in dimensions
- Ignoring storage needs (medicine cabinet, vanity drawers, shower niche)
- Choosing trendy finishes with poor resale value
- Not setting aside a contingency budget
- Hiring contractors without verifying licenses or insurance
- Paying the full balance before the final walkthrough
- Failing to plan electrical outlet and lighting locations before framing
- Selecting window treatments after trim is installed (missing needed blocking or wiring)
- Not inspecting delivered materials upon arrival
Frequently Asked Questions
What is the correct order of operations for a bathroom remodel?
The standard sequence is: demolition, rough in plumbing, rough in electrical, waterproofing, shower tile, floor tile, vanity installation, toilet installation, fixtures and accessories, paint and trim, final walkthrough. Deviating from this order creates rework. For example, installing a vanity before floor tile means cutting tile around the vanity base, which looks worse and makes future vanity replacement harder.
How long does a bathroom remodel take?
Active on site construction typically takes 2 to 5 weeks for a standard full renovation. Including planning, design, permitting, and material procurement, the full project timeline runs 6 weeks to 3 months. Factors that extend timelines include layout changes (requiring plumbing relocation), custom material orders, and permit processing times.
Do I need a permit for a bathroom remodel?
In most jurisdictions, yes, if you’re modifying plumbing, electrical, or structural elements. In Seattle, any bathroom remodel exceeding $5,000 in total work requires permits, even for cosmetic upgrades. Unpermitted work can result in fines, forced removal of completed work, and complications when selling your home or filing insurance claims.
What percentage of a bathroom remodel budget goes to plumbing?
Plumbing typically represents 10% to 15% of total bathroom remodel costs. This percentage increases if you’re changing the layout (moving drains or supply lines) and decreases if you’re keeping fixtures in their current locations.
What is the ROI on a bathroom remodel?
A midrange bathroom remodel recoups approximately 80% of its cost at resale, making it the strongest interior ROI in the 2025 Zonda Cost vs. Value Report. Upscale bathroom remodels return only 36% to 50%. Mid range materials and timeless design choices consistently outperform luxury finishes.
What is the difference between waterproofing and a moisture barrier?
A waterproof membrane stops liquid water (shower spray, splashes) from penetrating substrates. A moisture barrier (vapor barrier) prevents water vapor and humidity from migrating into wall cavities. Bathrooms need both: waterproof membranes in direct wet areas and vapor barriers in surrounding walls to prevent condensation damage.
Should I choose porcelain or ceramic tile for a bathroom?
Porcelain is denser, harder, and more water resistant, making it the better choice for shower floors, shower walls, and bathroom floors. Ceramic tile is more affordable and easier to cut, making it suitable for dry area walls and decorative accents. For areas with direct water exposure, porcelain is worth the $2 to $5 per square foot premium.
What does CARB Phase 2 compliance mean for bathroom cabinets?
CARB Phase 2 (and EPA TSCA Title VI) limits formaldehyde emissions from composite wood products like plywood, particleboard, and MDF used in cabinet construction. In an enclosed bathroom with limited ventilation, these emissions standards matter more than in open living spaces. Always verify compliance before purchasing bathroom cabinetry.
How should I structure the payment schedule with my contractor?
A standard payment schedule includes a 10% to 15% deposit at signing, progress payments tied to completed milestones (after rough in, after tile), and a final 10% to 15% holdback released only after the walkthrough and punch list completion. Never pay the full balance before work is inspected and approved.
What should I look for when comparing contractor bids?
Compare scope (are all tasks included?), material specifications and allowances, labor breakdowns, timeline milestones, payment terms, warranty coverage, and explicit exclusions. The lowest number often means the thinnest scope.
A bathroom remodel checklist that includes the right terminology, contractor vetting process, and phase by phase planning gives you the vocabulary to communicate clearly, evaluate bids accurately, and make confident decisions at every project stage. Whether you’re planning a simple refresh or a full gut renovation, knowing these terms puts you in control.
Ready to start selecting materials for your bathroom project? Request a free design quote to get help with vanity, countertop, and flooring selections.